64 57 498 D3543
D3543.201.01.05.02 08.2016
145
Sirona Dental Systems GmbH 4Operation
Operating Instructions INTEGO 4.6Assistant element
båÖäáëÜ
4.6.6.3
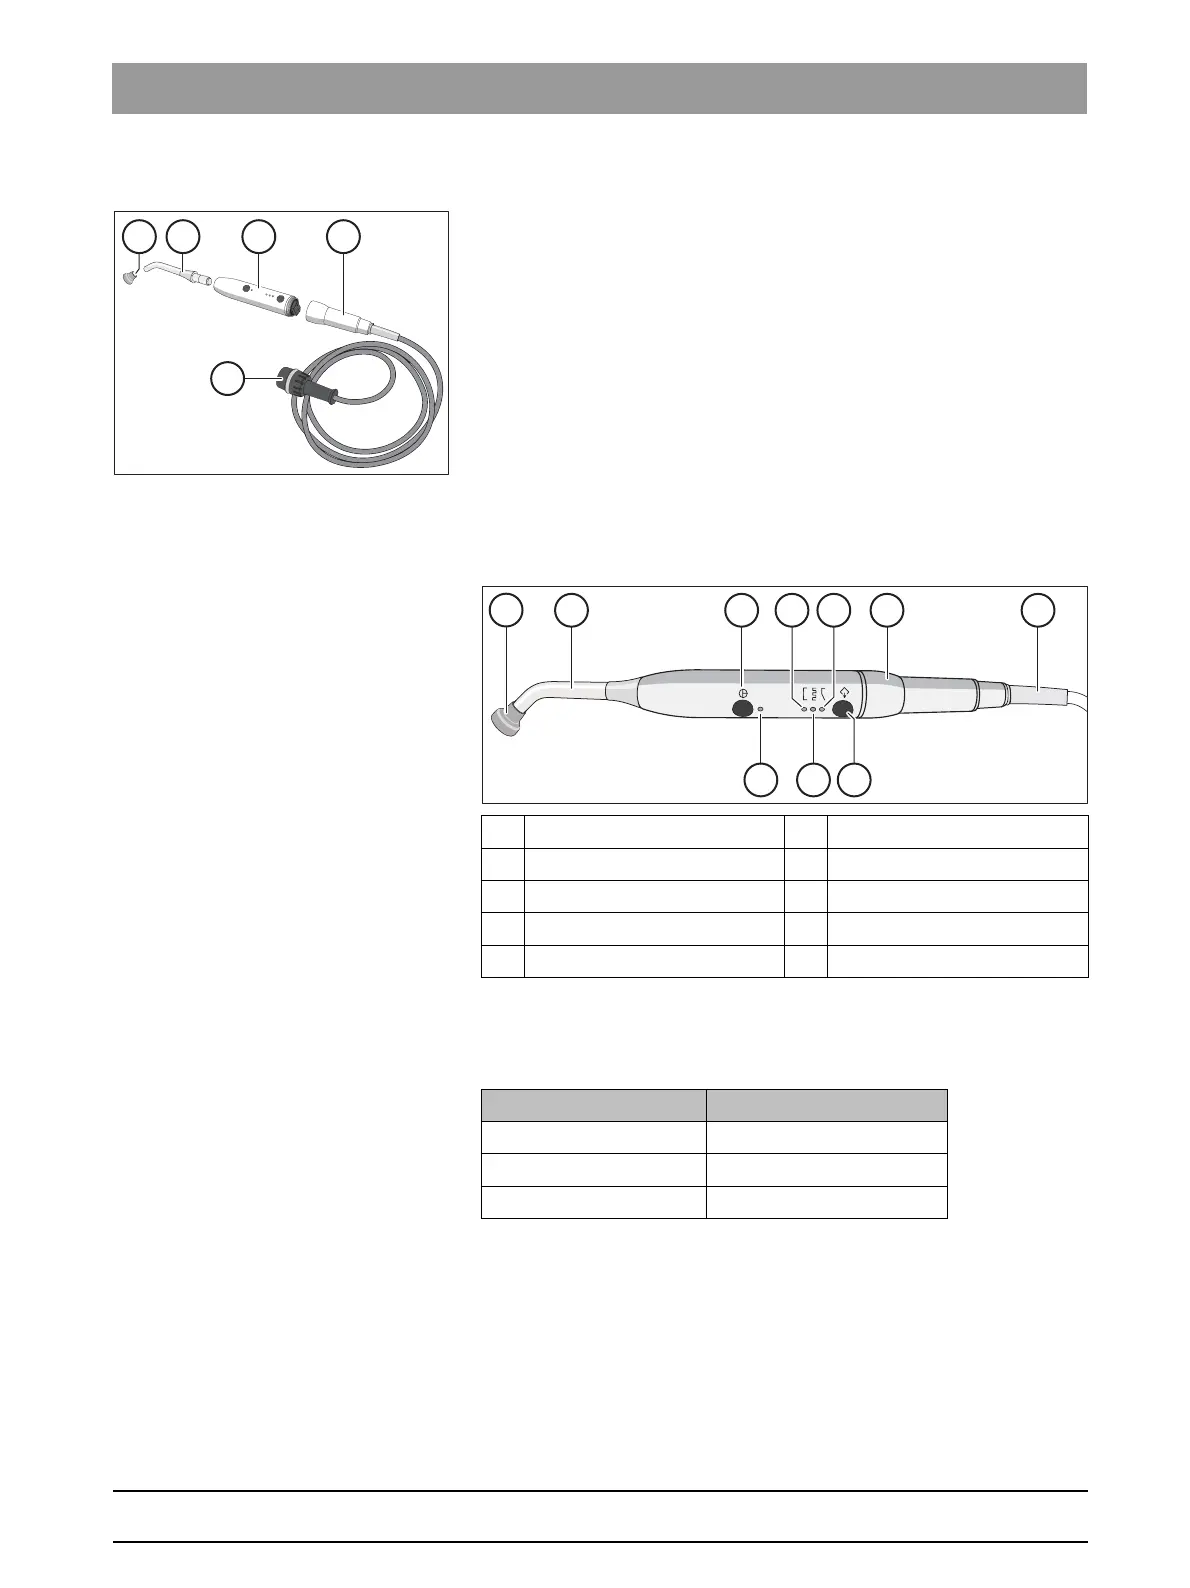
Connecting the Mini L.E.D.
Mini LED in holder 2
The Mini L.E.D. is connected to the assistant element in holder 2.
1. Connect the supply cable A to the treatment center.
2. Screw the hose coupling B onto the Mini L.E.D. C.
3. Screw the sterilized light guide B onto the Mini L.E.D. C. Make sure
to insert the fiber optic correctly.
The fiber optic clicks into place audibly.
4. Slip the glare shield E onto the light guide D.
The glare shield protects your eyes against reflecting curing light
4.6.6.4
Functional description
Controls
Status control lamp
The status control lamp D signals the following states:
The Mini L.E.D. has three operating modes, which you can select with the
Mode
H key:
A Glare shield F Pulse curing mode light
B Fiber optics G "Soft start" mode lamp
C On/off button H Mode button
D Status control lamp I Straight handpiece
E Quick curing mode light J Supply cable
Status control lamp Mode
Off Instrument in holder
green Normalbetrieb
red, flashing Overheat protection