6.
UnscrewthetwoconduitnutsinthePrimaryUnitsecuringittotheConnectionUnit.
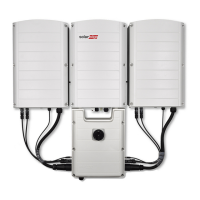
Figure 52: Conduit nuts
7. RemovethescrewsecuringthePrimaryUnittothemountingbracketandremovethePrimaryUnit
fromthemountingbracket.
NOTE
If you remove the Primary Unit and do not immediately install a new one, then:
o
Lock the Connection Unit in the OFF position using a lock on the switch.
o
Use insulation tape to isolate each of the AC and DC wires.
o
Seal the open conduits using duct tape.
8. PlacethenewPrimaryUnitonthemountingbracket;insertthescrewsecuringthePrimaryUnit
throughtherightsideoftheheatsinkandintothebracket.
9. ScrewthetwoconduitnutsinthePrimaryUnitsecuringtheConnectionUnittothePrimaryUnit.
10. ConnecttheDC,ACwiresandthecommunicationconnectorstothePrimaryUnit.
11. Fora3unitinverterreconnecttheAC,DCandcommcablesfromtheConnectionUnittotheright
SecondaryUnit.
12. ClosethePrimaryUnitcover.
13. PerformthecommissioningstepsasdescribedinActivating,CommissioningandConfiguringtheSystem
UsingtheInverterSetApponpage42.
14. Inthemonitoringplatform,usetheReplacebuttoninthelogical layouttab(insiteAdmin).
Replacing a Secondary Unit
1. TurnOFFtheInverterON/OFFswitch,andwaituntilthegreenLEDisblinking,indicatingthattheDC
voltageissafe(<50V),orwaitfiveminutesbeforecontinuingtothenextstep.
WARNING!
If you cannot see Primary Unit LEDs or you cannot connect to the Primary Unit, or if the red LED light is
on indicating a malfunction , wait five minutes for the input capacitors of the inverter to discharge.
Si vous ne pouvez pas voir l'écran de l'onduleur ou si un dysfonctionnement est indiqué sur l'écran LCD,
attendez cinq minutes pour que les condensateurs d'entrée de l'onduleur soient déchargés.
2. DisconnecttheACtotheinverterbyturningOFFthecircuitbreakersonthedistributionpanel.
3. DisconnectalltheconnectorsonthebottomoftheSecondaryUnit.
4. RemovethescrewsecuringtheSecondaryUnittothemountingbracketandremovetheSecondary
Unitfromthemountingbracket.
5. PlacethenewSecondaryUnitonthemountingbracket.
6. Insertoneofthesuppliedscrewsthroughtheoutersideoftheheatsinkandintothebracket.
Appendix D: Replacing System Components
-Three Phase Inverter with Synergy Technology Installation MAN-01-00402-1.4
79