46
Electrical Connection
Wiring procedures
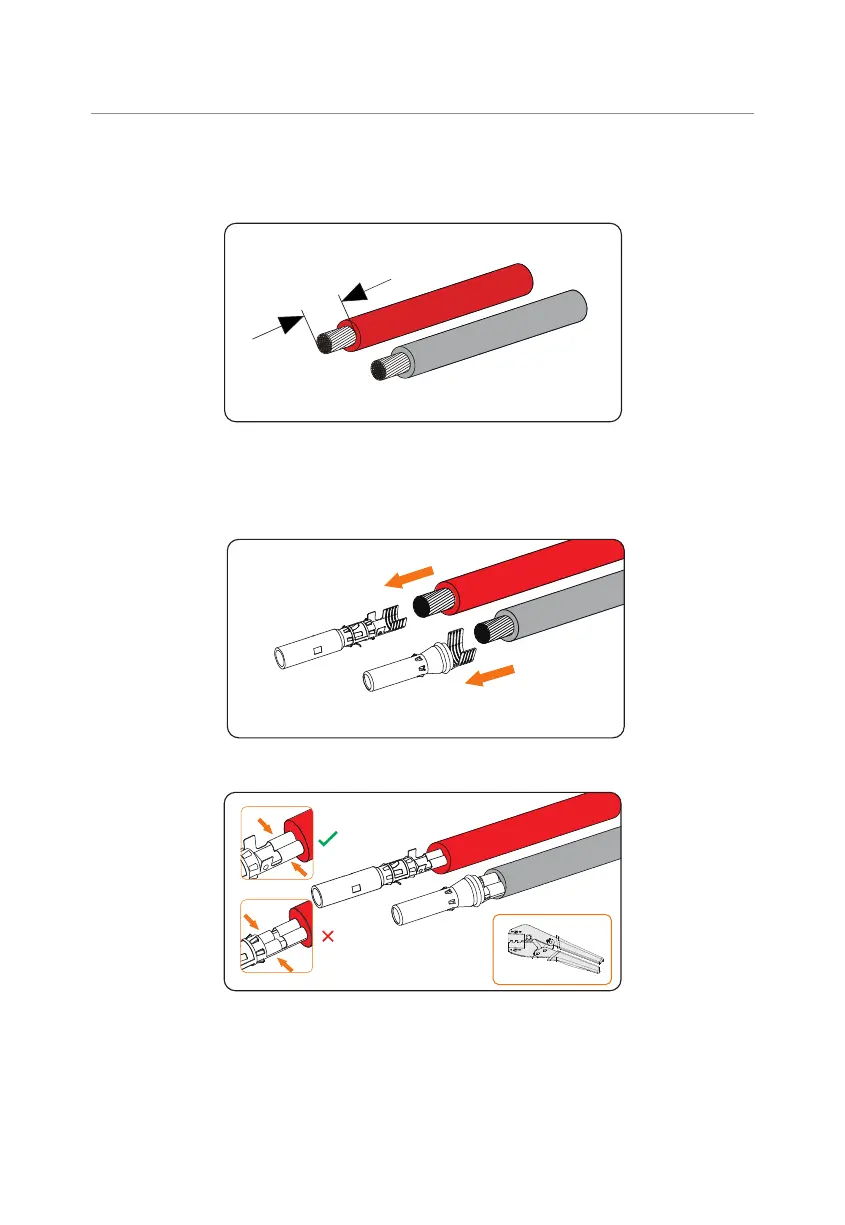
Step 1: Strip approx. 7 mm of the cable insulation.
4-6mm²
7 mm
+
-
Figure 8-15 Striping the PV cable
Step 2: Insert the stripped cable into the PV pin contact. Ensure that the stripped cable
and the PV pin contact are of the same polarity. Crimp it with crimping tool for PV
terminal.
+
-
Figure 8-16 Inserting the PV pin contact
+
-
Figure 8-17 Crimping the terminal
Step 3: Thread the PV cable through swivel nut and insert the cable into the PV
connector until a "Click" is heard. Gently pull the cable backward to ensure firm
connection. Tighten the swivel nut clockwise. Verify that the PV connectors have
the correct polarity before connection.
 Loading...


