34
Mechanical Installation
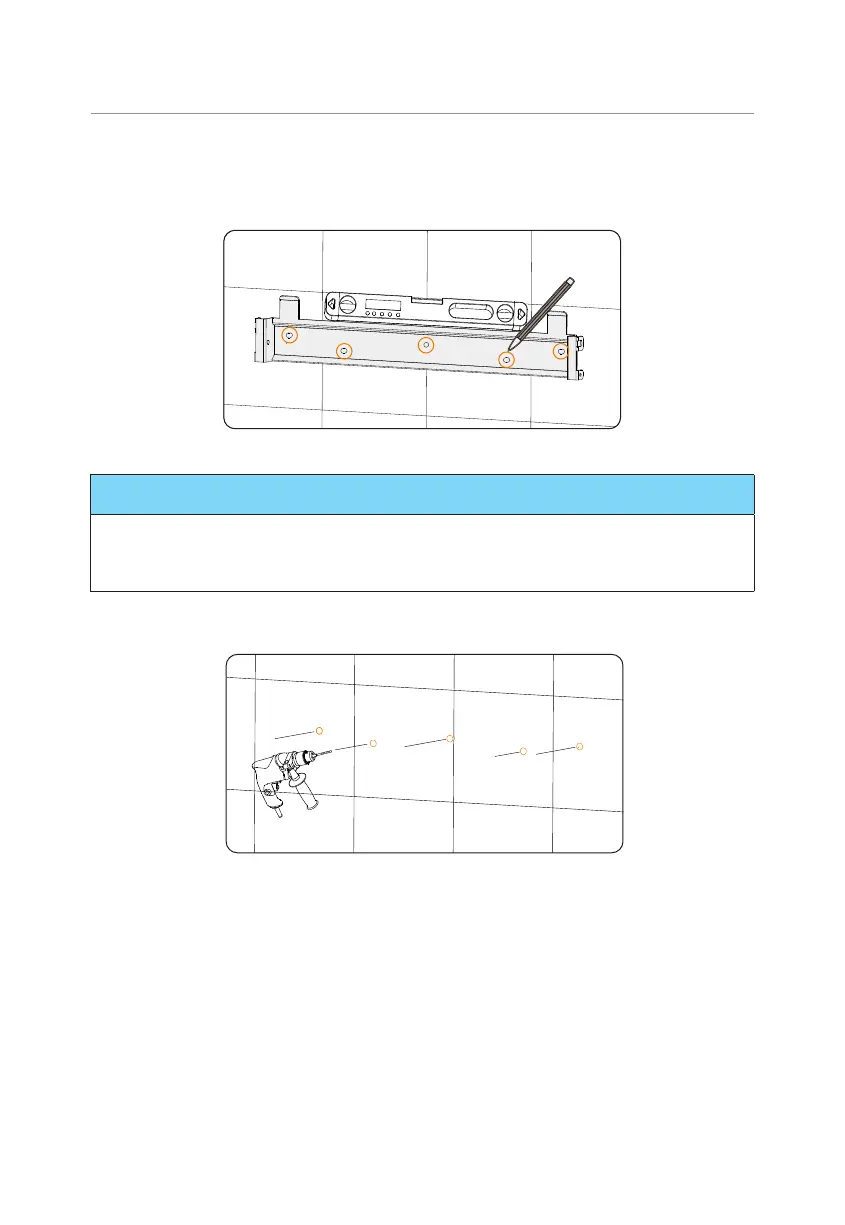
7.2 Installation procedures
Step 1: Align the bracket horizontally on the wall and mark the position of the drill holes.
Figure 7-5 Marking the holes
NOTICE!
• Take the height of the stacked battery into account when mounting the bracket.
• Observe the bubble of spirit level and adjust the bracket until the bubble stays in the
middle.
Step 2: Set the bracket aside and drill holes with
Ø
12 drill bit. The depth of the holes
should be 90 mm.
Figure 7-6 Drilling holes
Step 3: Knock the expansion screws into the holes and secure the bracket to the wall
with screws by torque wrench.
 Loading...


