35
Mechanical Installation
M8
Figure 7-7 Inserting the screws
Step 4: Open the anti-static bag and take out the inverter, and then install the handles.
Figure 7-8 Install the handles
NOTICE!
• Avoid placing the inverter in a way that the wiring terminals are in contact with the
floor or any other objects as they are not designed to bear the weight of the inverter.
• If the inverter is temperally needed to be placed on the ground, use foam or other
protective materials to prevent any damage of inverter.
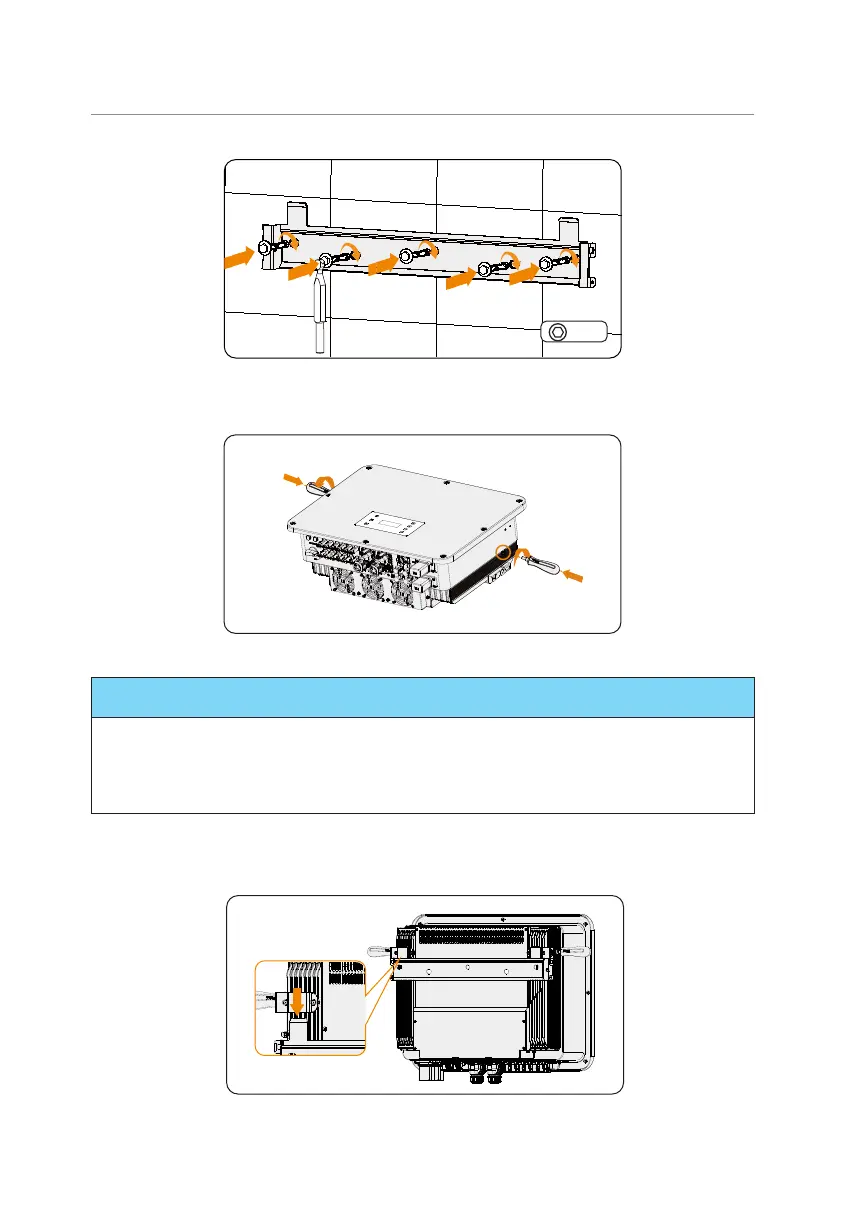
Step 5: Lift the inverter by the handles and hang it on the bracket. The buckle on the
bracket must be hooked into the keyways of the inverter. And then remove the
handles
.
Figure 7-9 Hanging the inverter
 Loading...


