EasyManuals Logo

SolaX Power X3-ULT-15KP User Manual

SolaX Power X3-ULT-15KP
171 pages
To Next Page IconTo Next Page
To Previous Page IconTo Previous Page
Page #67 background imageLoading...
Page #67 background image
59
Electrical Connection
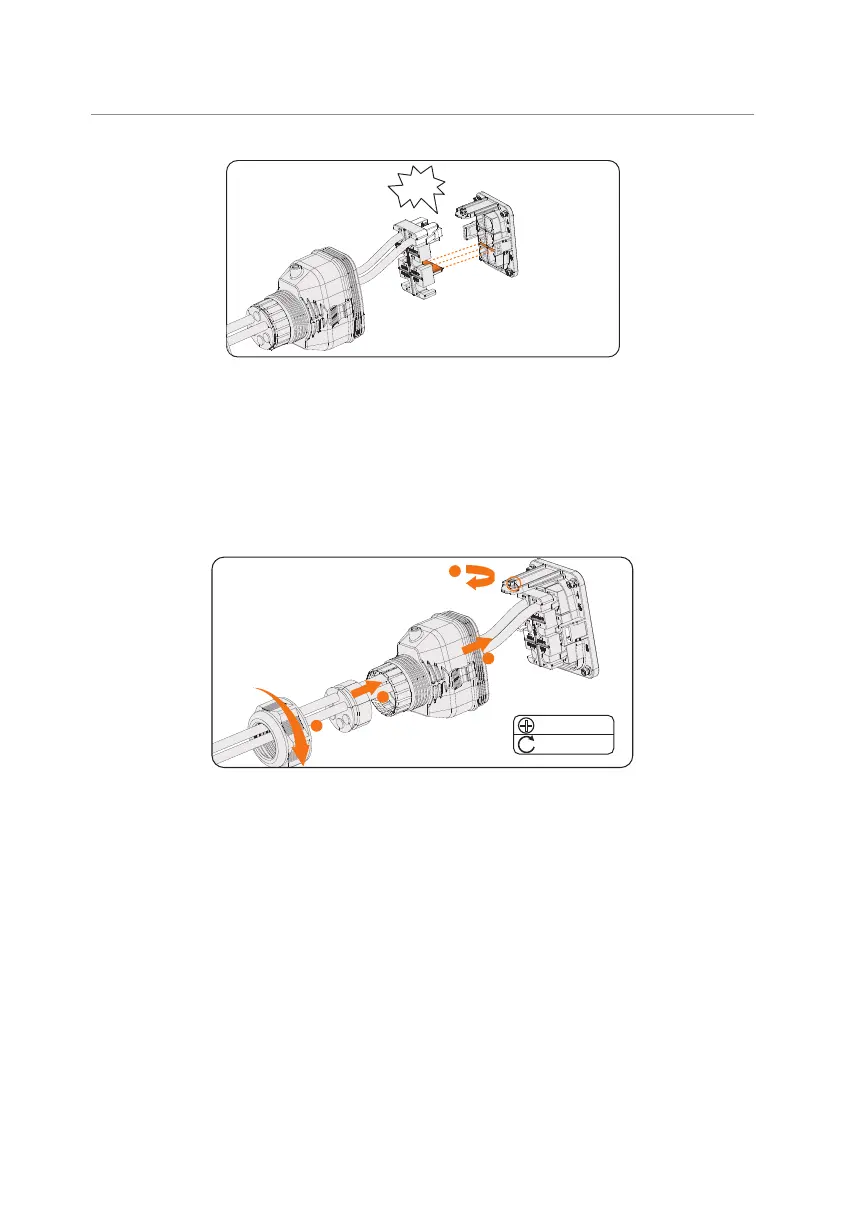
COM 1
terminal on
the inverter
Click!
Figure 8-36 Inserting the connector to COM 1
Step 6: Secure the assembled connector on COM 1 terminal.
a. Install the connector enclosure back into the COM 1 terminal.
b. Install the cable support sleeve into the enclosure.
c. Tighten M3 screw to secure it. (Torque: 0.4 ± 0.1 N·m)
d. Clockwise tighten the swivel nut to finish the COM 1 wiring connection.
3
M3
0.4 ± 0.1 N·m
2
4
1
Figure 8-37 Securing the connector

Table of Contents

Questions and Answers:

Question and Answer IconNeed help?

Do you have a question about the SolaX Power X3-ULT-15KP and is the answer not in the manual?

SolaX Power X3-ULT-15KP Specifications

General IconGeneral
BrandSolaX Power
ModelX3-ULT-15KP
CategoryInverter
LanguageEnglish

Related product manuals