129
Decommissioning
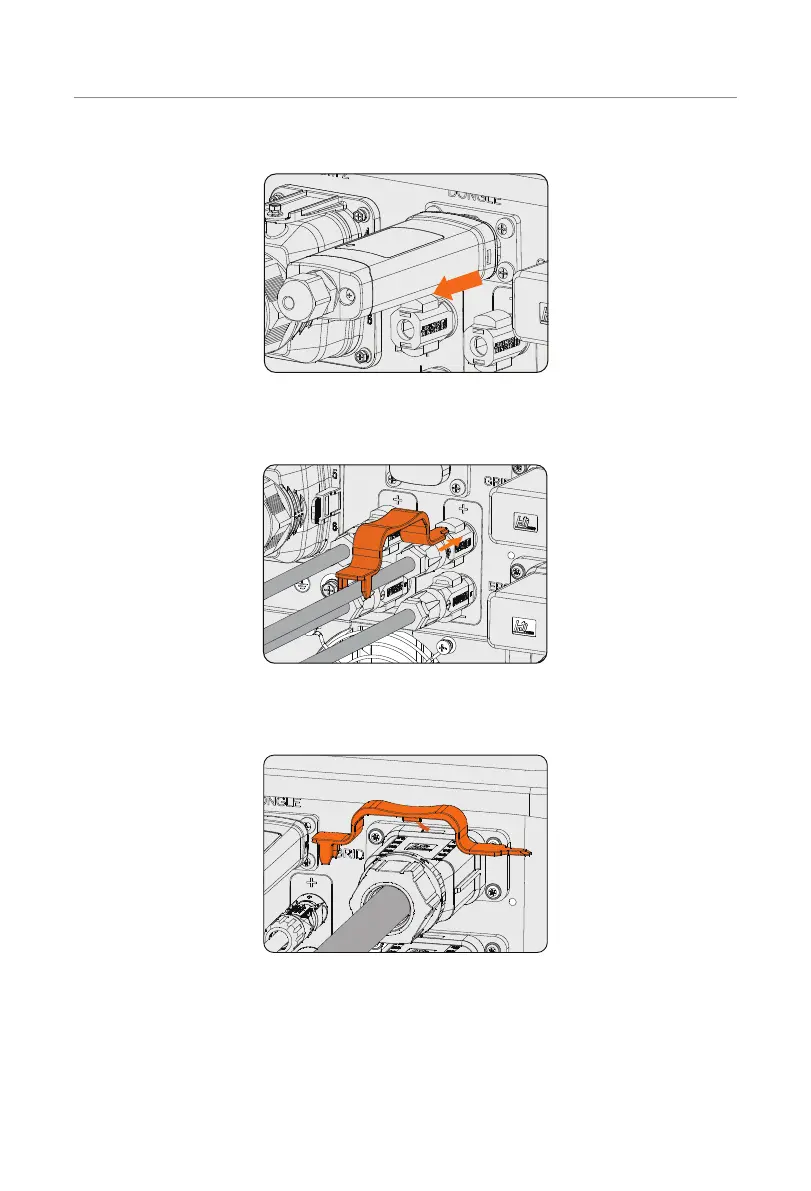
Step 6: Slight pull the dongle module.
Figure 12-3 Removing the dongle
Step 7: Disconnect the battery connecters: Insert the removal tool into the notch of
connectors and slight pull the connectors.
Figure 12-4 Removing the Battery connector
Step 8: Disconnect the AC connector: Insert the removal tool to the slot of the AC
connector to release it. Slight pull the connectors.
Figure 12-5 Removing AC connector
Step 9: Disconnect the COM 1 connector and COM 2 connector: Please loosen the
swivel nut of the COM connector and anti-clockwise loosen M3 screw of the
communication connector by cross screwdriver. Pinch the tabs on the sides of
the connector and pull the connector at the same time to remove it.
Step 10: Put the original teriminal cap on the terminals.

 Loading...


