65
Electrical Connection
7.6.4 RS485 Communication Connection
For SolaX products, such as the Adapter Box, EV-Charger, and Datahub they can be
connected to pin3 and pin 6 or pin4 and pin5. As for pin1, pin2, pin7,and pin8 they can
be utilized to connect devices other than SolaX products. If you require simultaneous
connections of multiple devices, a splitter adapter can be employed.
NOTICE!
• Please refer to "14 Appendix" for the specific application of Adapter Box, EV-Charger
and Datahub.
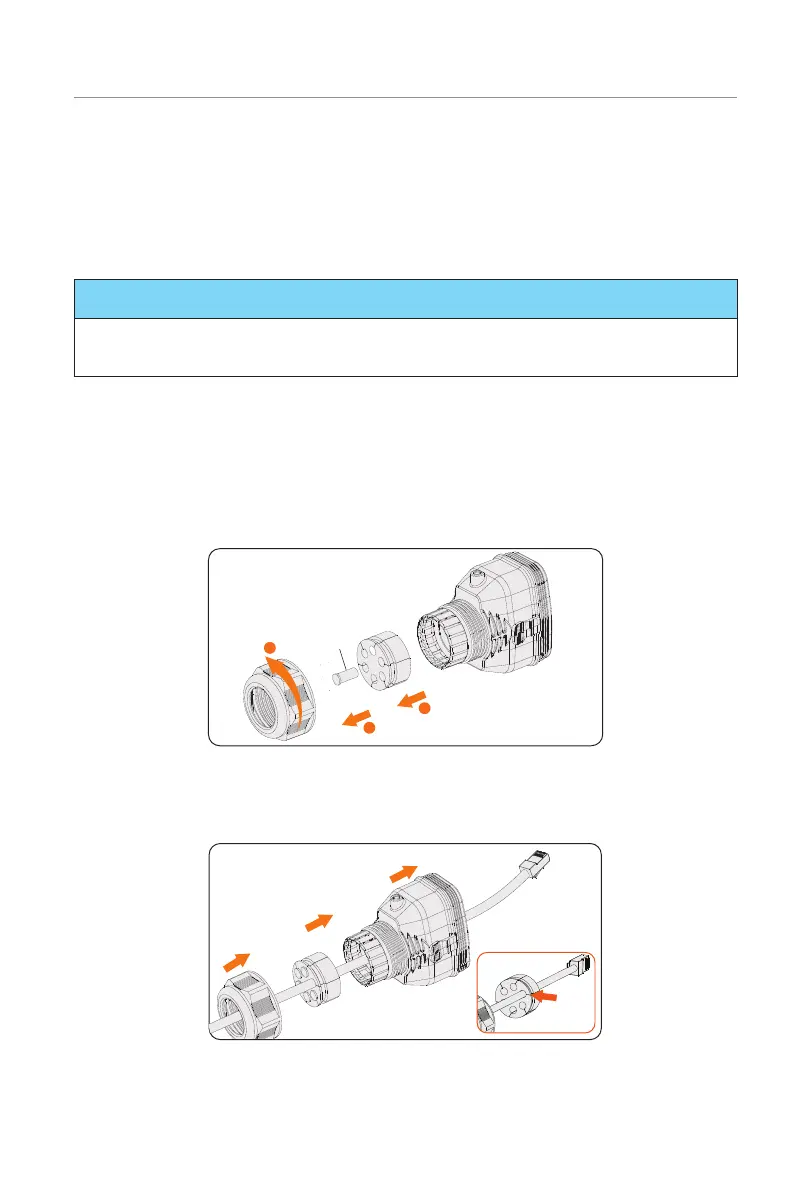
External equipment wiring procedure
Step 1: Loosen the screws on the COM 1 terminal. Pinch the tabs on the sides of the
COM 1 connector enclosure and pull it at the same time to remove it.
Step 2: Anti-clockwise loosen the swivel nut and pull out the sealing plugs. Keep them
still in the cable support sleeve if you choose not to connect the cable.
Remove
1
2
3
Figure 7-43 Disassembling the connector
Step 3: Thread the cable through the swivel nut, cable support sleeve, and connector
enclosure in sequence.
Figure 7-44 Threading the cables

 Loading...


