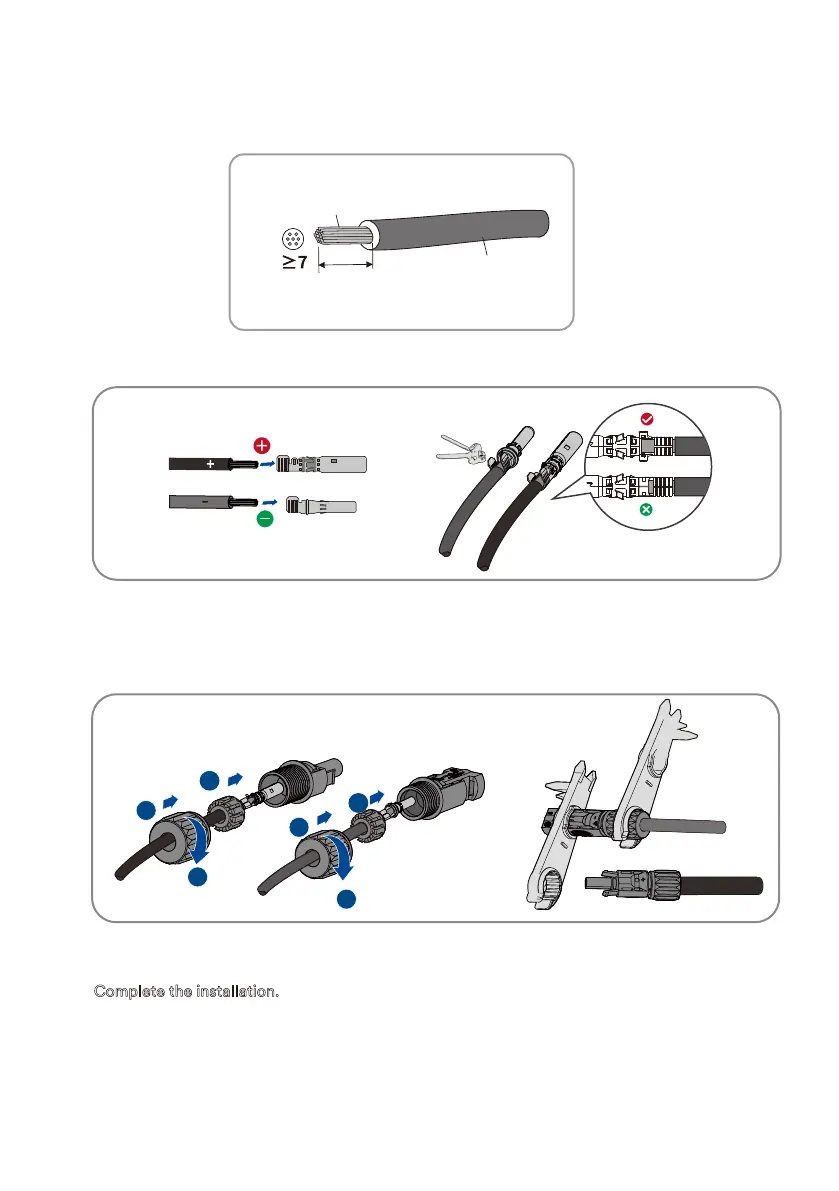
Complete the installation.
Step 3:
Lead the cable through cable gland, and insert into the insulator until it snaps into place.
Gently pull the cable backward to ensure firm connection. Tighten the cable gland and
the insulator (Torque 2.5-3Nm).
Step 1:Strip 12 mm off the cable insulation.
Proceed as follows to assemble each DC connector.
Step 2:Assemble the cable ends with the crimping pliers.
Step 4:Ensure that the cable is correctly positioned.
2.5-6mm
2
Φ -5 8mm
≈12mm
1
2
3
1
2
3
UM0035_ASW05-12kH-T2-T3_EN_V01_0523









 To Next Page