17
Locations and Functions of Parts
Chapter 1 Overview
memory card is inserted into a slot, and then turns off. It
flashes red when reading to or writing from a “Memory
Stick PRO Duo” or an SD memory card.
When the access lamp is flashing red, do not insert/remove
the “Memory Stick PRO Duo” or SD memory card, or turn
off the power.
g DOCK (docking) indicator
When an SR-R4 is docked, the light reception status of the
recorder connectors is displayed.
Green: Good
Yellow: Caution level
Sensitivity has decreased, but signal can be transferred
without error. Clean the recorder connector or replace
the connector optical module as soon as practicable.
Red: Light detection error
A light reception problem occurred, and signal cannot
be transferred correctly. Promptly clean the recorder
connector or replace the connector optical module.
Off: No signal
For details about cleaning the connectors, see “Cleaning
the Recorder Connector” (page 77). For information
about replacing the optical module, consult your local
Sony representative.
h Tripod receptacles (bottom)
Mounting point for a tripod using
3
/
8
" tripod screws.
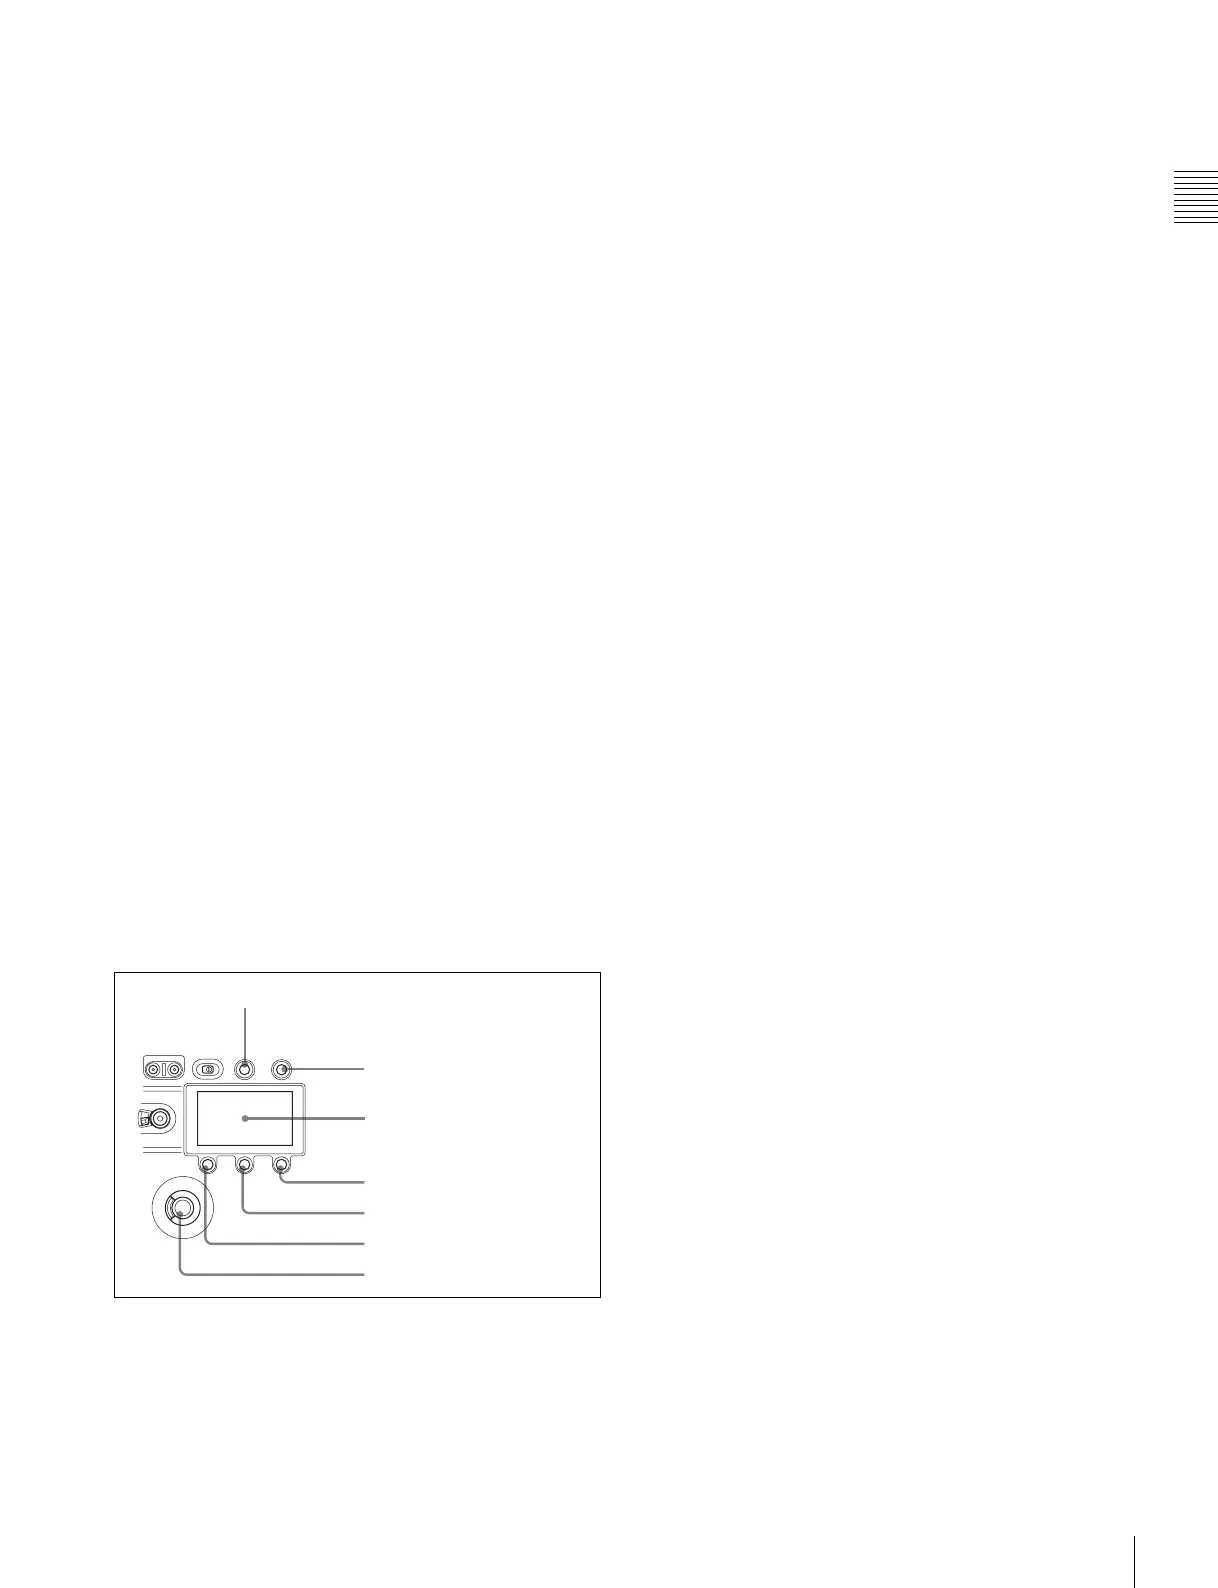
Display/menu operation block
Used to switch the monitor display between the subdisplay
and the viewfinder, and to operate the menus.
For details on menu operations, see “3-3-1 Basic
Operation of the Subdisplay” (page 30) and “3-4 VF Menu
Basic Operation” (page 39).
a VF DISPLAY (viewfinder display) button
Displays the status screen on the viewfinder and monitor.
For details about the information displayed, see “3-7
Viewing and Setting the Viewfinder Display” (page 44).
b VF MENU (viewfinder menu) button
Displays the menu screen on the viewfinder and monitor.
With the DVF-EL100 connected, press and hold this
button for two seconds or longer to display the Digital VF
Picture menu.
c Subdisplay
Displays the camera configuration settings. Press and hold
the SETTING button (1 second or longer) to enter Settings
Change mode.
d SETTING button
Press and hold for 1 second or longer to enter Settings
Change mode to change camera settings using the
subdisplay.
e PAGE button
Displays the next page when the subdisplay is in Settings
Change mode.
f BACK button
Cancels changes and returns to the previous screen when
the subdisplay is in Settings Change mode or when
displaying the menu in the viewfinder or on a monitor.
Pressing the BACK button when the DVF adjustment
menu is displayed returns the display to the VF menu page
select screen.
g MENU SEL (selection)/ENTER dial
Turn the dial to select items and press to enter when the
subdisplay is in Settings Change mode or when displaying
the menu in the viewfinder or on a monitor.
a VF DISPLAY button
g MENU SEL/ENTER dial
e PAGE button
b VF MENU button
c Subdisplay
d SETTING button
f BACK button