21
Attaching a Lens
Chapter 2 Installation and Preparations
4
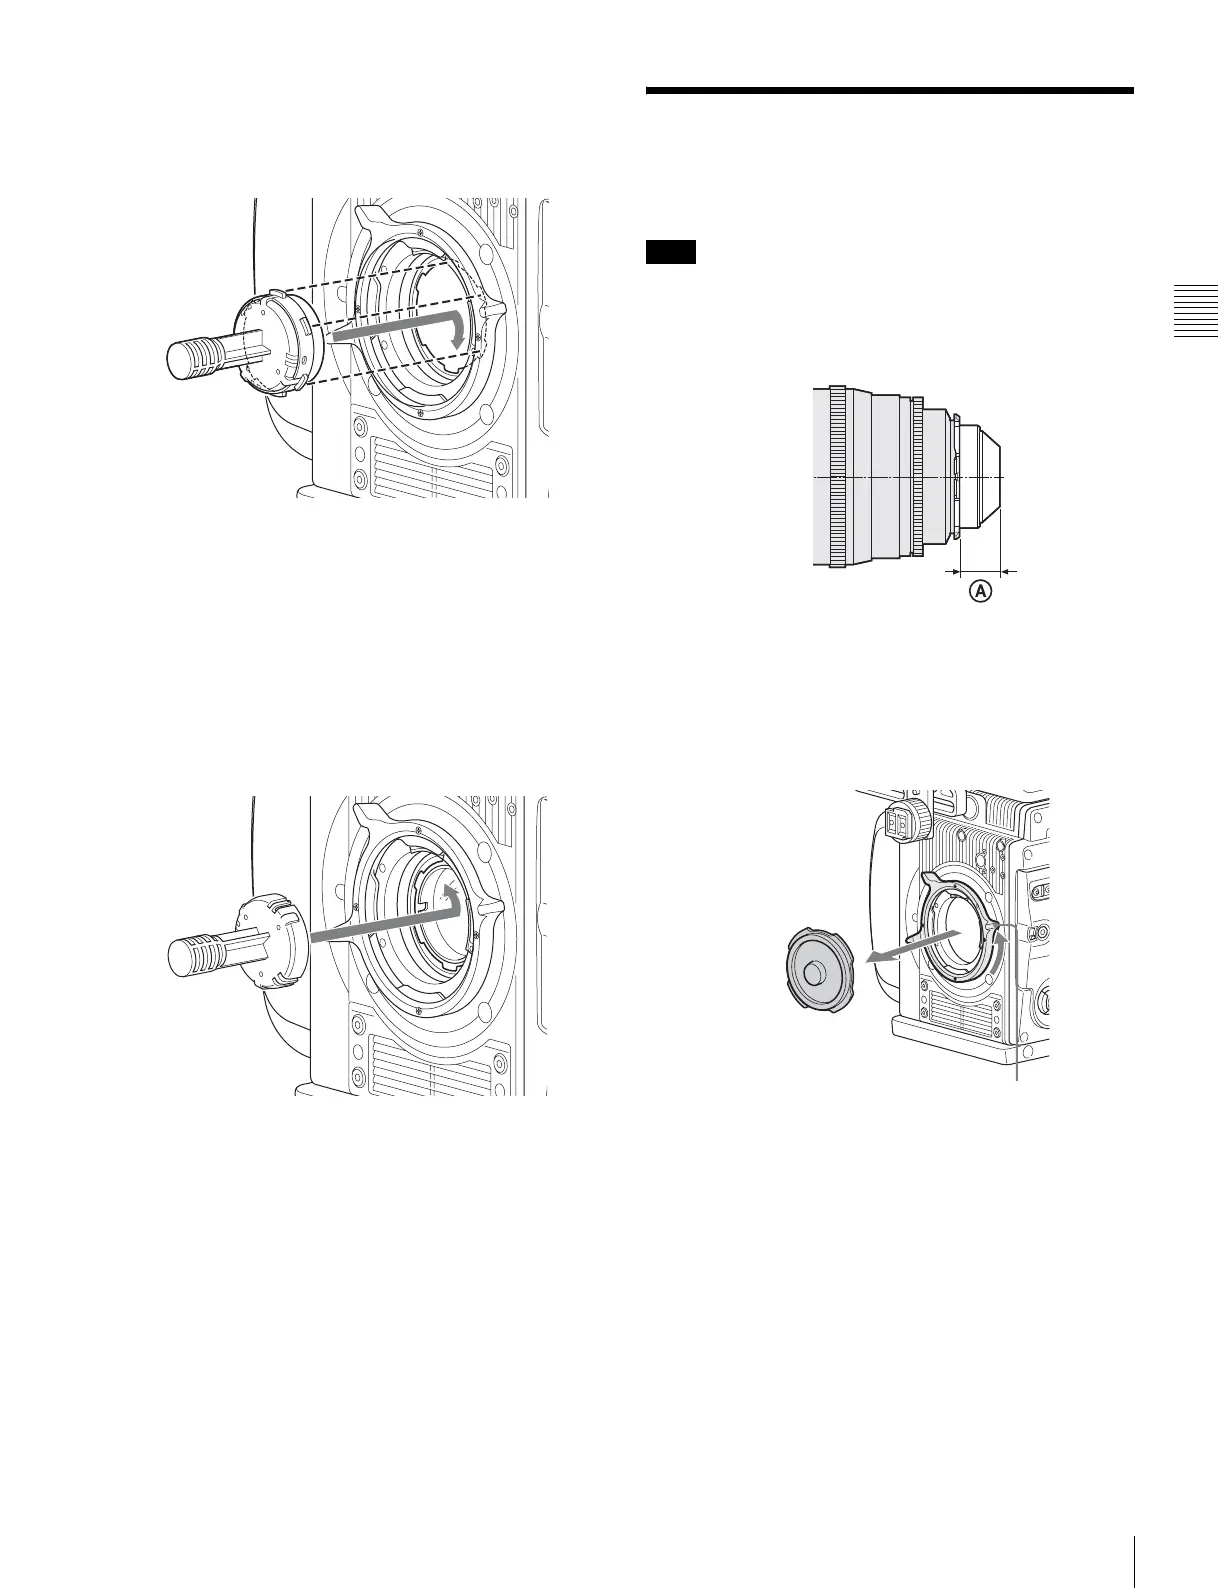
Align the notch on the filter mount with the protrusion
on the filter holder, insert the mounting tool onto the
filter mount, and then turn clockwise until it clicks into
place.
5
Pull the mounting tool straight off.
The mounting tool separates from the camera, and the
filter is mounted in place.
To remove the filter
1
Align the protrusion on the mounting tool with the
notch on the filter holder, then press the tool onto the
filter mount.
Press the tool until it clicks into place.
2
Rotate the mounting tool counterclockwise, then lift
the tool off the camera.
The filter holder is removed with the mounting tool.
2-4 Attaching a Lens
Attach a lens that conforms to the PL lens mount.
Always use a lens whose projection from the flange (A in
the figure) is less than 31.5 mm (1
1
/
4
inch). Use of any lens
that protrudes more than 31.5 mm (1
1
/
4
inch) will damage
the internal filter.
For information on handling lenses, refer to the operation
manual for the lens.
1
Rotate the lens fixing lever counterclockwise and
remove the lens mount cap from the lens mount.
2
Align the lens’ alignment pin with the notch in the
upper part of the lens mount and insert the lens into the
mount.
3
While supporting the lens, rotate the lens fixing lever
clockwise to secure the lens.
Note
Lens fixing lever