38
Basic Settings using the Subdisplay
Chapter 3 Basic Adjustments and Settings
Functions that can be allocated to the ASSIGN
buttons
a) The signal output in the viewfinder is active only when SDI OUT2 is
selected as the signal source.
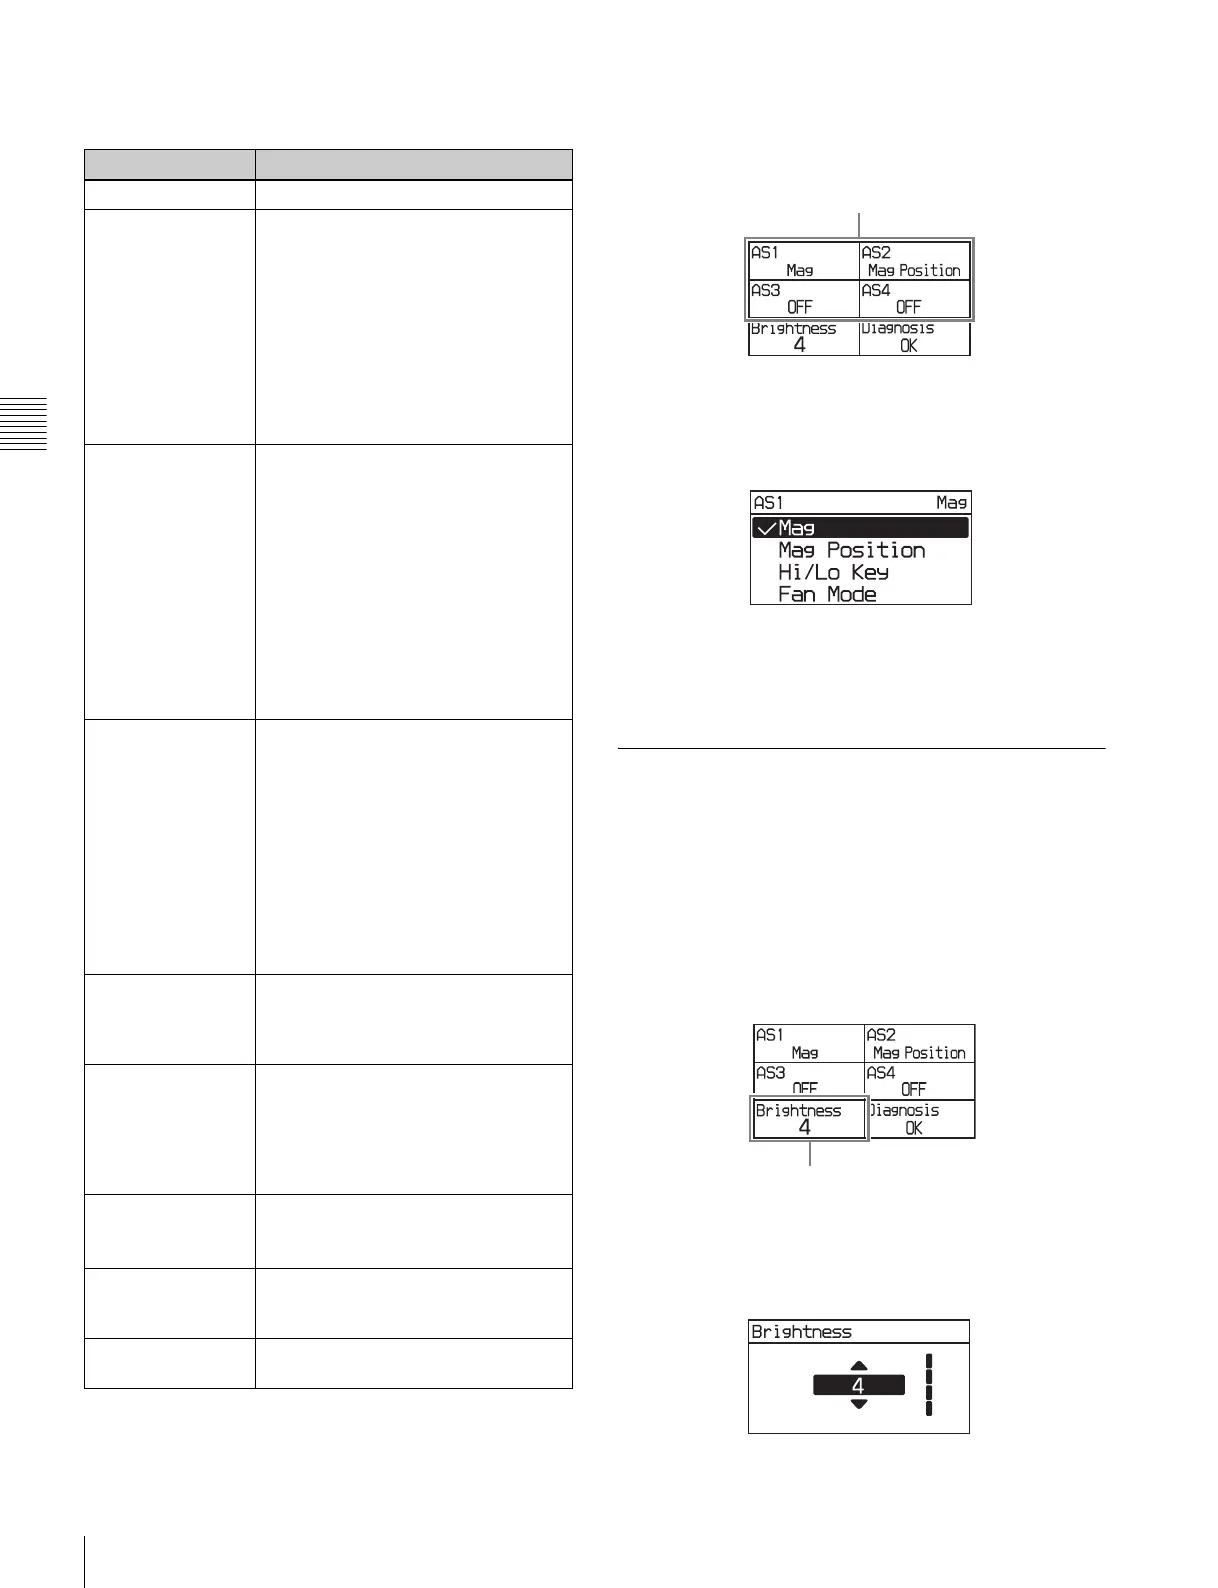
1
Select AS1 to AS4 for the button you wish to assign on
settings page 3, then press the MENU SEL/ENTER dial.
Settings page 3
2
Turn the MENU SEL/ENTER dial to select the
function to assign, then press the MENU SEL/ENTER
dial.
To set using the VF menu
Set on the <Switch Assign> page in the Config menu (page
64).
3-3-15 Adjusting the Subdisplay
Brightness
The brightness of the subdisplay can be adjusted to one of
four levels.
1
Select Brightness on settings page 3, then press the
MENU SEL/ENTER dial.
Settings page 3
2
Turn the MENU SEL/ENTER dial to adjust the
brightness, then press the MENU SEL/ENTER dial.
The higher the value, the brighter the subdisplay.
Menu indication Function
OFF No function is allocated.
Mag Displays a magnified image in the
viewfinder and on the SDI OUT2
connector.
a)
Each time the button is pressed, the
magnification changes between 2-
times, 4-times, and Off. When the
magnification is 2-times or 4-times, the
ASSIGN button allocated with the Mag
function is lit.
The display returns to normal after
about 30 seconds.
Mag Position Selects the position of the image that
is magnified by the Mag function.
There are nine points on the screen
that can act as the center point of the
magnified image. This function sets the
position of the magnified image as an
area centered on one of these points.
Each time the button is pressed, the
area moves one position from top left
to bottom right. When the display is
magnified, the ASSIGN button
allocated with the Mag Position
function is lit.
Hi/Lo Key Temporarily changes the LUT set for
the SDI OUT2 connector to check the
high-luminance highlights and low-
luminance clipped blacks of the image
in the viewfinder and from the SDI
OUT2 connector.
a)
The button toggles between high-
luminance check (gain reduction), low-
luminance check (gain amplification),
and normal.
The display returns to normal after
about 30 seconds.
Fan Mode Switches the fan operating mode.
For details on the fan operating mode,
see “3-3-9 Selecting the Fan
Operating Mode” (page 36).
Rec Review Plays the video just recorded.
The playback interval (all or the last
five seconds) follows the setting in the
SR-R4 menu. Pressing the ASSIGN
button during playback pauses
playback.
Highlight Clip Ind. Indicates the blown-out areas of the
image output in the viewfinder and on
the SDI OUT2 connector in red.
a)
SRMemory Eject Closes the file and unmounts the
SRMemory card inserted in the SR-
R4, then unlocks the lid of the SR-R4.
Bars Outputs color bars.
Can be assigned to ASSIGN 4 only.
ASSIGN buttons
Brightness