www.stryker.com SK-7500 REV 00 69
Service
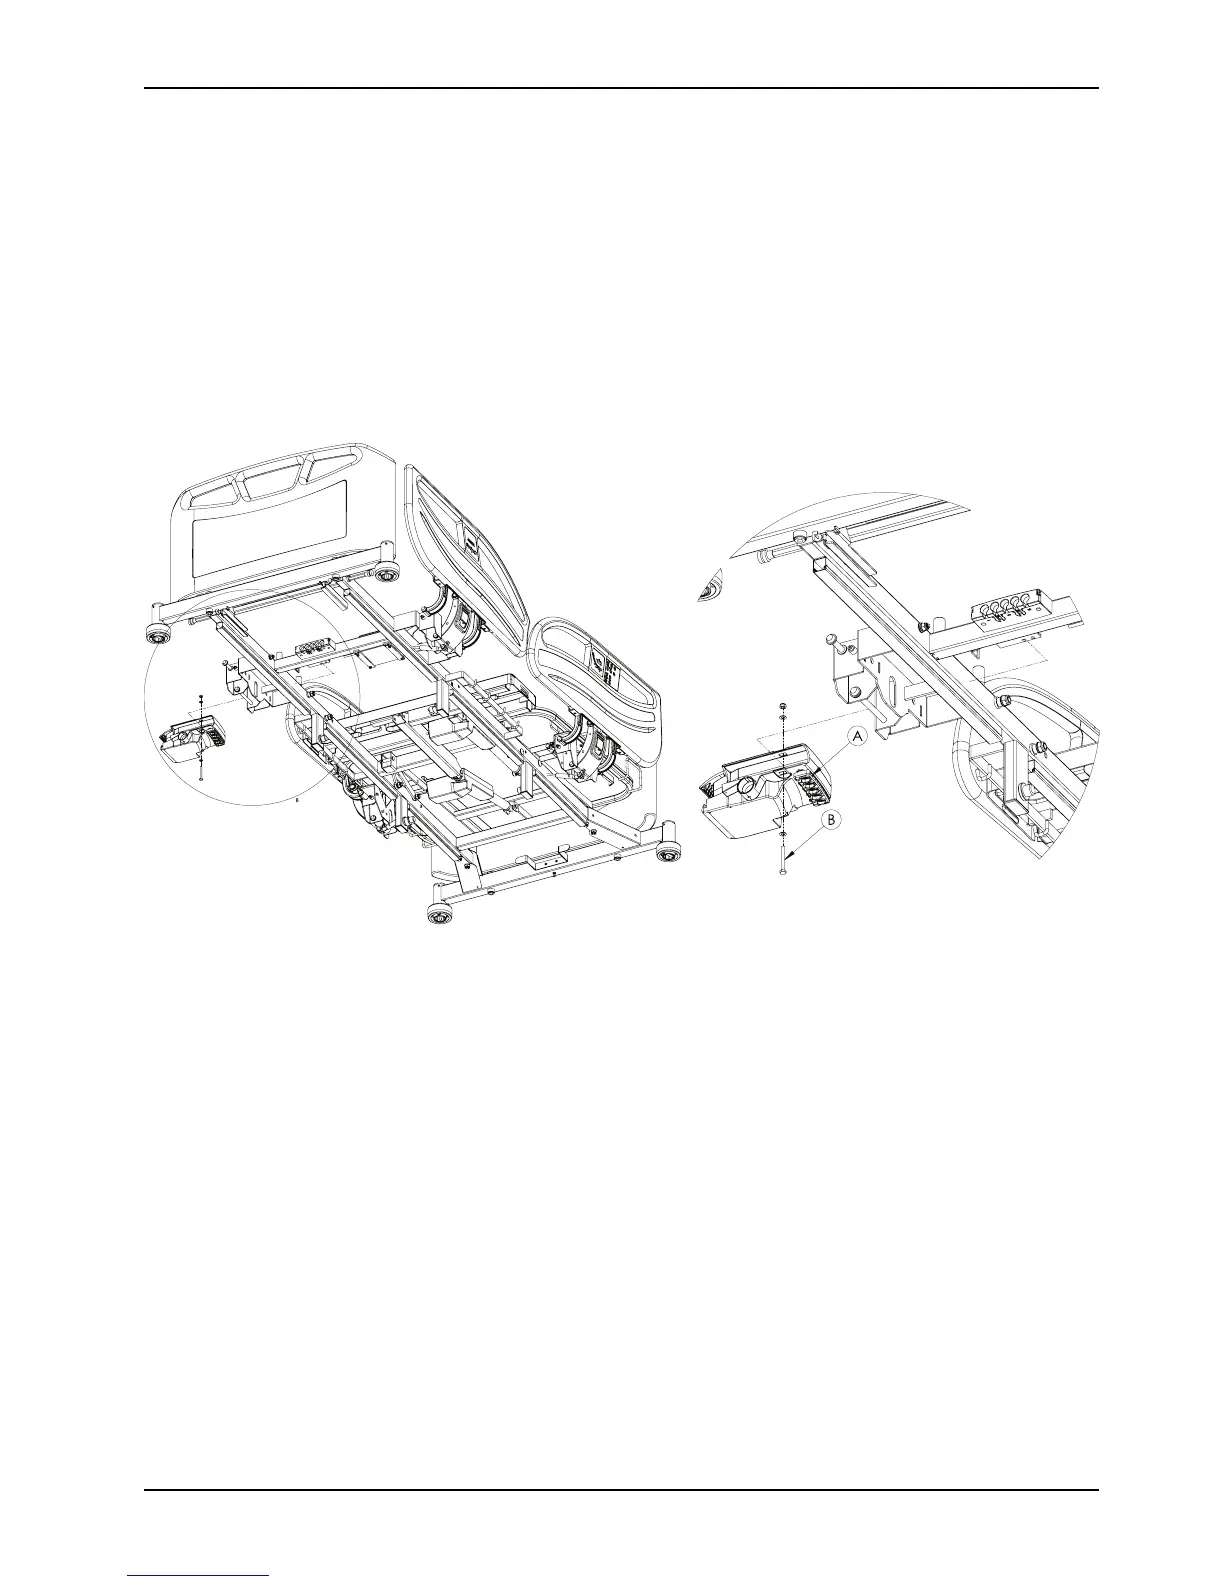
Control box replacement (Continued)
9. Remove the power cord from the control box.
10. Unplug the control cables and the battery cable from the control box.
Note: Pay attention to the control cable connection locations for reinstallation.
11. Using a 10 mm combination wrench and a 10 mm socket, remove the bolt (B) that secures the control box to the
litter frame (Figure 11 on page 69).
12. Remove and discard the control box.
13. Reverse steps to reinstall.
14. Verify proper operation of the product before returning it to service.
Figure 11: Control box
Battery replacement
Tools required:
• Diagonal pliers
• #2 Phillips screwdriver
Procedure:
1. Apply the brakes.
2. Raise the product to the highest height position.
3. Power down the bed and unplug the power cord from the wall outlet.
4. Remove the cable routing cover that secures the gatch (legrest) actuator cable to the litter frame.
5. Using diagonal pliers, cut and discard the cable tie that secures the battery cable to all of the actuator cables.
6. Using a #2 Phillips screwdriver, unscrew the four screws (A) that secure the battery to the litter frame (Figure 12 on
page 70).
Note: Support the battery while removing the screws so the battery does not fall.
7. Remove the battery.