SummaSign Pro T-series Cutters User’ s Manual
General Information 1-23
5. To configure the cutter for drag knife operation, press the key (tool
select).
Then press the left or right jogging key until DRAG KNIFE appears on the
second line of the LCD .
Press ENTER and an asterisk will appear next to DRAG KNIFE. This indicates
that the DRAG KNIFE is selected. The drag knife will remain selected until
another tool is selected or the cutter is powered down. To start up the
cutter in drag knife mode refer to section 2.4.5 (tool submenu of the
USER CONFIG MENU).
6. To set the pressure of the drag knife, refer to paragraph 1.7.1 point 5.
7. To set the knife offset, perform the knife offset test described in
paragraph 2.3.3.
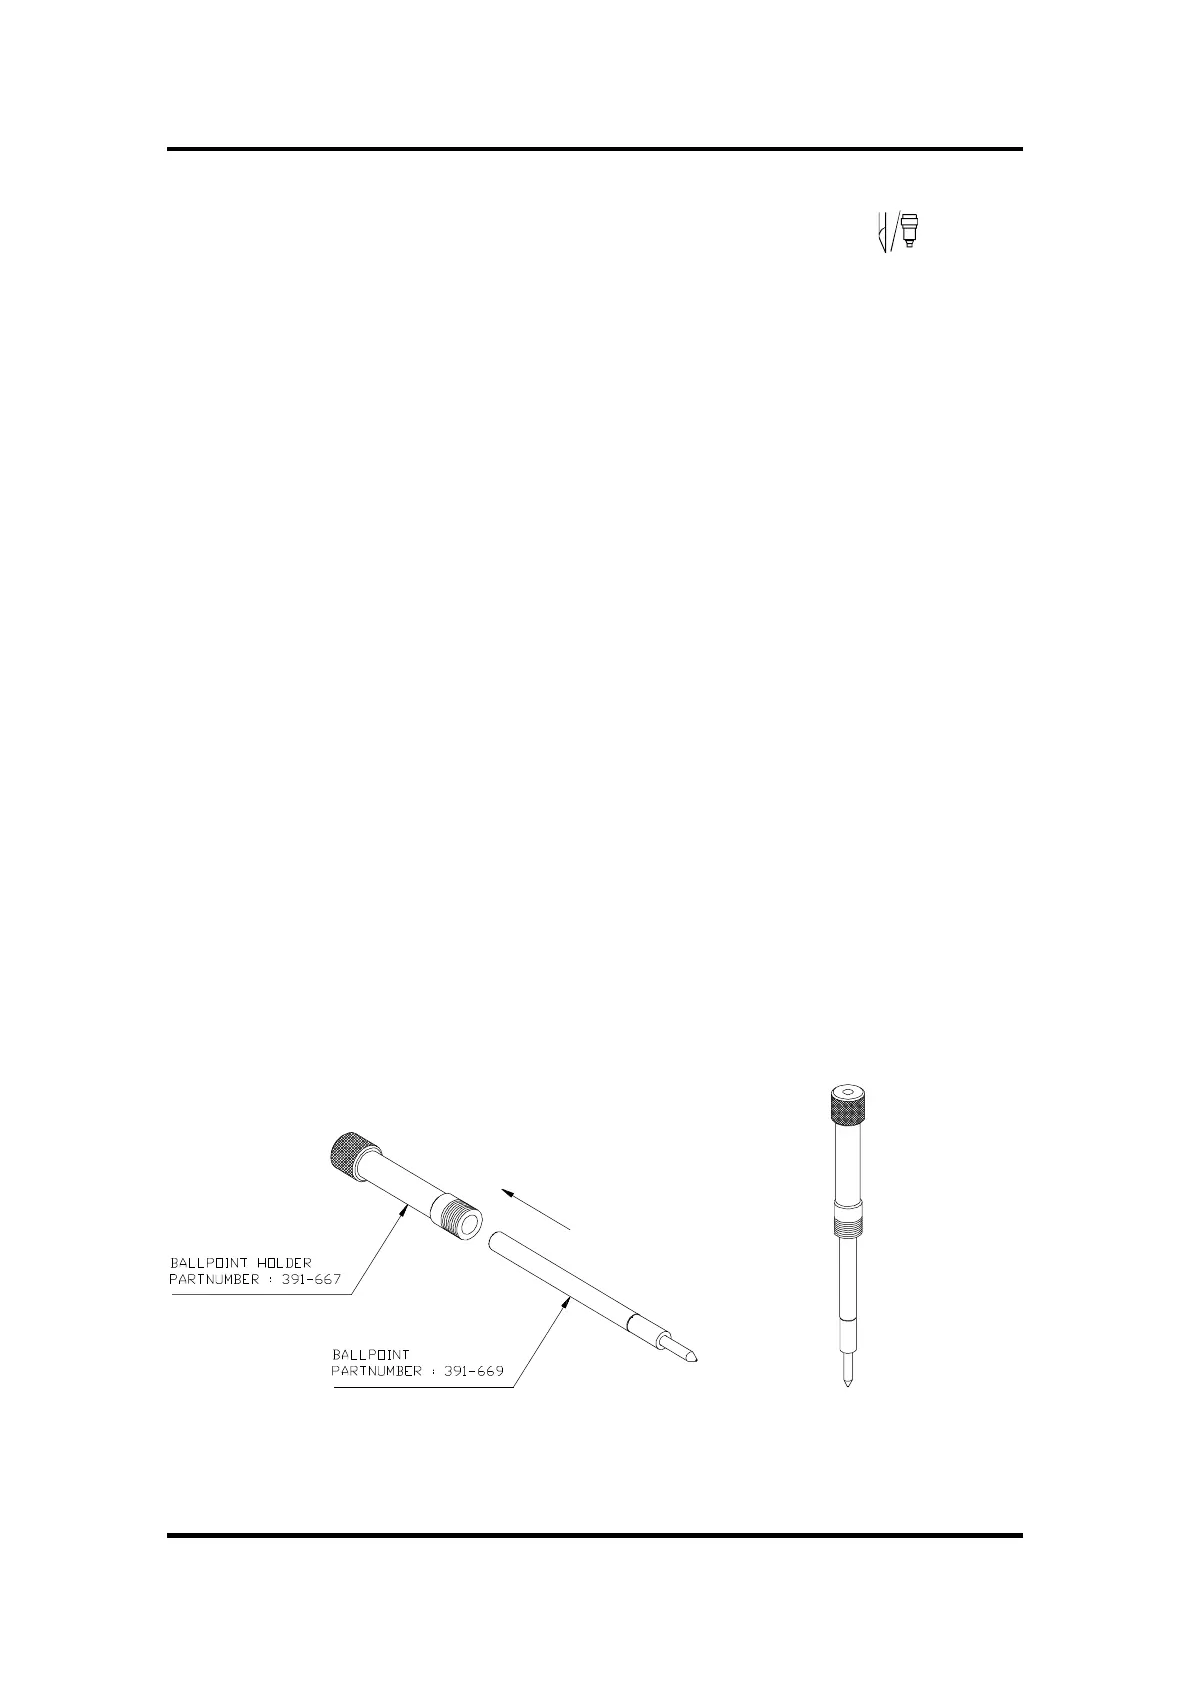
1.7.4. INSTALLING A BALLPOINT PEN
The SummaSign Pro cutters can also be operated with a BALL POINT pen. After
replacing the knife with a ball point pen, the cutter can be used as a plotter to
draw draft plots of new or existing designs on paper.
è To install the ball point pen, proceed as follows:
1. Remove the knife by turning the knife holder anticlockwise with one
hand while holding the nose piece in place with the other hand.
2. Remove the nose piece (refer to Fig 1-14)
3. Insert the ballpoint pen holder into the tool shaft as shown in Figure 1-14.
FIGURE 1-13 :
BALLPOINT PEN ASSEMBLY