SINGLE PHASE HI 10/12kW | User Manual14
≥ 500mm
≥ 500mm
≥ 500mm
≥ 100
mm
0
≥ 500mm
Choose the recommended drill head (as shown below pic) to drill 4 holes in the wall, 82-90mm deep.
1. Use a proper hammer to t the expansion bolt into the holes.
2. Carry and hold the inverter, ensure the hanger aims at the expansion bolt, and x the inverter on the
wall.
3. Fasten the screw head of the expansion bolt to nish the mounting.
WARNING
Risk of injury (Heavy Object).
Remember that this inverter is heavy so users must be careful in handling the unit during installation
especially when mounting or removing from a wall.
Mounting the Inverter
WARNING
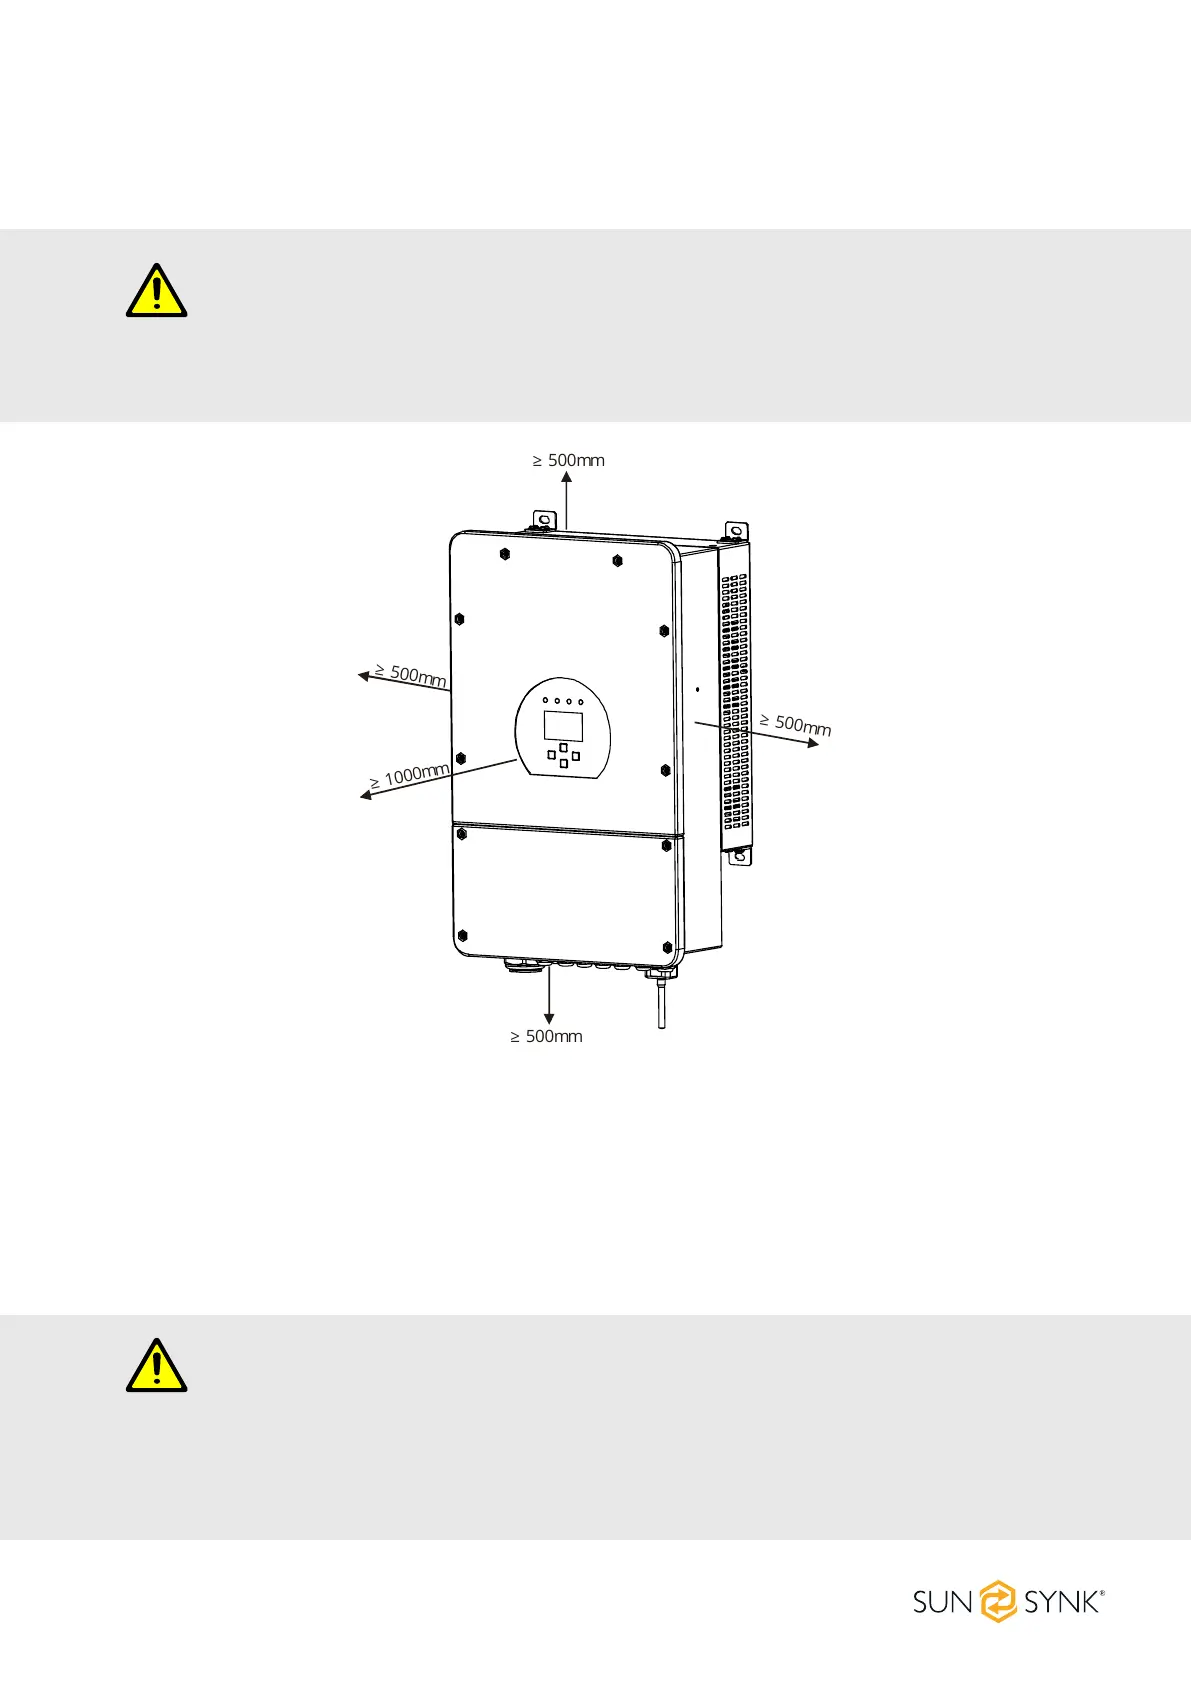
For proper air circulation to dissipate heat, allow a clearance of approx. 50cm to the side and approx.
50cm above and below the unit. And 100cm to the front.
Install the indoor unit on the wall where the oor height is higher than 1600mm.
For proper heat dissipation, allow a clearance of approximately 500mm to the side, 500mm above and
below the unit, and 1000mm to the front of the unit.
 Loading...