Emission Control Devices: 1B-4
Repair Instructions
Heated Oxygen Sensor (HO2S) Removal and
Installation
B705H11206004
Removal
WARNING
!
Do not remove the HO2 sensor while it is hot.
CAUTION
!
• Be careful not to expose the HO2 sensor to
excessive shock.
• Do not use an impact wrench when
removing or installing the HO2 sensor.
• Be careful not to twist or damage the
sensor lead wires.
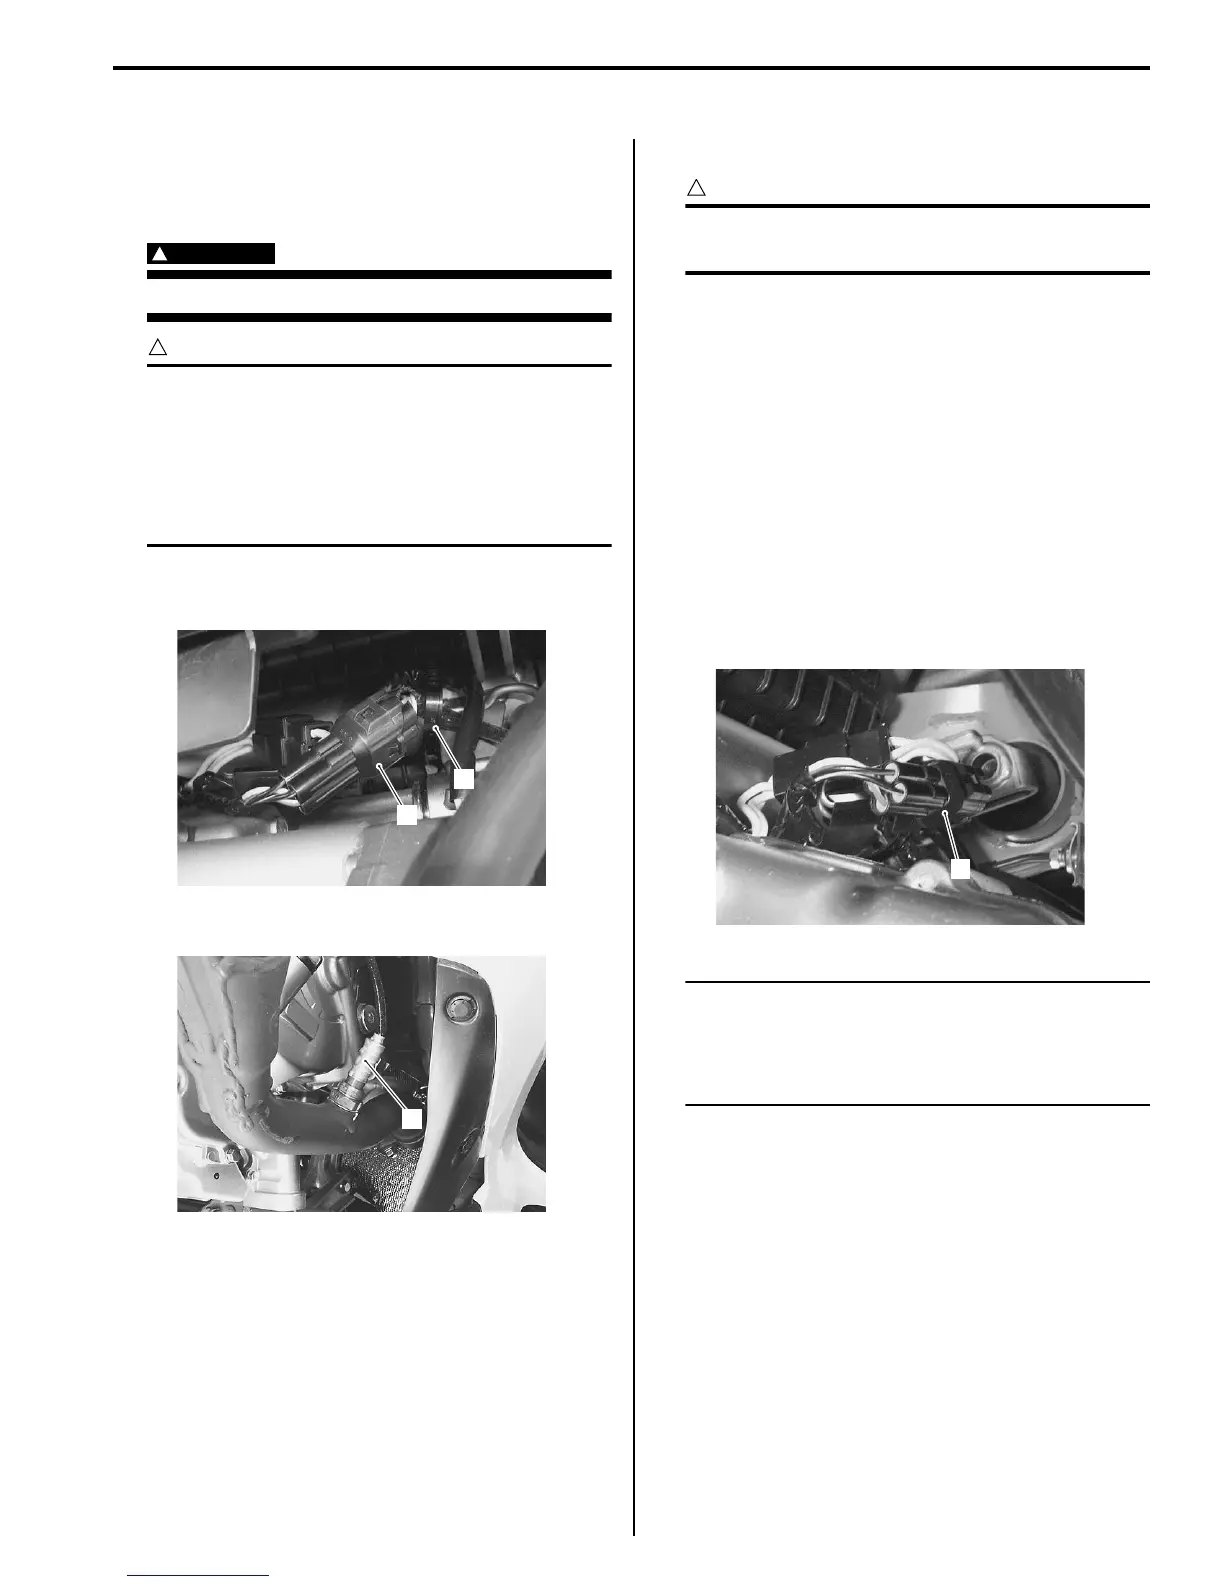
1) Disconnect the HO2 sensor coupler (1) and remove
the clamp (2).
2) Remove the HO2 sensor (3).
Installation
CAUTION
!
Do not apply oil or other materials to the
sensor air holes.
Install the HO2 sensor in the reverse order of removal.
Pay attention to the following point:
• Tighten the HO2 sensor to the specified torque.
Tightening torque
HO2 sensor: 48 N·m (4.8 kgf-m, 34.5 lb-ft)
Heated Oxygen Sensor (HO2S) Inspection
B705H11206002
Inspect the HO2 sensor in the following procedures:
1) Inspect the HO2 sensor and its circuit referring to
flow table of the malfunction code (C44). Refer to
“DTC “C44” (P0130, P0135): HO2 Sensor (HO2S)
Circuit Malfunction in Section 1A (Page1A-64)”.
2) Disconnect the HO2 sensor coupler (1).
NOTE
• Temperature of the sensor affects
resistance value largely.
• Make sure that the sensor heater is at
correct temperature.
1
2
I705H1120007-01
3
I705H1120001-02
1
I705H1110104-04
 Loading...