PARKING AND REAR BRAKE 5C-7
3) Install brake drum after making sure that inside of brake
drum and brake shoes are free from dirt and oil.
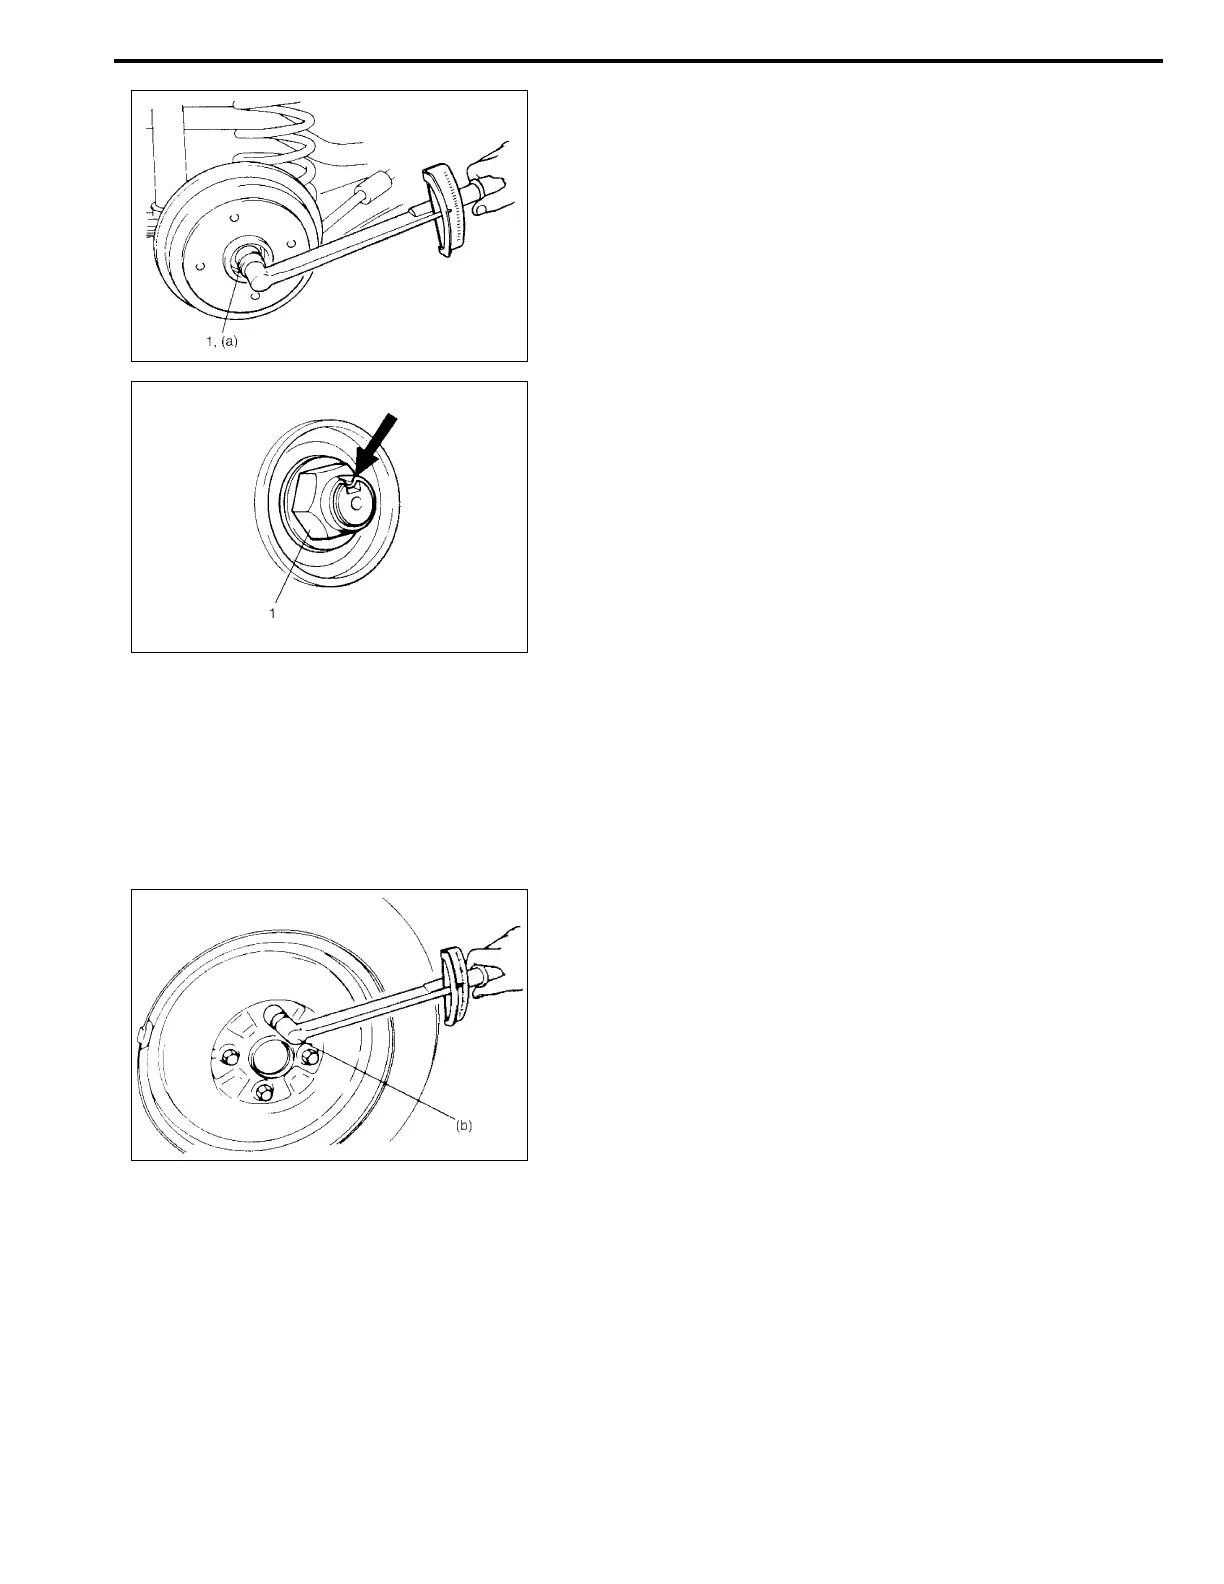
4) Install new spindle nut (1).
5) Tighten spindle nut (1) to specified torque.
Tightening torque
Spindle nut (a): 175 N·m (17.5 kg-m, 126.5 lb-ft)
6) Calk spindle nut (1).
7) Install spindle cap.
8) Upon completion of all jobs, depress brake pedal with about
300 N (30 kg, 66 lbs) load at least 15 – 20 times until
adjuster actuator clicking sound from drum brake can not be
heard so as to obtain proper drum-to-shoe clearance.
Adjust parking brake cable. (For adjustment, refer to “Parking
Brake Inspection and Adjustment” in Section 5.)
9) Install console box cap if removed.
10) Install wheel and tighten wheel bolts to specified torque.
Tightening torque
Wheel bolt (b): 95 N·m (9.5 kg-m, 69.0 lb-ft)
11) Check to ensure that brake drum is free from dragging and
proper braking is obtained. Then remove vehicle from hoist
and perform brake test (foot brake and parking brake).
Brake Drum Removal and Installation (for
4WD Model)
Removal
1) Hoist vehicle and remove wheel referring to “Wheel
Removal” in Section 3F.
NOTE:
• When installing spindle cap, hammer lightly several
locations on the collar of cap until collar comes closely
into contact with brake drum.
• If fitting part of cap is deformed or damaged or if it is
fitted loosely, replace with new one.
 Loading...