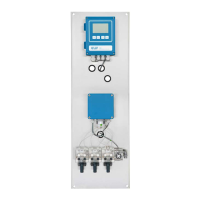
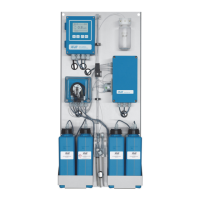
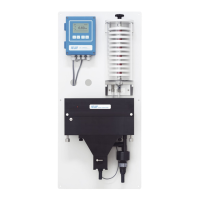
AMI Sample Sequencer
Installation
A-96.250.661 / 120418 23
3. Installation
3.1. Installation Check List
Check Instrument’s specification must conform to your power ratings. Do
not turn on power until instructed to do so.
On-site
requirements
AC model: 100–240 VAC (10%), 50/60 Hz (5%),
DC model: 24 VDC (±10%)
isolated power outlet with ground connection and 8 VA
Sample line with min. 5 l/h and 0.5–3 bar
Waste line with atmospheric drain
Installation
Install the AMI Sample Sequencer, p. 24
Connect Sample and Waste, p. 25
Install the connection tube to the AMI analyzer
Replace the flow regulating valve of the AMI analyzer with a
blind plug
Electrical
Wiring
Connect the AMI analyzer to the AMI Sample Sequencer
Connect the AMI Sample Sequencer to the mains; do not switch
on power yet! See Power Supply, p. 43
Power-up Perform exactly in this order:
– Turn on the sample flow. See Instrument Setup, p. 45
– Adjust the sample flow on all connected sample inlets of the
sample sequencer
– Switch on power. See Instrument Setup, p. 45
Instrument
Setup
Program all parameters for operation (sequence, alarms).