6Ć22
3. Pull the Front Panel module slightly away from the front of the chassis
until you can reach the interconnect cables at the rear of the module.
4. Unplug the following cables from their jacks on the Front Panel module:
H The Display ControlĆtoĆfrontĆpanel cable at J84
H The menu flex circuitĆtoĆfront panel at J40
H The CPUĆtoĆfrontĆpanel cable at J30
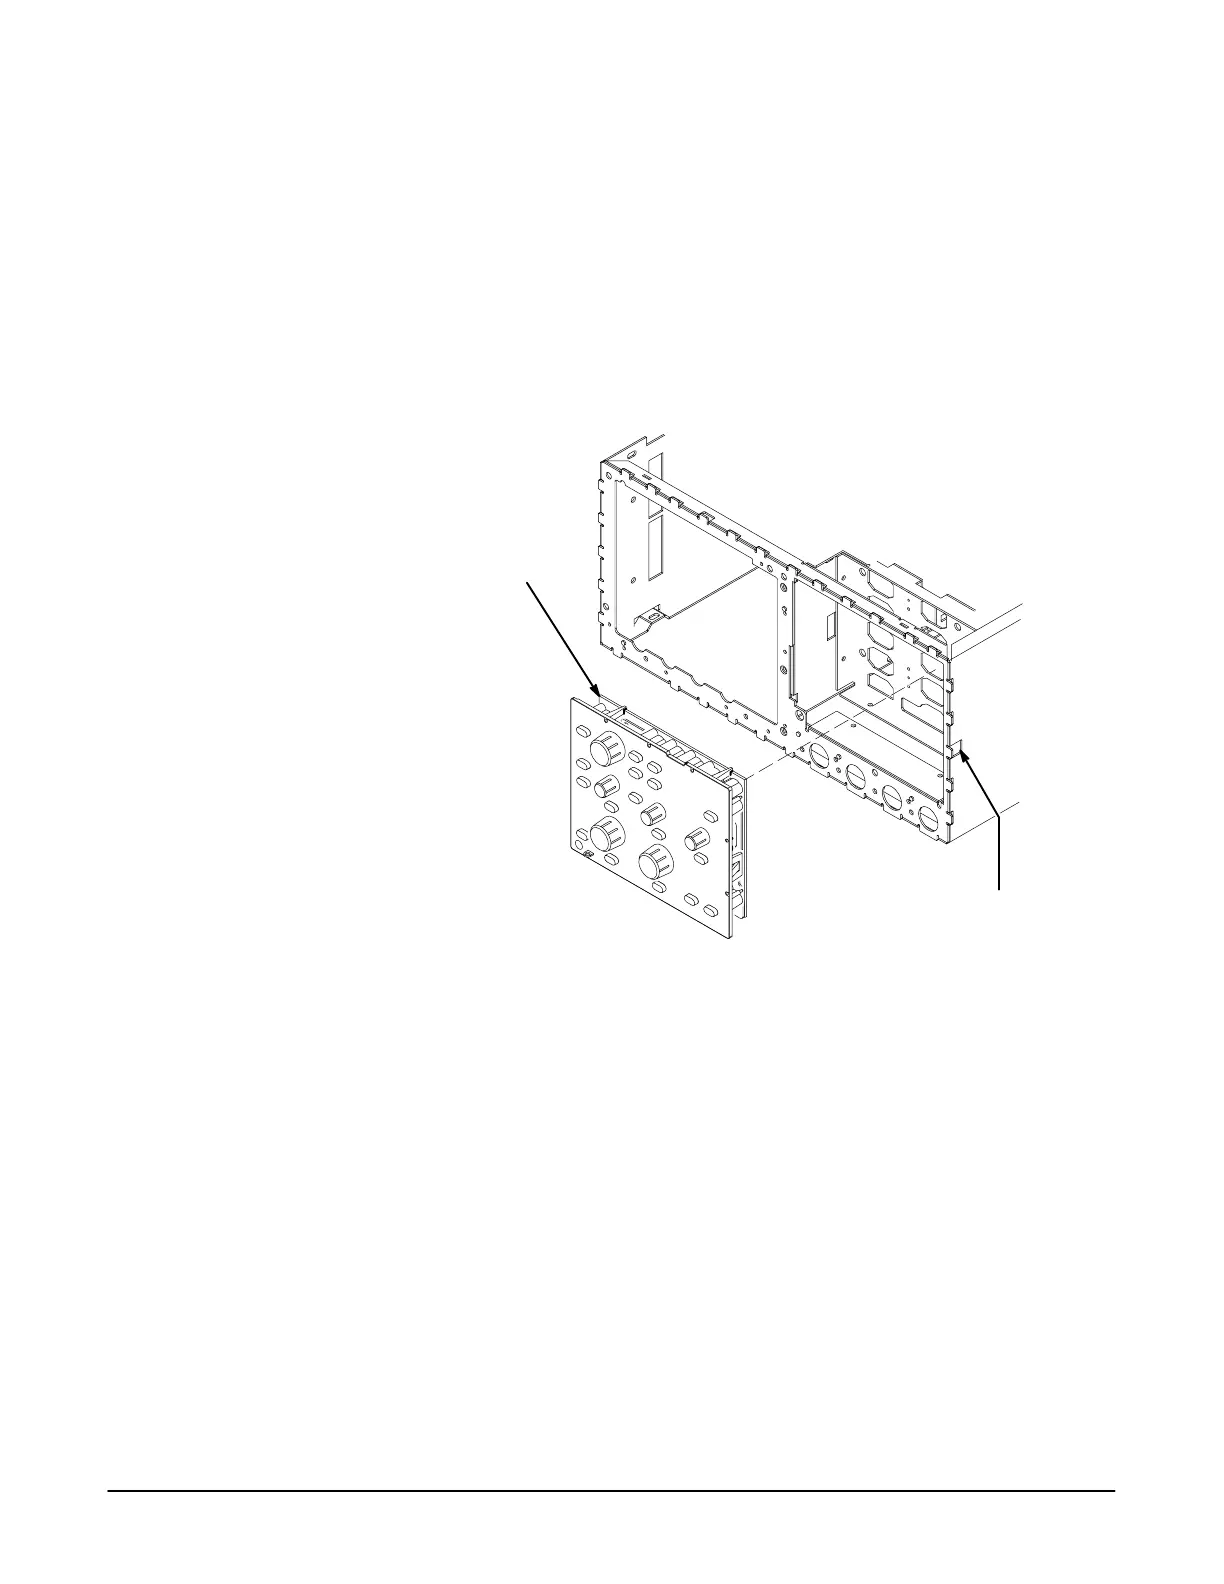
5. Lift the Front Panel module out from the chassis.
Front Panel
Assembly
Press Latch
to Release
#"
# !!
The following procedures describe the disassembly of the Front Panel
module into its subparts once it is removed from the instrument.
Ċ This procedure requires that the
procedure FrontĆPanel Knobs and Shafts Removal be performed first.

 Loading...
