# !! "
# "
6Ć33
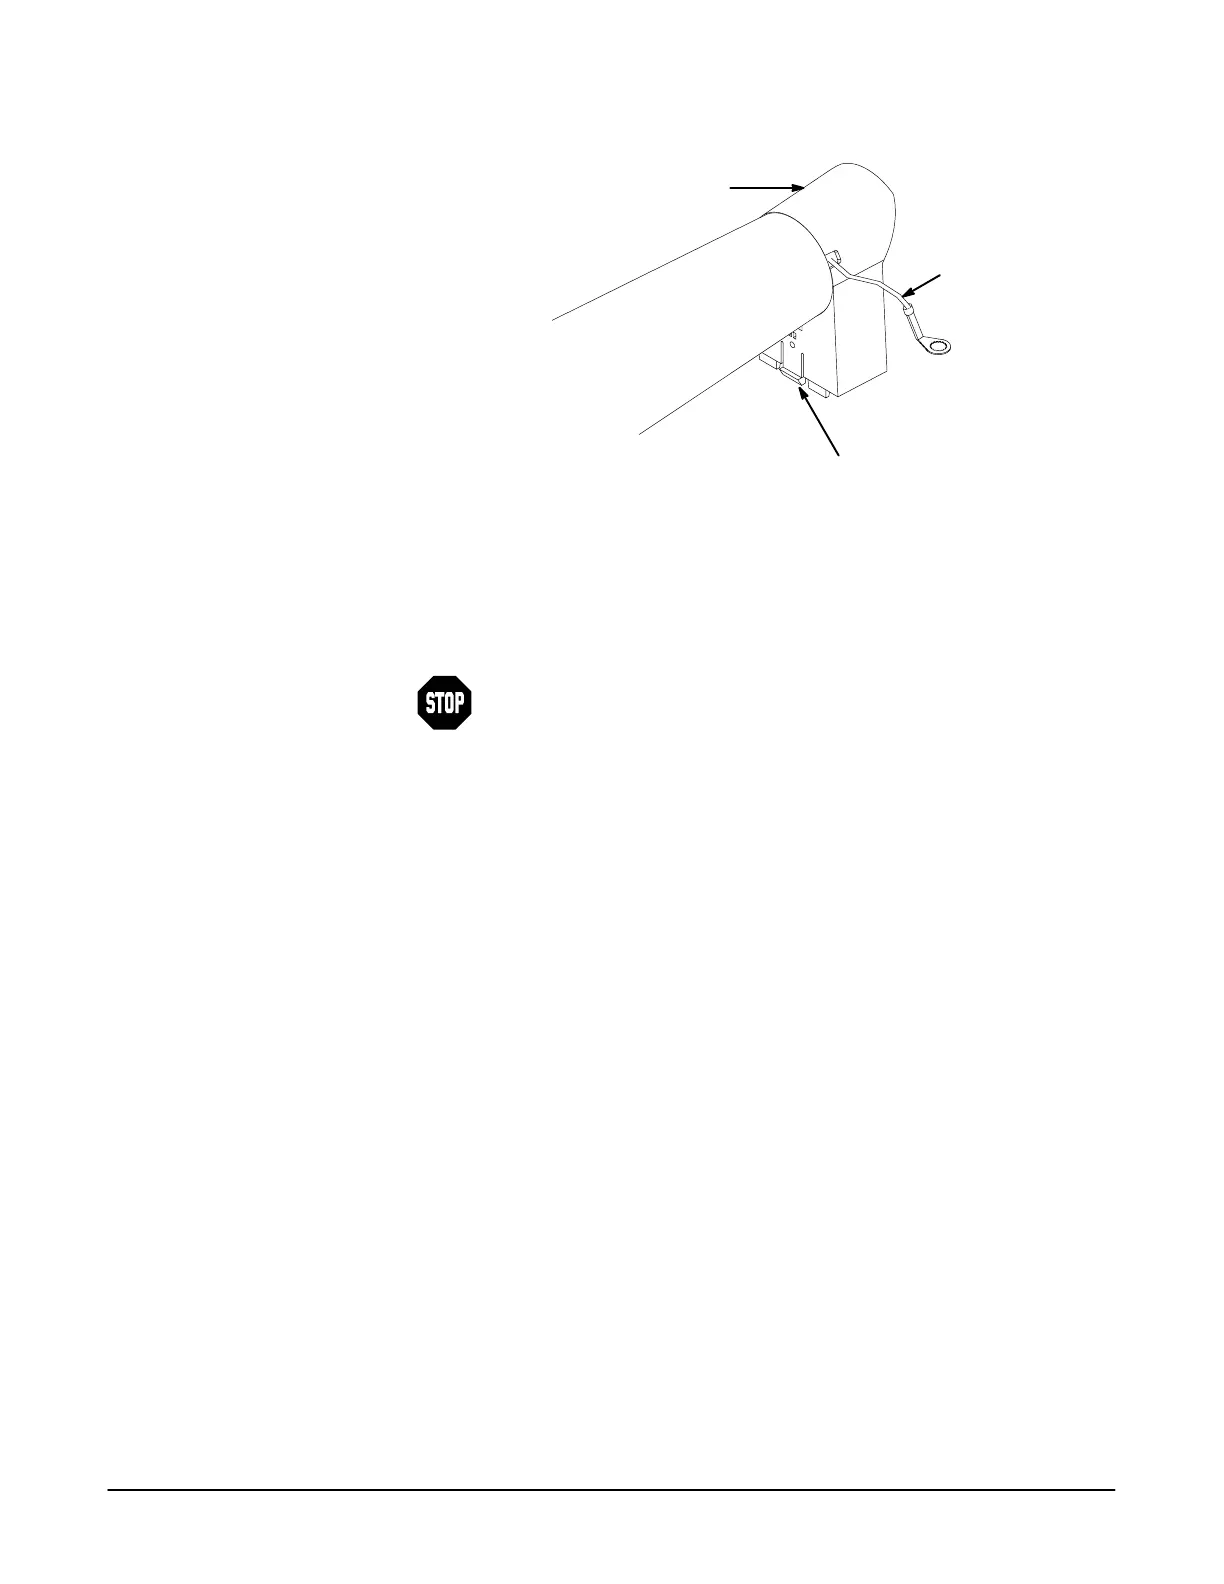
Rear CRT Bracket
Release Rear CRT
Bracket Latch From
Chassis
Spring Ground Wire
" %$ ! "
6. Lift the rear of the CRT until it is above the chassis. Then pull the CRT
away from the CRT Front Bracket.
Stop here if you are removing the CRT assembly to gain access to
other portions of the instrument. If you are installing a new CRT or
hardware attached to the CRT, continue with this procedure.
7. Slide the Rear CRT Bracket from the CRT. The Spring Ground Wire will
slide out also. (See Figure 6Ć20 on page 6Ć35.)
8. Remove the CRT Socket with its cover from the rear pin connector of the
CRT.
9. Disconnect the vertical and horizontal control wires from the side of the
CRT. Note the proper location of both sets of wires for reinstallation.
10. Slide the CRT shield and its front support off the CRT.
11. Store the CRT in a safe location.
!!
1. Slide the CRT shield and its front support onto the CRT as far forward as
possible.
2. Align the holes in the shield so that the vertical and horizontal control
pins on the side of the CRT are accessible.
3. Align the slot in the CRT Socket to the key on the CRT pin connector
and slide the Socket onto the pins.
4. Slip the CRT socket wires through the Rear CRT Bracket and slide the
bracket onto the rear of the CRT.
5. Ensure that the Rear CRT Bracket is properly aligned with the slots
provided in the CRT Shield.
 Loading...

