% "## !$!"
!% $
6Ć37
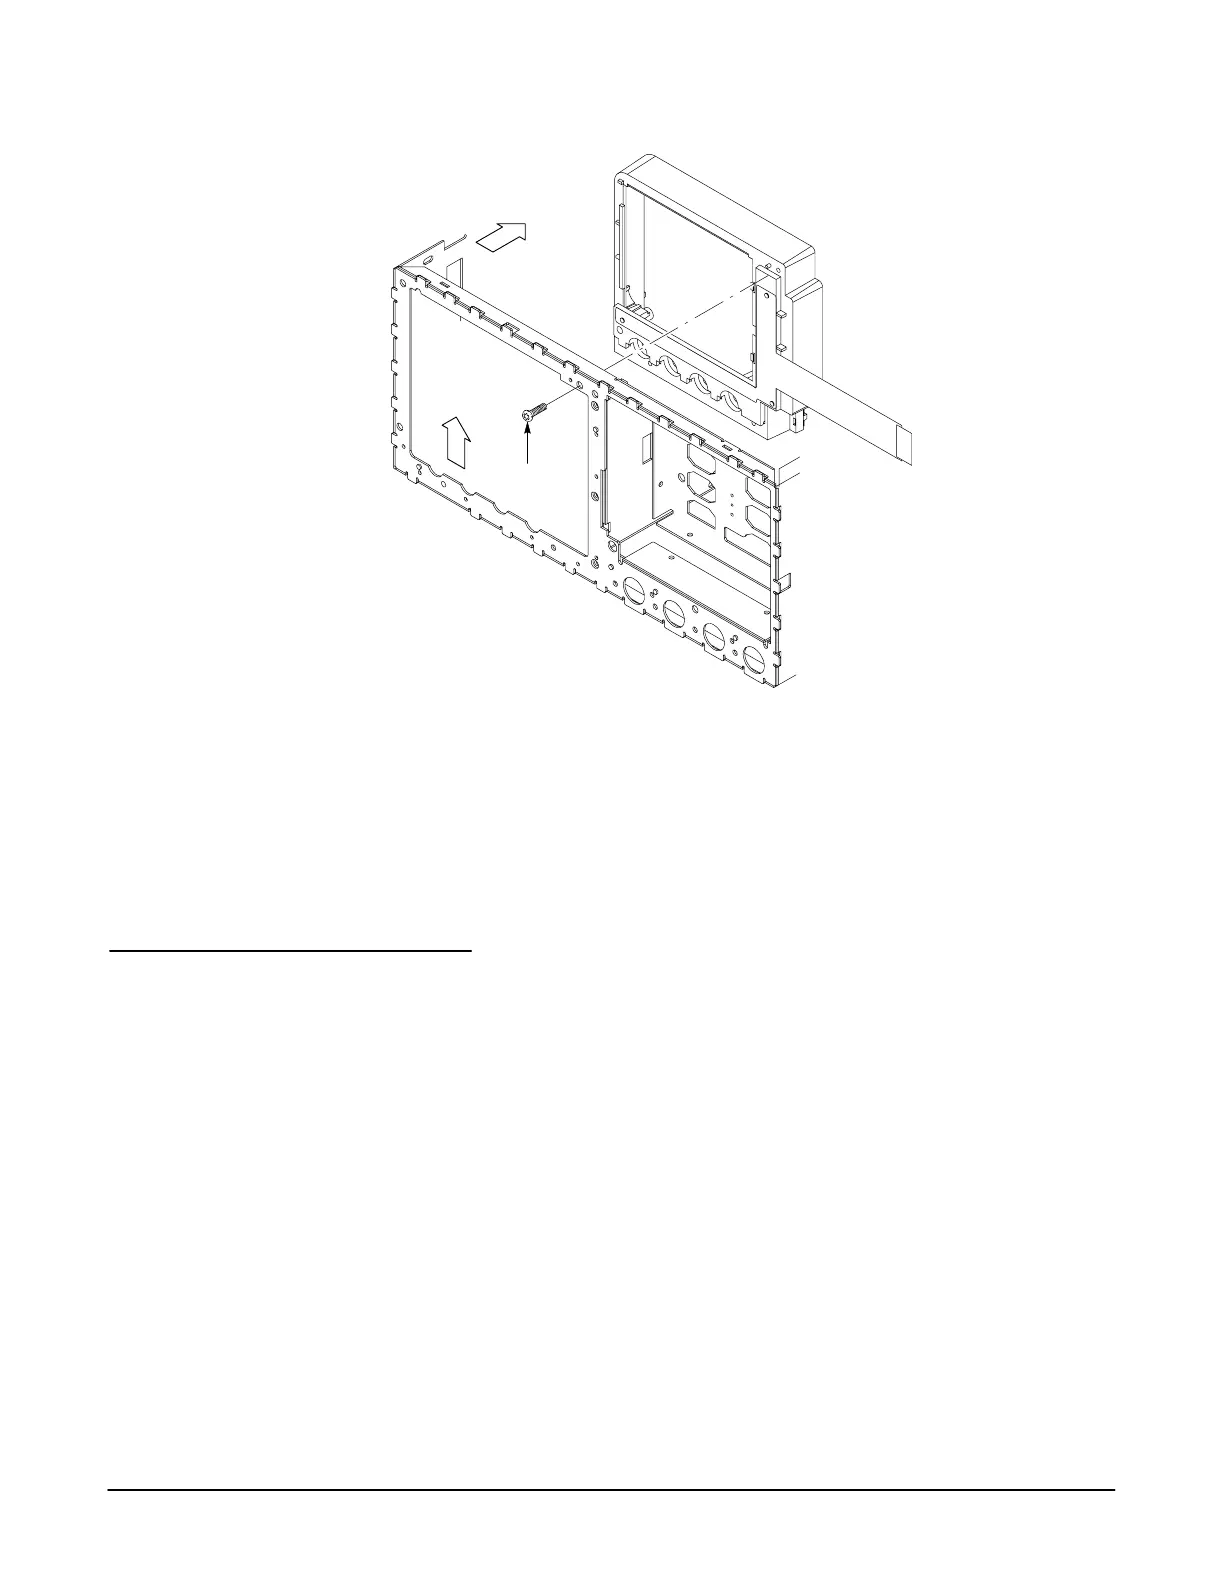
Mounting
Screw
$! ('% # !# !#
3. ReĆinstall the CRT front bracket by sliding the bracket into the chassis
and secure it with the four mounting screws.
4. Install all previously removed components.
The procedures that follow describe how to remove and install the CRT
front bracket.
# !$!" ! $! Ċ This procedure requires that the
following procedures be performed first:
H Rear Cover Removal
H Cabinet Removal
H Front Trim Removal
H A3 Display Driver Board
H Fan Assembly
H CRT
1. Unplug the cables from connectors J80, J82, and J84 on the A2 Display
Control board.
"& #!
!
 Loading...

