Incoming Inspection
Test Preset Rec
all.
4. Restore the Factory Preset. (See page 60, Restore the Factory Presets.)
NOTE. This test overwrites presets A1 through A4. Save any existing presets to
USB flash memo
ry before doing this procedure.
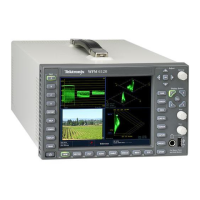
5. Set the waveform monitor to display a picture in tile 1 and a waveform in
the the rem
aining tiles:
a. Press the Display Select button 1 button and then press the PICT button.
b. Press the Display Select button 2 and then press the WFM button.
c. Press the Display Select button 3 and then press the WFM button.
d. Press the Display Select button 4 and then press the WFM button.
6. Save the current settings as preset A1:
a. Press and hold the PRESET button to display the Preset Menu.
b. Select Save Preset > Select Group A > Save A1.
c. Save the preset as Preset A1.
d. Briefly press the PRESET button to close the Preset menu.
7. Repeat steps 5 and 6 to create a preset with picture in tile 2 and waveform in
tiles 1, 3, and 4. Save as Preset A2.
8. Repeat steps 5 and 6 to create a preset with picture in tile 3 and waveform in
tiles 1, 2, and 4. Save as Preset A3.
9. Repeat steps 5 and 6 to create a preset with picture in tile 4 and waveform in
tiles 1, 2, and 3. Save as Preset A4.
10. Set the waveform monitor to the factory presets. (See page 60, Restore the
Factory Presets.)
11. Short pin
s 1 and 6 together on the remote cable.
12. Preset A1 should be restored so that a picture is displayed in tile 1. It may
take several seconds f or the display to change.
13. Short pins 1 and 7 together on the remote cable.
14. Preset A2 should be restored so that a picture is displayed in tile 2. It may
take several seconds f or the display to change.
15. Short pins 1 and 8 together on the remote cable.
16. Preset A3 should be restored so that a picture is displayed in tile 3. It may
take several seconds f or the display to change.
74 Waveform Monitors Specifi
cations and Performance Verification

 Loading...


