1
A
V
W
W
CC:R
CV:G
OUTPUT
V(W) A(W)
MENU PROTECT CHECK
ESC/ KEY LOCK ENTER/MEM 1 2 3
DIGIT
PRESET/ SEQUENCE
* LOCK/RMT STEP STOP PAUSE START
2
3
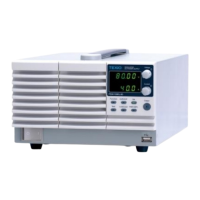
PDS-A series
A
V
W
W
CC:R
CV:G
OUTPUT
V(W) A(W)
MENU PROTECT CHECK
ESC/ KEY LOCK ENTER/ MEM
1 2 3
DIGIT
PRESET/ SEQUENCE
* LOCK/ RMT
STEP STOP PAUSE START
PDS-A series
A
V
W
W
CC:R
CV:G
OUTPUT
V(W) A(W)
MENU PROTECT CHECK
ESC/ KEY LOCK ENTER/MEM 1 2 3
DIGIT
PRESET/ SEQUENCE
* LOCK/ RMT STEP STOP PAUSE START
4
5
PDS-A series
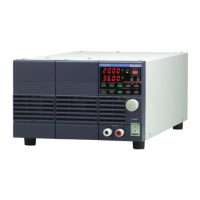
Turn on the power switch while pressing and
holding the MENU key.
Release the MENU key when the panel is lit.
"SYAd" (system address) is then displayed in the
voltage indicator.
Turn the rotary encoder to change the value.
If the PDS-A unit is connected to a PC, specify
"1" as the system address. If the unit is
connected to local bus, a value from "2" to "31"
can be specified as the address.
After specifying the value, press the ENTER key.
If the system address is set to "1" and pressing
the ENTER key, "PCAd" (PC address) is then
displayed in the voltage indicator.
Turn the rotary encoder to change the value.
The value range is from "0" to "31".
Press the ENTER key to specify "PCAd".
When you are finished, press the ESC key to exit.
After the address has been set, the unit reboots.