© TIMYO B.V. TIMYO USER MANUAL EN SKO52021V2 PAGE 64
6.3 Fully integrated battery TM40/TM50/TM70
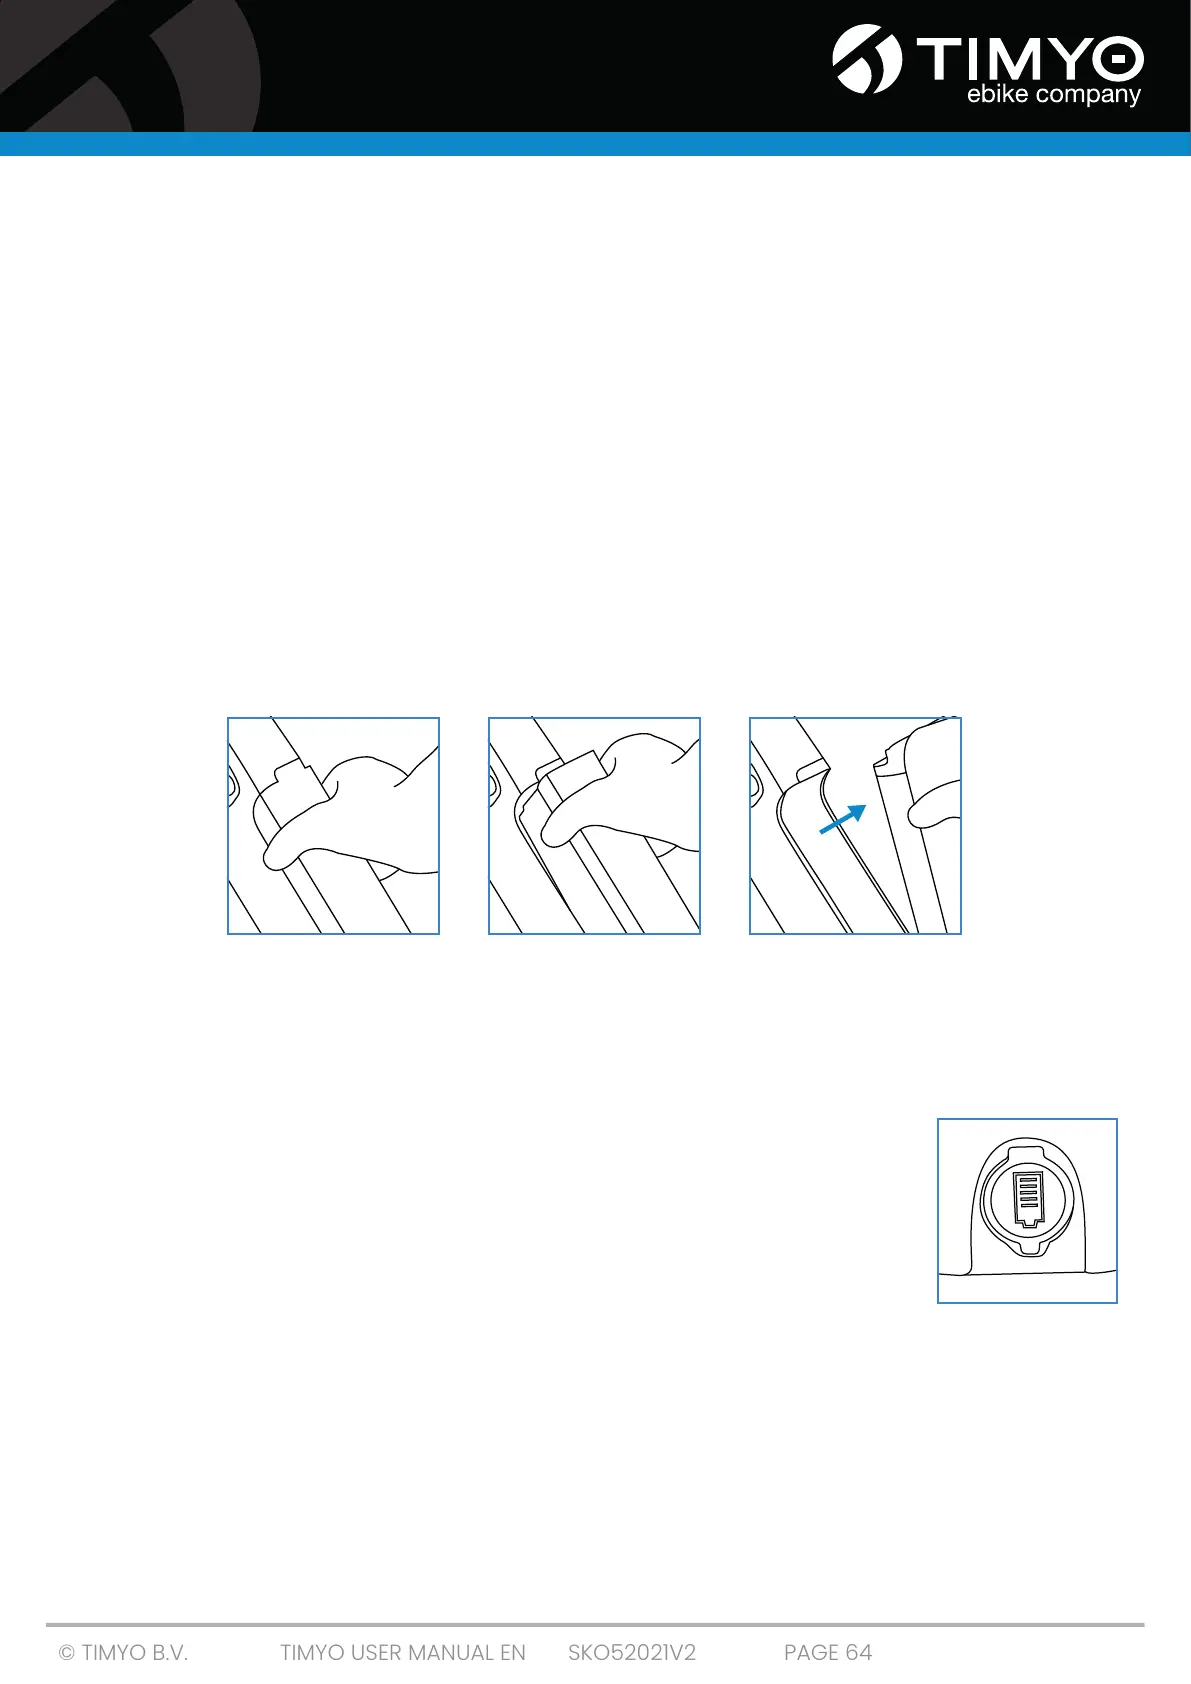
6.3.1 Control of the battery lock - fully integrated
To attach the battery pack to the e-bike, follow the steps below:
■ Gently insert the battery into the battery slot in the center frame.
■ The battery turns on automatically, you don't need to activate it manually.
■ Lock the battery by turning the key to the "lock" symbol.
■ Always remove the key from the battery pack during operation.
■ To unlock the battery lock, turn the key to "unlock".
■ Remove the key from the lock after opening or closing.
6.3.2 Removing the battery from the e-bike - fully integrated
Use the key on the battery lock.
■ Insert the key into the lock on the left side of the battery and carefully turn the key
towards the "unlock" symbol.
■ Remove the key from the battery.
■ Pull the battery pack forward in line with the frame.
■ You can now carefully remove the battery from the battery slot with both hands.
6.3.3 Inserting the battery into the e-bike - fully integrated
You can place the battery in the middle frame. First, position the bottom of the battery pack in the
correct position at the battery connector, insert the battery pack in place with a downward motion
until you hear a click.
6.3.4 Charging the battery - fully integrated
The battery should be charged with the charger provided. The
battery can remain in the e-bike during charging, but it can also be removed
from the e-bike. Charging takes place via the regular electricity grid. In some
cases, you will need to turn on the battery before the battery can be charged.
The charging port is located on the lower part of the battery.
6.4 Important information about the battery
■ The four LED lights show the approximate status of the battery. As a rule, one
light represents 25% battery capacity
■ Press "power" to query status. This is only possible when the battery is switched on.
■ If only one light is on, charging the battery is recommended
■ Do not leave the battery in direct sunlight
■ Charge the battery at least every 2 months when it is not in use