Maintenance Procedures - Hydraulic Quantium 310 Maintenance Manual
Page 4-20 Document Ref 941113-001 Rev 2
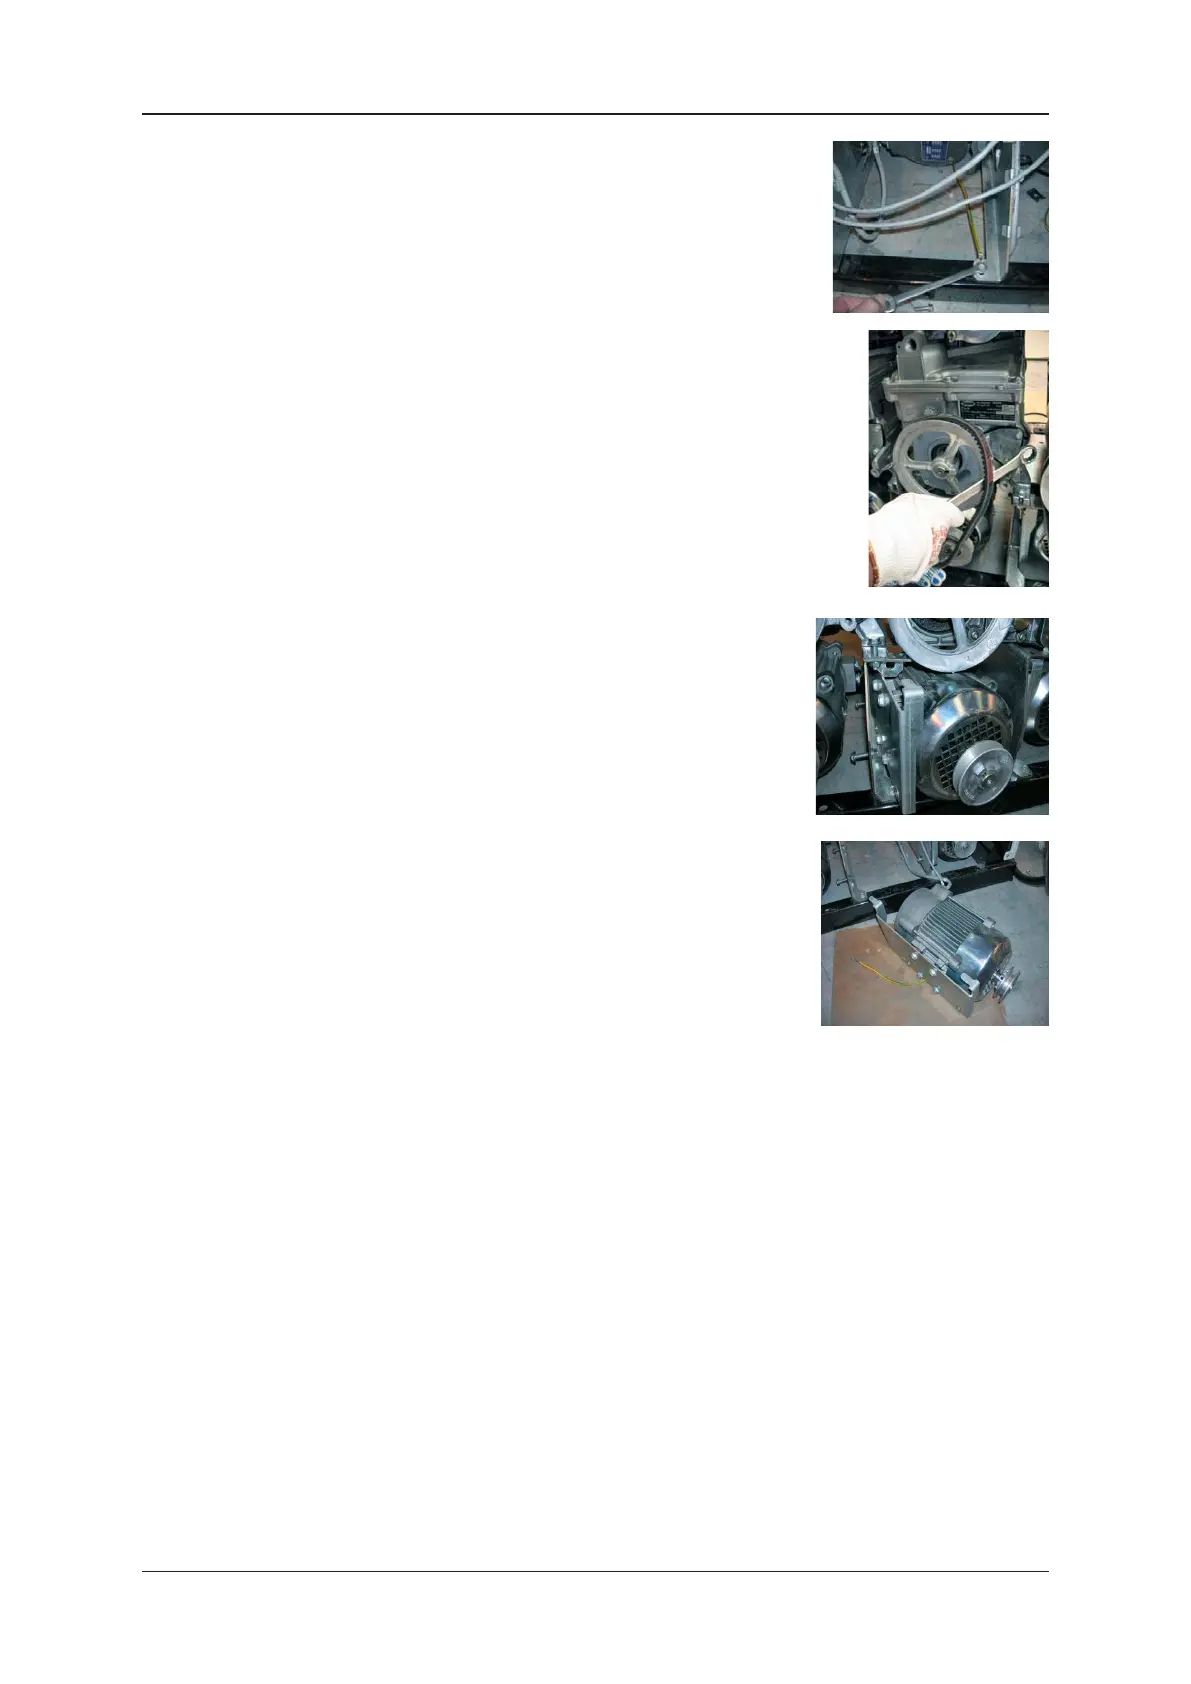
16) Using a 10mm spanner, disconnect the motor earth wire.
Note : ensure that the cables are only attached at the motor
end.
17) Follow the instructions given in section 4.5 to remove the motor
v-belt.
18) From side A of the dispenser, pull the motor forwards to release it
from the slots in the pump support bracket.
19) From side A of the dispenser, lift the motor, cables and bracket
out of the unit.
20) Using a 13mm spanner, loosen and remove the four screws
on the motor bracket and remove the bracket completely. Re-
fit the motor bracket to the new motor.
21) Using a crosshead screwdriver, disconnect the earth wire from
the motor and fit to the new motor.
22) From side A of the dispenser, position the motor into the slots on the pump support bracket.
23) Check the alignment of the pulley between the motor and the pump.
24) Follow the instructions given in section 4.5 to re-fit and adjust the motor v-belt.
25) Feed the motor control cable up the unit through the glands and into the calculator head.
Replace the cable ties and tighten the relevant glands using a 32mm spanner.
Note : ensure that the cable is routed correctly and contained accordingly.
26) Using a small screwdriver, re-fit the connector to the motor control cable.
Note : refer to the wiring diagram in section 7.
27) Re-connect the motor control cable connection to the mainboard in the calculator head.
Note : refer to the wiring diagram in section 7.
28) If removed, re-fit the centre plate cover and apply new Weights & Measurements seals.
Note : qualification for carrying out this task may vary by country.