■
3-8
b) Adjustment after turning power on
The brightness of the monitor can be adjusted according to illumination in the
examination room. (Refer to “3.9.1 General.”)
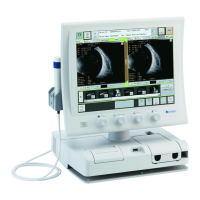
3.2.4 Switching between optical (OPT) mode and ultrasound (US) mode
Touching the “Setup” button (1) on each screen displays the setup screen (Fig. 2)
(Fig. 3). Touching any of the mode buttons (2) opens the measurement screen
corresponding to the selected measurement mode.
Data obtained on this screen is retained after switching between the ultrasound
(US) mode and the optical (OPT) mode.
(Fig. 1) (Fig. 2)
(Fig. 3)
3.2.5 Entering the patient data
■ If the patient information and measurement data already exists, make
sure that both the new patient information and existing measurement
data belong to the same patient before replacing the existing patient
information with the new data.
■ The patient’s ID can be entered only when the patient information entry
screen is displayed.
■ Only the first 14 digits of the ID number are displayed in the patient
information field. Check that the ID number is correct on the patient
information entry screen.
■ The network support system “TOMEY Link” (optional) is required to use
the patient information query function. “DATA Transfer” provided with
the Machine is not available for query of the patient data.
■ For details on the TOMEY Link Server settings, refer to the TOMEY Link
instruction manual.
■ Appropriate connection settings are required for connection with TOMEY
Link. Refer to "3.9.4 d) PC connection settings" to make settings.
(1)
(2)
(2)

 Loading...