■
3-14
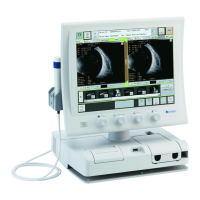
3.3.2 Alignment
■ Do not allow any person to place their hands or fingers in the clearance
under the measuring head or the section under the chin rest. Their hands
or fingers may be caught and injured.
■ Measurement results may be affected if the patient’s eyelid and/or
eyelashes cover the automatic alignment ring during measurement.
■ Ask the patient to open their eyes wide or have the physician lightly hold
the patient's upper eyelid with their fingers.
■ Auto Alignment may not be effective when the patient blinks frequently
during measurement. Ask the patient to stop blinking during
measurement.
■ Ask the patient to look into the fixation light in the measurement window.
If the patient looks in a different direction or moves, the measurement
may not be conducted correctly.
■ This instrument is designed to perform measurement in Auto mode to
ensure higher accuracy through standard operation. However, Auto
Alignment may not be particularly effective when insufficient light is
reflected due to deformation or inflammation of the cornea. In this case,
conduct measurement manually.
■ The reflection in the center of the cornea may not be clearly viewed when
any deformation and/or inflammation of the cornea is severe. In this case,
an error may occur even in Manual mode.
a) Auto Alignment setting
Refer to “3.3.1 Setting measurement conditions.”
b) Positioning by Touch Alignment
■ When moving an element up, down, left and right using Touch Alignment,
touch the panel and release your finger immediately. Do not press the
panel continuously.
1) Use Touch Alignment or the joystick to position the patient's eye on the screen.
2) Lightly touch the center of the cornea (1) on the screen. The measuring head
moves so that the patient's eye is positioned in the center of the screen. When the
center of the cornea (1) enters the alignment ring (2) with Auto Alignment turned
on, focusing in the X and Z axes automatically starts.

 Loading...