© Copyright 2013 TRENDnet. All Rights Reserved.
TRENDnet User’s Guide
TEG-448WS
16
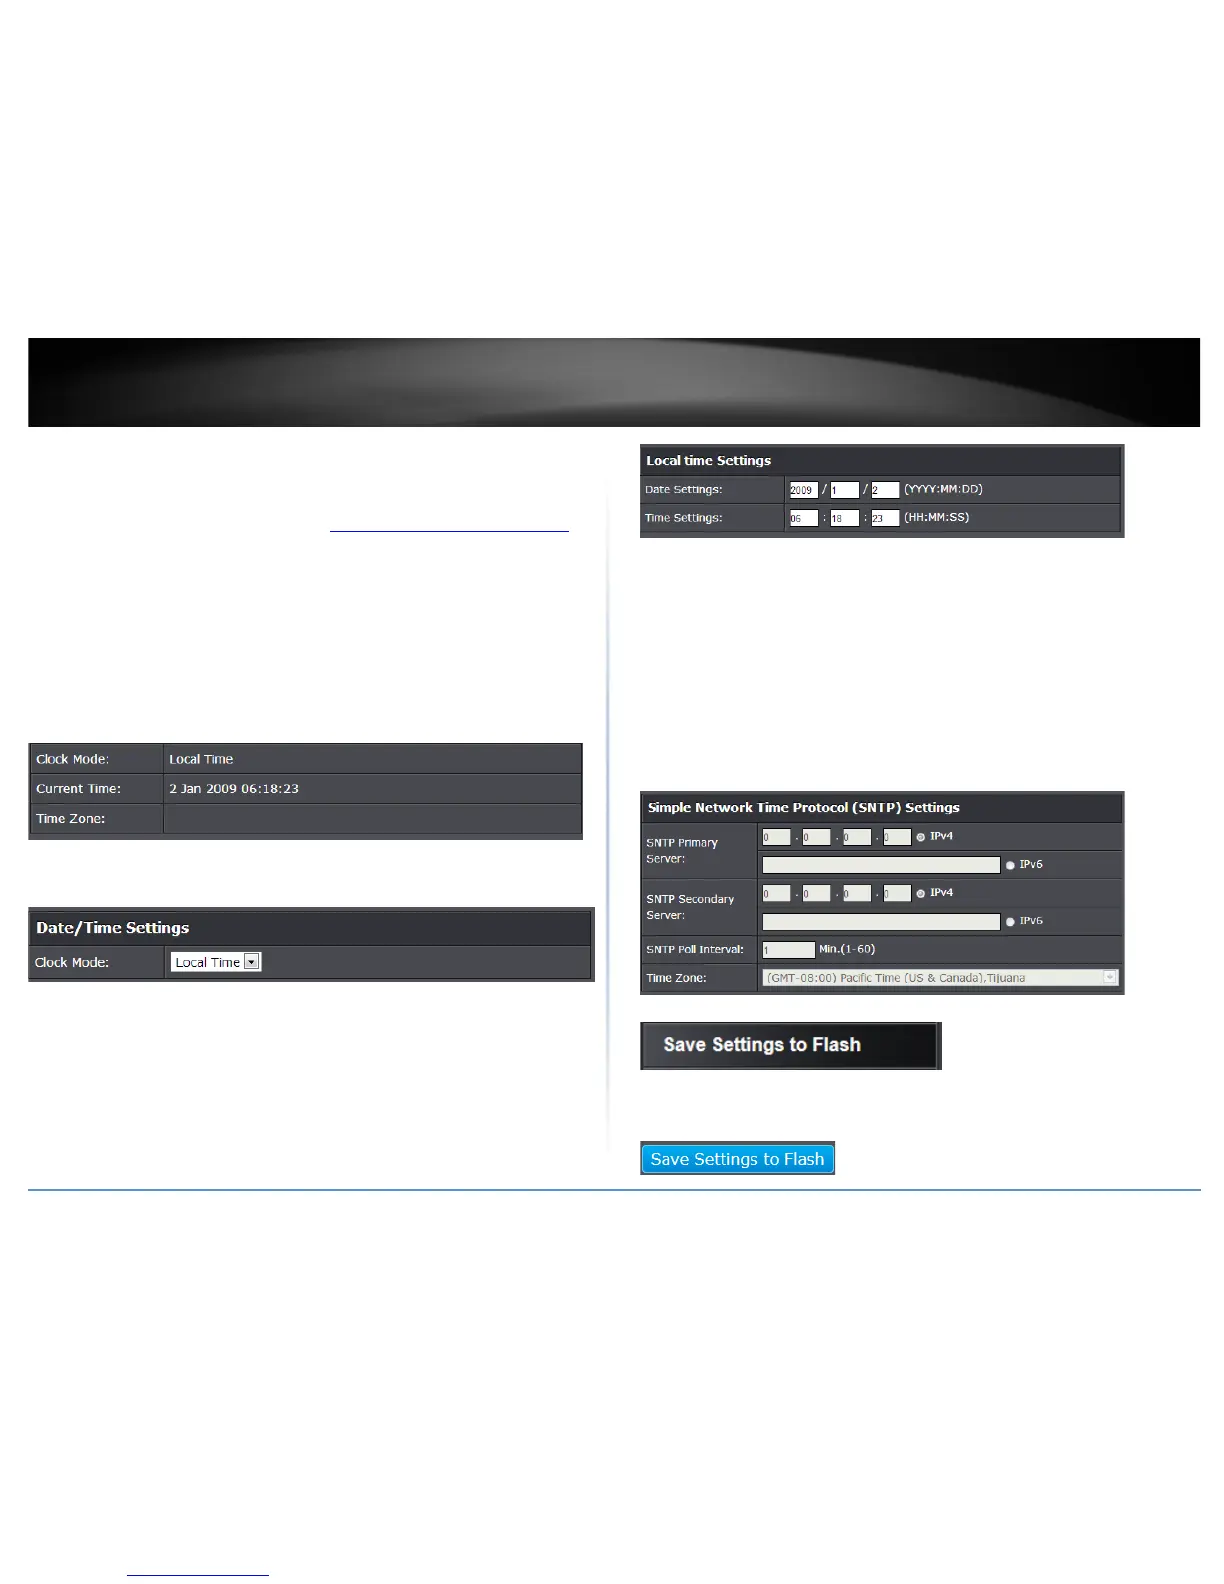
Set the switch date and time
System > System Time
1. Log into your switch management page (see “Access your switch management page
”
on page 7).
2. Click on System, and click on System Time.
3. Review the settings. Click Apply to save changes.
• Clock Mode - Displays if system time and date is set manually Local Time or
obtained automatically from a network time server SNTP.
• Current Time – Displays the current system time and date.
• Time Zone – Displays the current system time zone.
• Clock Mode: Select Local Time to manually configure your date and time
settings or select SNTP to configure your switch to automatically obtain
settings from an network time server.
o Local Time – Allows you to manually set the time settings. If selecting
this option, under Local Time Settings, manually enter your date and
time settings.
Date Settings – Enter your date settings (YYYY/MM/DD).
Time Settings – Enter your time settings (HH:MM:SS)
o SNTP – Allows you to configure your switch to pull time and date
settings automatically from a network time server. I f selecting this
option, under Simple Network Time Protocol (SNTP) Settings, enter
your time server settings.
SNTP Primary Server – Enter the primary network time server
IPv4 or IPv6 address.
SNTP Secondary Server – Enter the secondary network time
server IPv4 or IPv6 address.
SNTP Poll Interval – Enter the interval time when your switch
will update the time and date settings with the time server.
Time Zone – Click the drop-down list to select your time
zone.
4. Click Save Settings to Flash (menu).
5. Click Save Settings to Flash (button), then click OK.
Note: This step saves all configuration changes to the NV-RAM to ensure that if the
switch is rebooted or power cycled, the configuration changes will still be applied.