Setup your router with Bark®
System > Bark
1. Log into your router management page (see “Access your router management page”
on page 6).
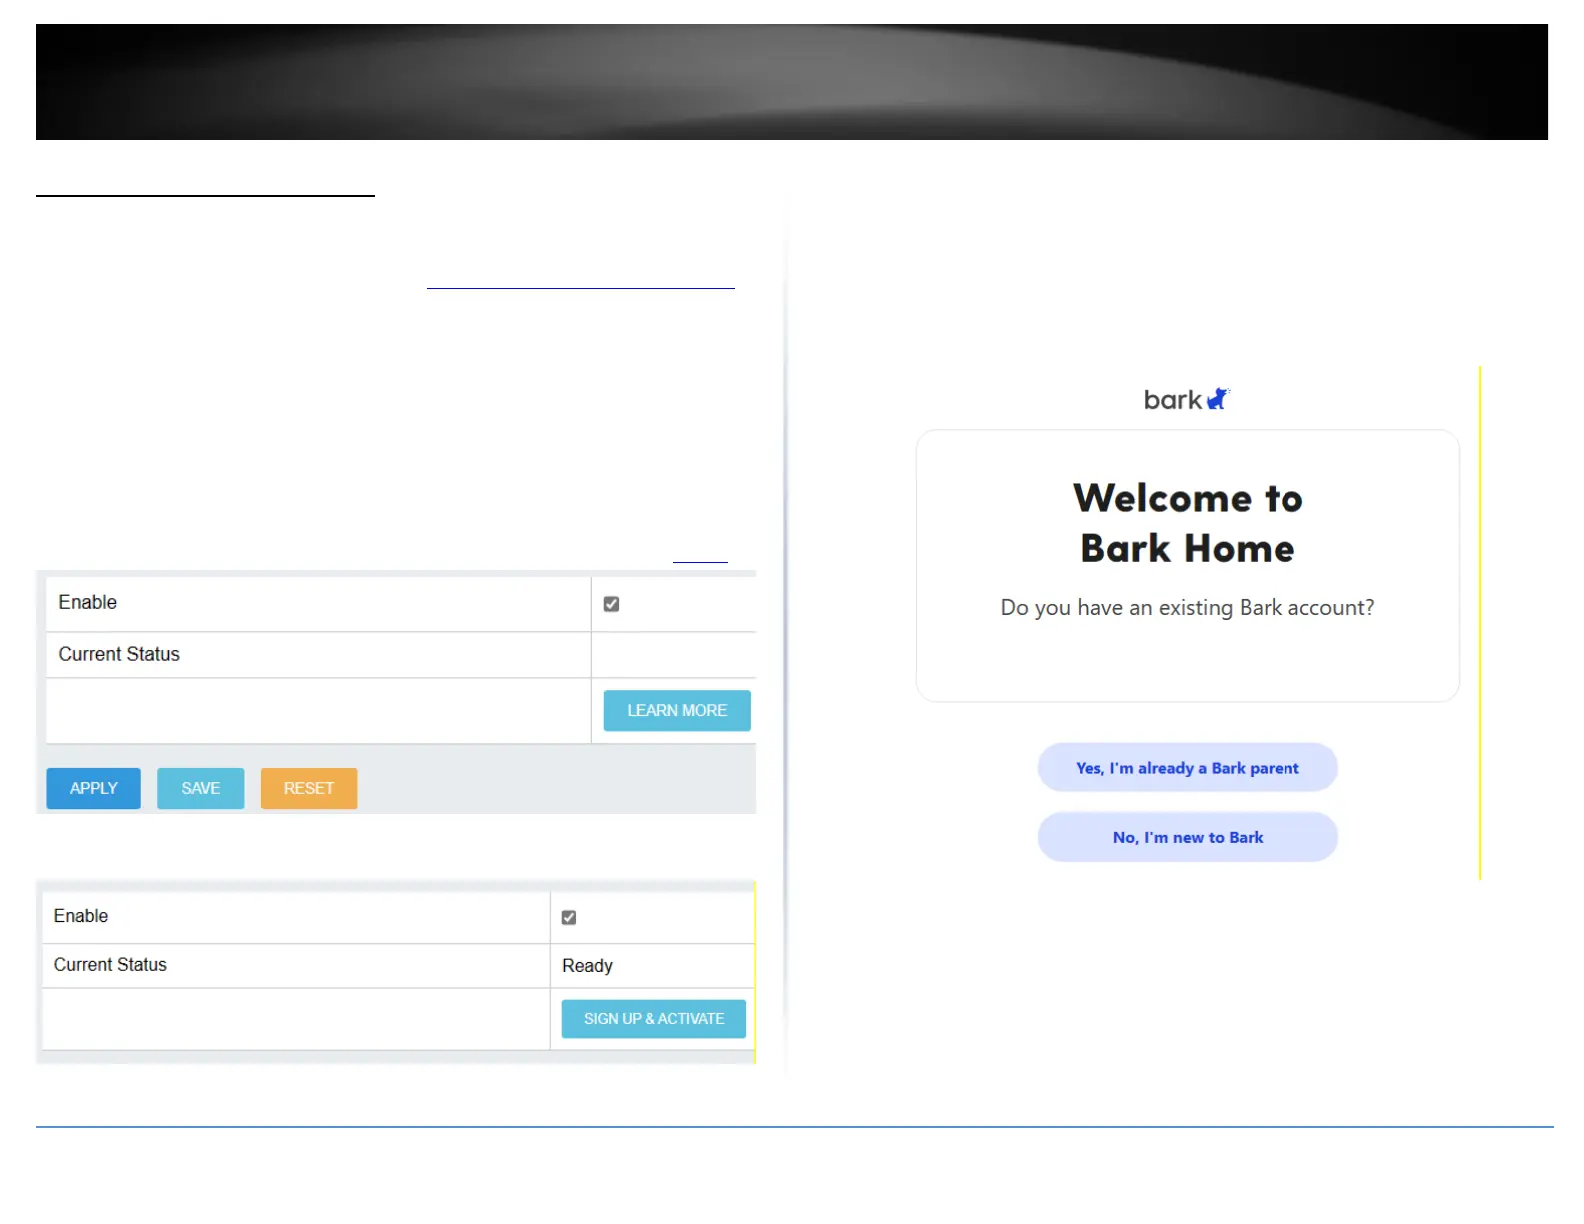
2. Click on System and click on Bark®.
3. Check the Enable option and click Apply.
Note: You may be prompted to make sure your router date and time configuration
settings are configured correctly. Please make sure manually configure the router date
and time settings or synchronize date and time with an NTP server. It is important to
make sure the router date and time settings are configured correctly before enabling
and configuring Bark®. To configure the router date and time settings, refer to page 7.
4. After enabling the Bark® service, click Sign Up & Activate.
4. At the signup page, to create a new Bark® account, click No, I’m new to Bark.
Note: If you had previously created an account with Bark®, click Yes, I’m already a Bark
parent and you will be prompted to login and continue with the steps to add your router
to your Bark account.
5. Click Get Started and continue with the steps following to create your Bark account.