83
Maintenance and Adjustment
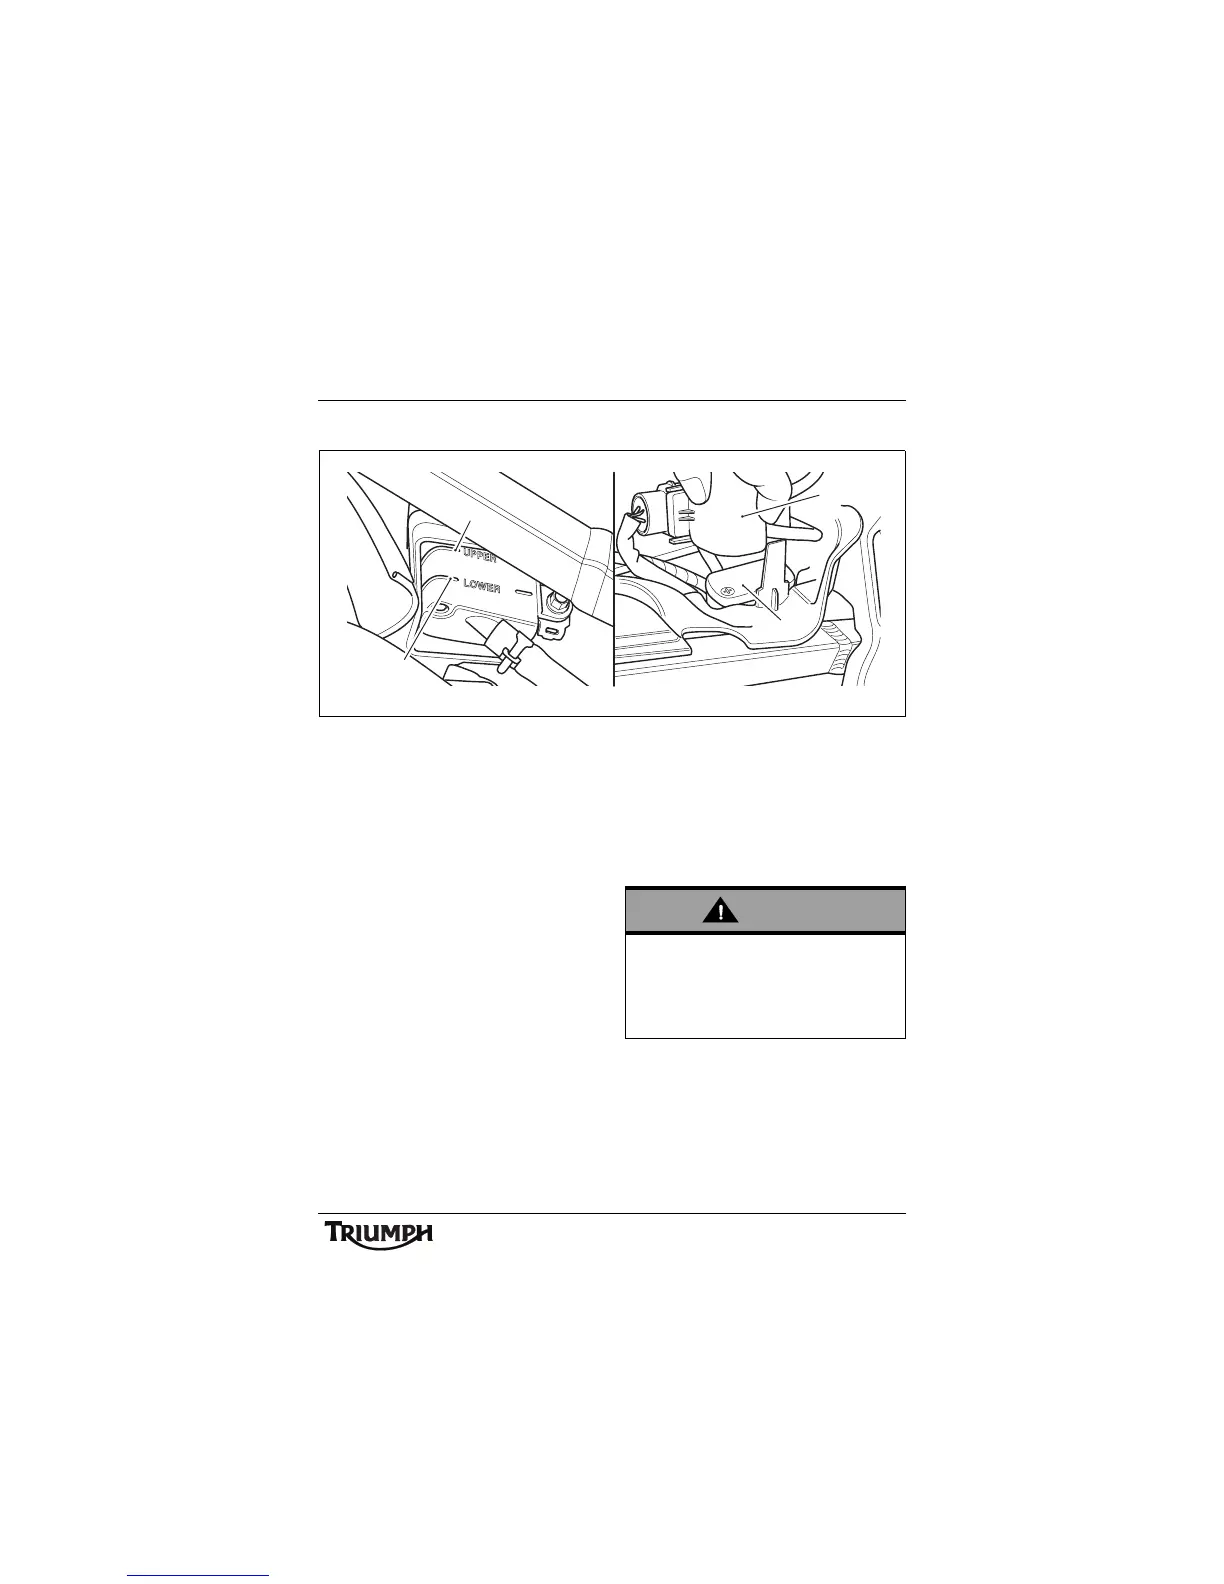
Rear Brake
1. Upper level line
2. Lower level line
3. Starter solenoid/Main fuse assembly
4. Rear brake fluid reservoir
Remove the seat.
Disconnect the battery, negative (black) lead
first.
The starter solenoid and main fuse are
attached to a rubber mounting. This
mounting fits over the rear brake fluid
reservoir filler cap.
To gain access to the filler cap, gently pull off
the starter solenoid/main fuse assembly with
the rubber mounting.
Remove the reservoir cap. Fill the reservoir to
the upper level line using new DOT 4 fluid
from a sealed container.
Refit the reservoir cap ensuring that the
diaphragm seal is correctly fitted.
Refit the starter solenoid/main fuse assembly.
Reconnect the battery, positive (red) lead first.
Refit the seat.
Brake Light Switches
The brake light is activated independently by
either the front or rear brake. If, with the
ignition in the ON position, the brake light
does not work when the front brake lever is
pulled or the rear brake pedal is pressed,
have your authorised Triumph dealer
investigate and rectify the fault.
ccns
1
2
4
3
Warning
Riding the motorcycle with defective brake
lights is illegal and dangerous.
An accident causing injury to the rider and
other road users may result from use of a
motorcycle with defective brake lights.
 Loading...