- 16 -
Printing and cutting
1. Create the data
Create the data using Adobe Illustrator
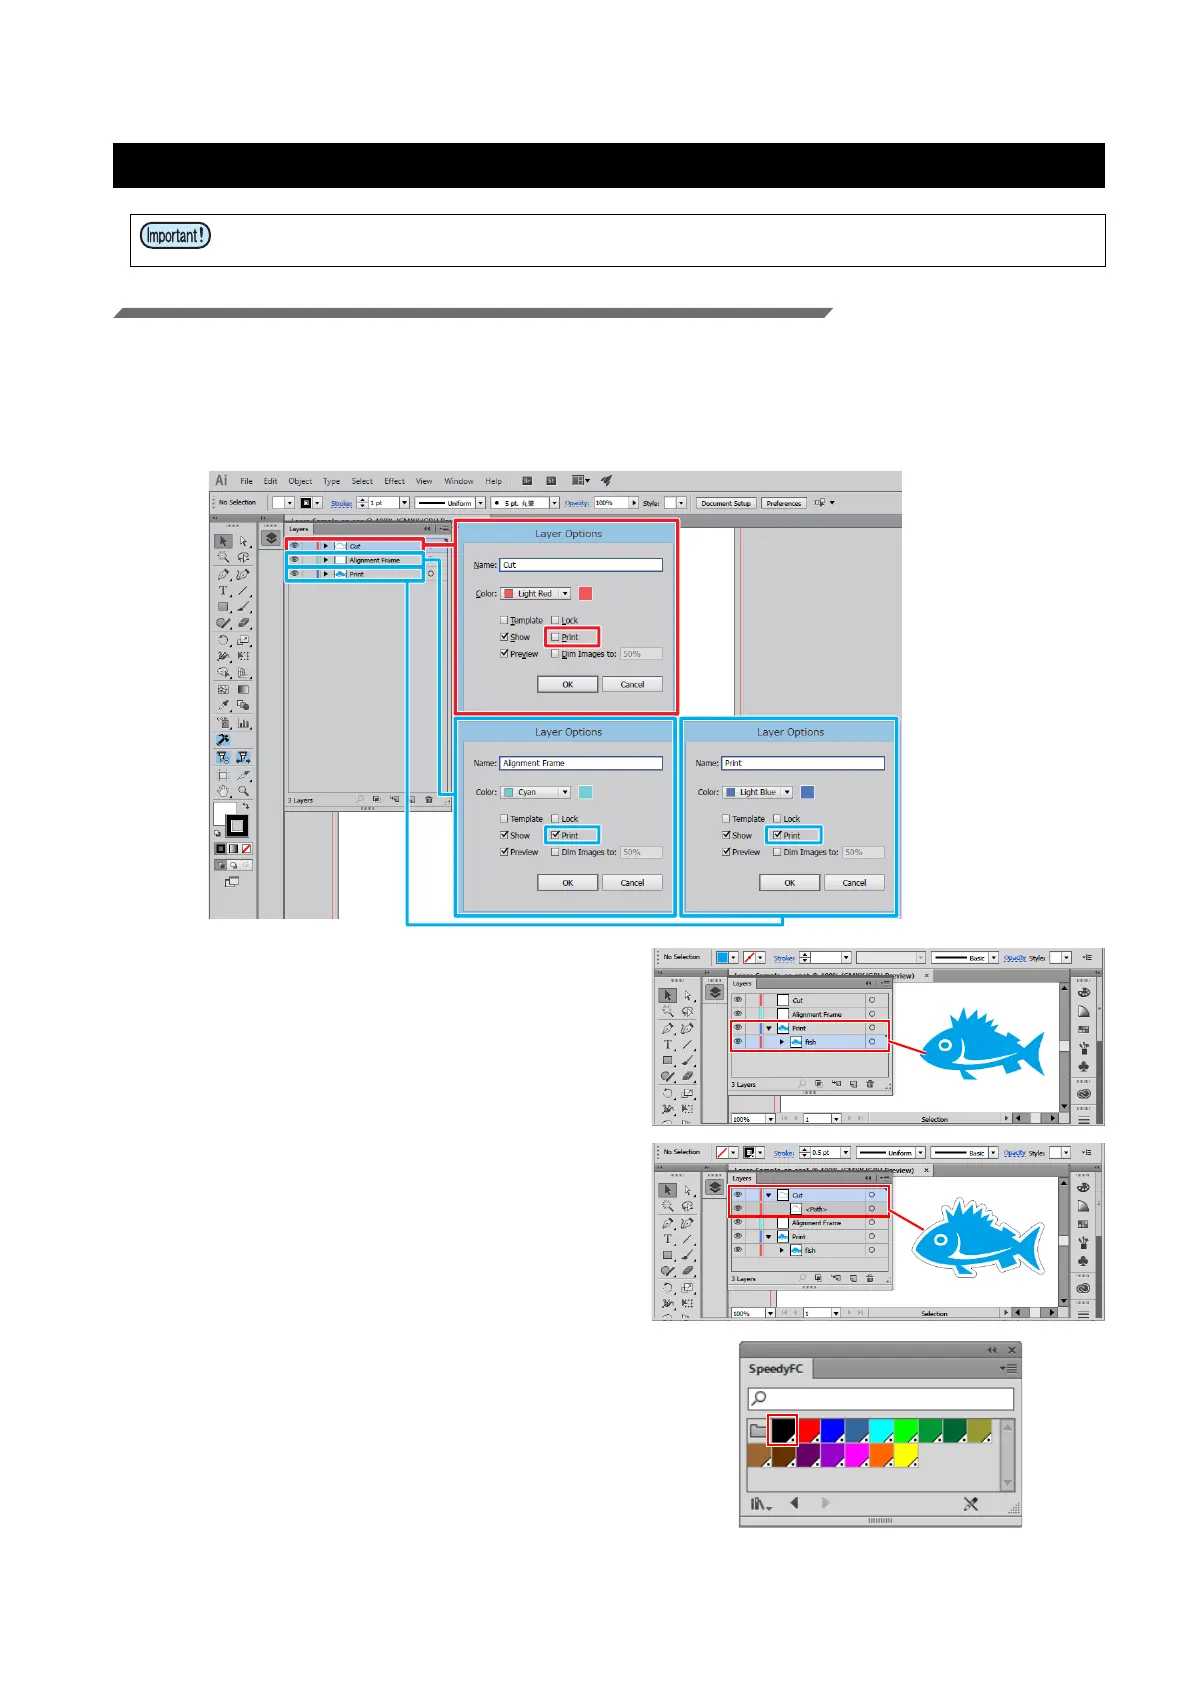
1. Create the print layer, cut layer and alignment frame layer.
• To ensure a smooth output, create the print, cut, and alignment frame layers in Adobe Illustrator in
advance. The alignment frame acts as a reference to prevent shifting during printing and cutting.
• In the [Layer Options] dialogs for each layer, check the [Print] check boxes for the print and alignment
frame layers and uncheck the [Print] check box for the cut layer.
2. Create the print data for the print layer.
3. Create the cut data for the cut layer.
• It is also possible to create a cut line(s) using the
FineCut "Frame Extraction" function.
4. Select the line color for the cut data from
the Trotec color swatch.
• For the example in this document, please select
[FCLaser_Black].
• Be sure to confirm "Preparation" on pages P. 7 to P. 15 before starting printing and laser cut-
ting.
 Loading...