- 8 -
1. Installing the Mimaki software/driver
1. Install FineCut 8 on the LaserCut PC.
• For more details, please refer FineCut Reference Guide “Chapter 1. Installation of FineCut”.
2. Install RasterLink on the RasterLink PC.
• For more details, please refer to RasterLink Installation Guide bundled with the Mimaki printer.
2. Configure FineCut
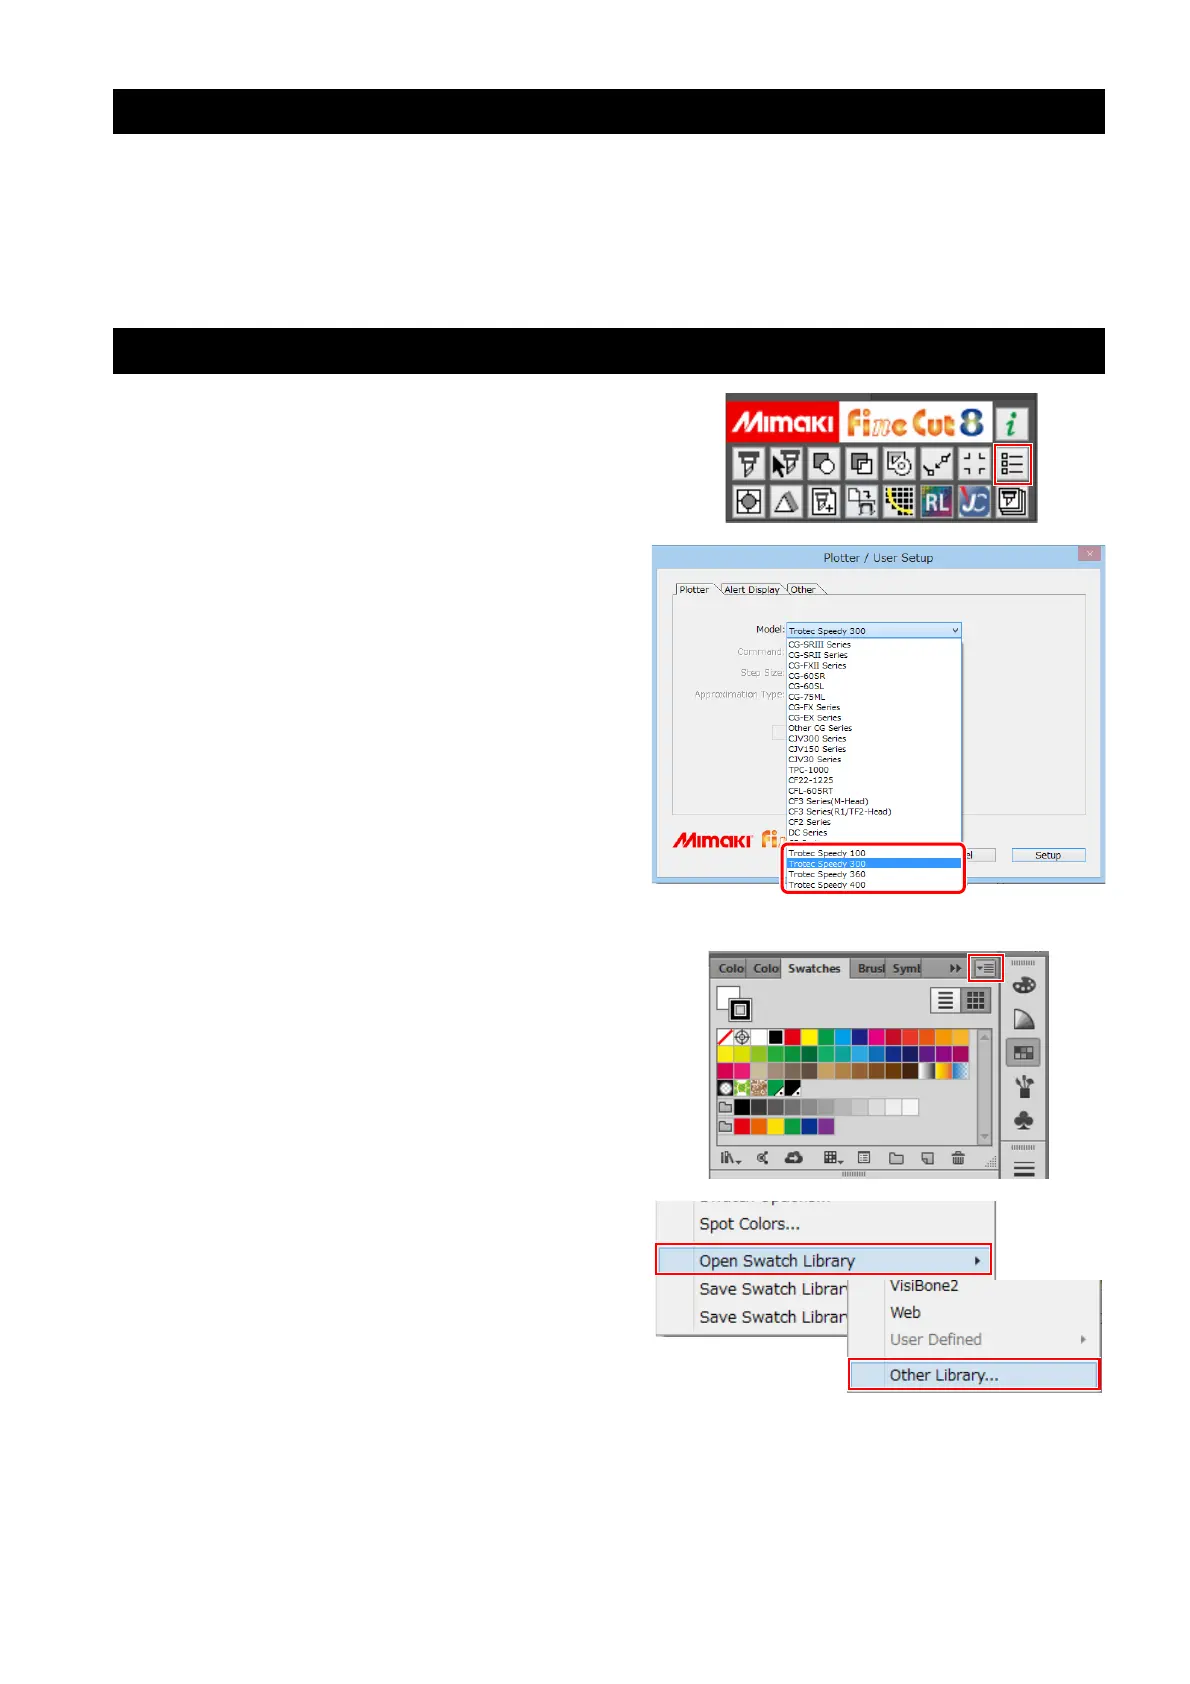
1. Click the [Plotter/User Setup] button on
the FineCut menu.
2. Select the Trotec Speedy Laser Engraver
in [Model].
Trotec Speedy Laser Engravers are not displayed
in the case of versions earlier than Adobe Illustra-
tor CC.
The following Trotec Speedy Laser Engravers are
compatible.
• Trotec Speedy 100
• Trotec Speedy 300
• Trotec Speedy 360
• Trotec Speedy 400
3. Open the Trotec color swatch.
(1) Click the top right icon on the Adobe Illustrator
swatch window.
(2) Click [Open Swatch Library] - [Other Library].
 Loading...