- 20 -
3. Print the print data into the media.
• For more details regarding the printing method, please refer to the "Operation Manual" on the CD bun-
dled with the Mimaki printer.
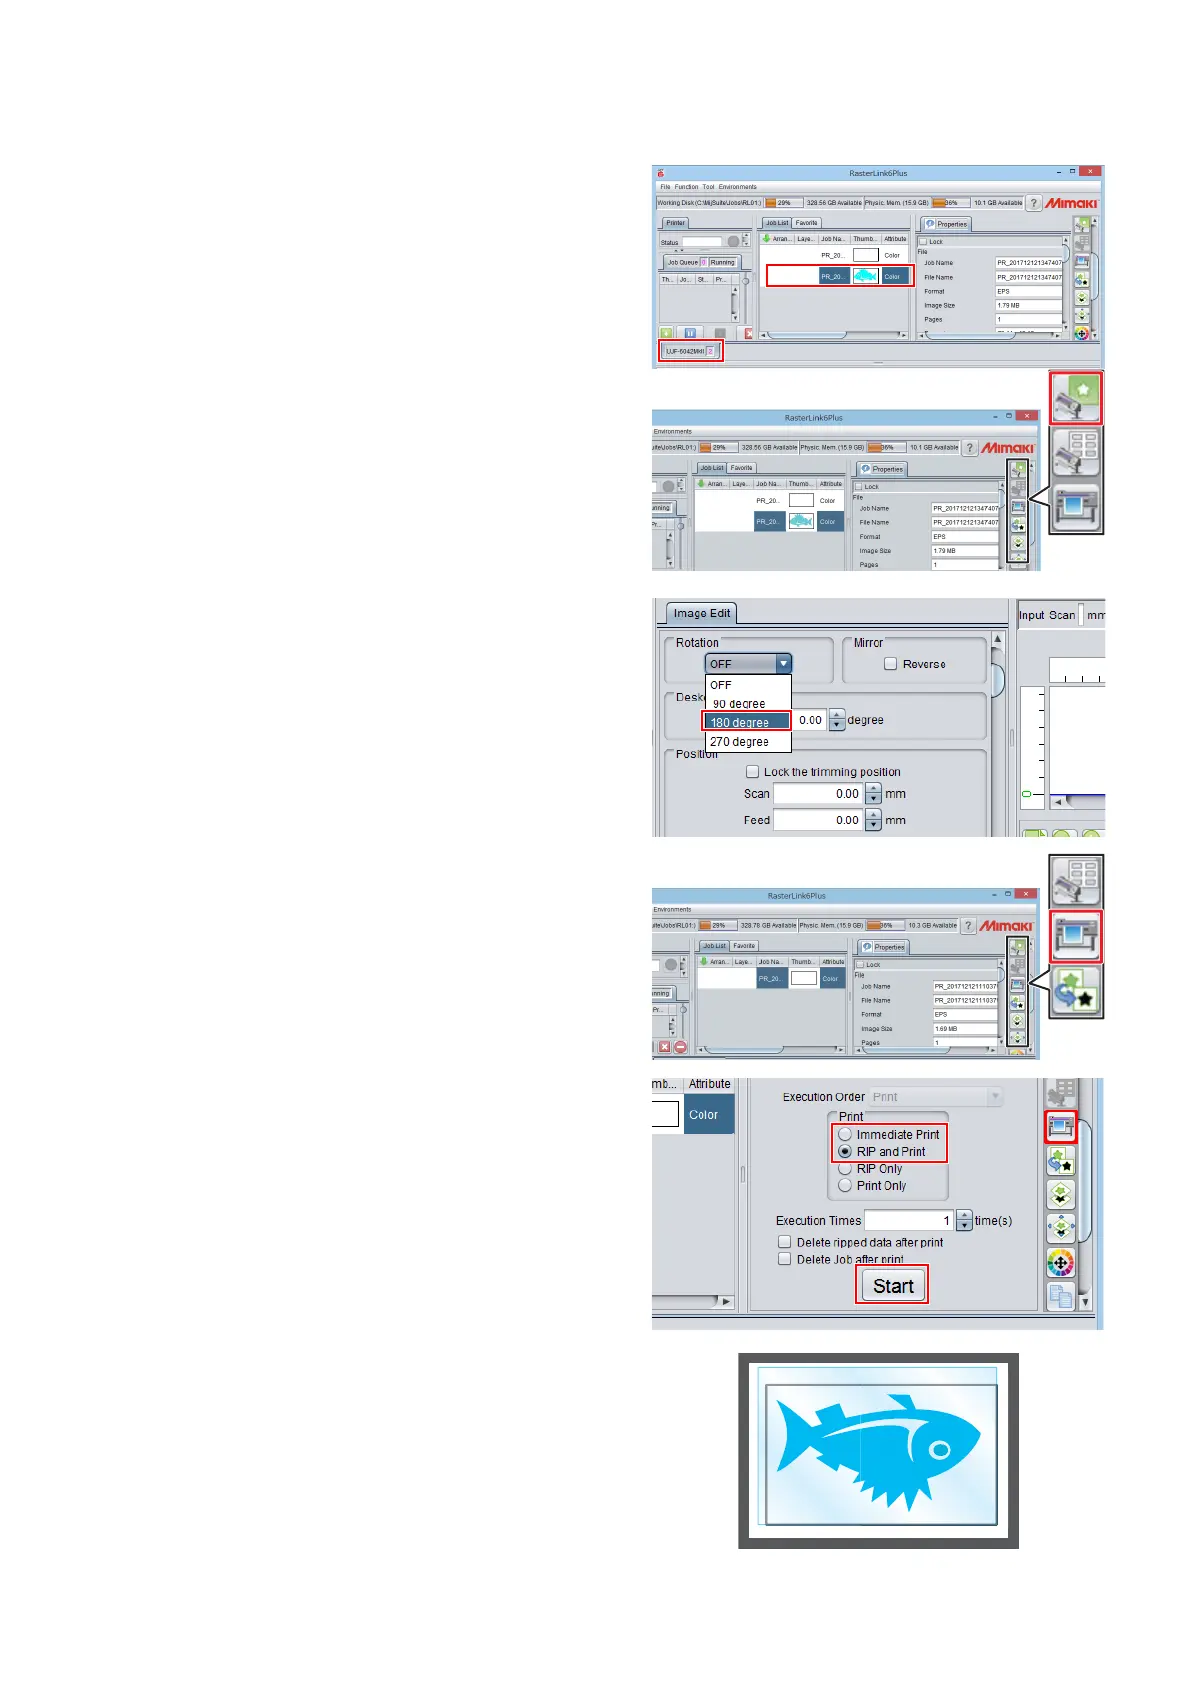
(1) Launch RasterLink.
(2) Click the Mimaki printer tab.
• Print data is automatically loaded and then
added to the [Job List].
(3) Click the [General Print] icon in the [Function
Icon] list to the right of the screen.
• The [Image Edit] panel is displayed.
(4) Rotate by 180 .
• Since the origin of the Mimaki printer is in the
lower right corner and the origin of the Trotec
Speedy Laser Engraver is in the upper left
corner, it is necessary to rotate by 180
before printing.
(5) Click the [Execution] icon in the [Function
Icon] list to the right of the screen.
• The [Execution] panel is displayed.
(6) Select [RIP and Print] or [Immediate Print] on
the [Execution] panel and click the [Start] but-
ton.
• Printing starts.
(7) The print data is printed.
 Loading...