Mover smart M RS1Installation
26 EN
60040-00463 ∙ 00 ∙ 09/2023
It is not permitted to reuse the screw with
used sealant� Request new screws from the
service department�
For screws with sealant, the thread must be
free of grease or oil�
6.1 Fitting the drive elements
NOTICE
Damage due to drilling of chassis parts and
lines/cables
Chassis parts, laid electrical cables, water pipes
and gas lines may be damaged when drilling�
Before drilling, check the designated position
to make sure that chassis parts or lines/ca-
bles cannot be damaged by the holes�
The frame of the vehicle must be free of rust, grease
and heavy soiling in the area of the mounting� There
must be no damage in the area of the wheel suspen-
sion�
6.1.1 Preparing for installation
The wheels and tyres fitted on the caravan must be of
the same size and type and the tyre pressure must be in
accordance with the manufacturer's instructions�
Remove all components from packing and place on
the floor�
Before starting the installation, remove the cable tie
and the cardboard pieces from the mounting�
Mover
smart
1 2
3
4
6
5
7
8
10
11
9
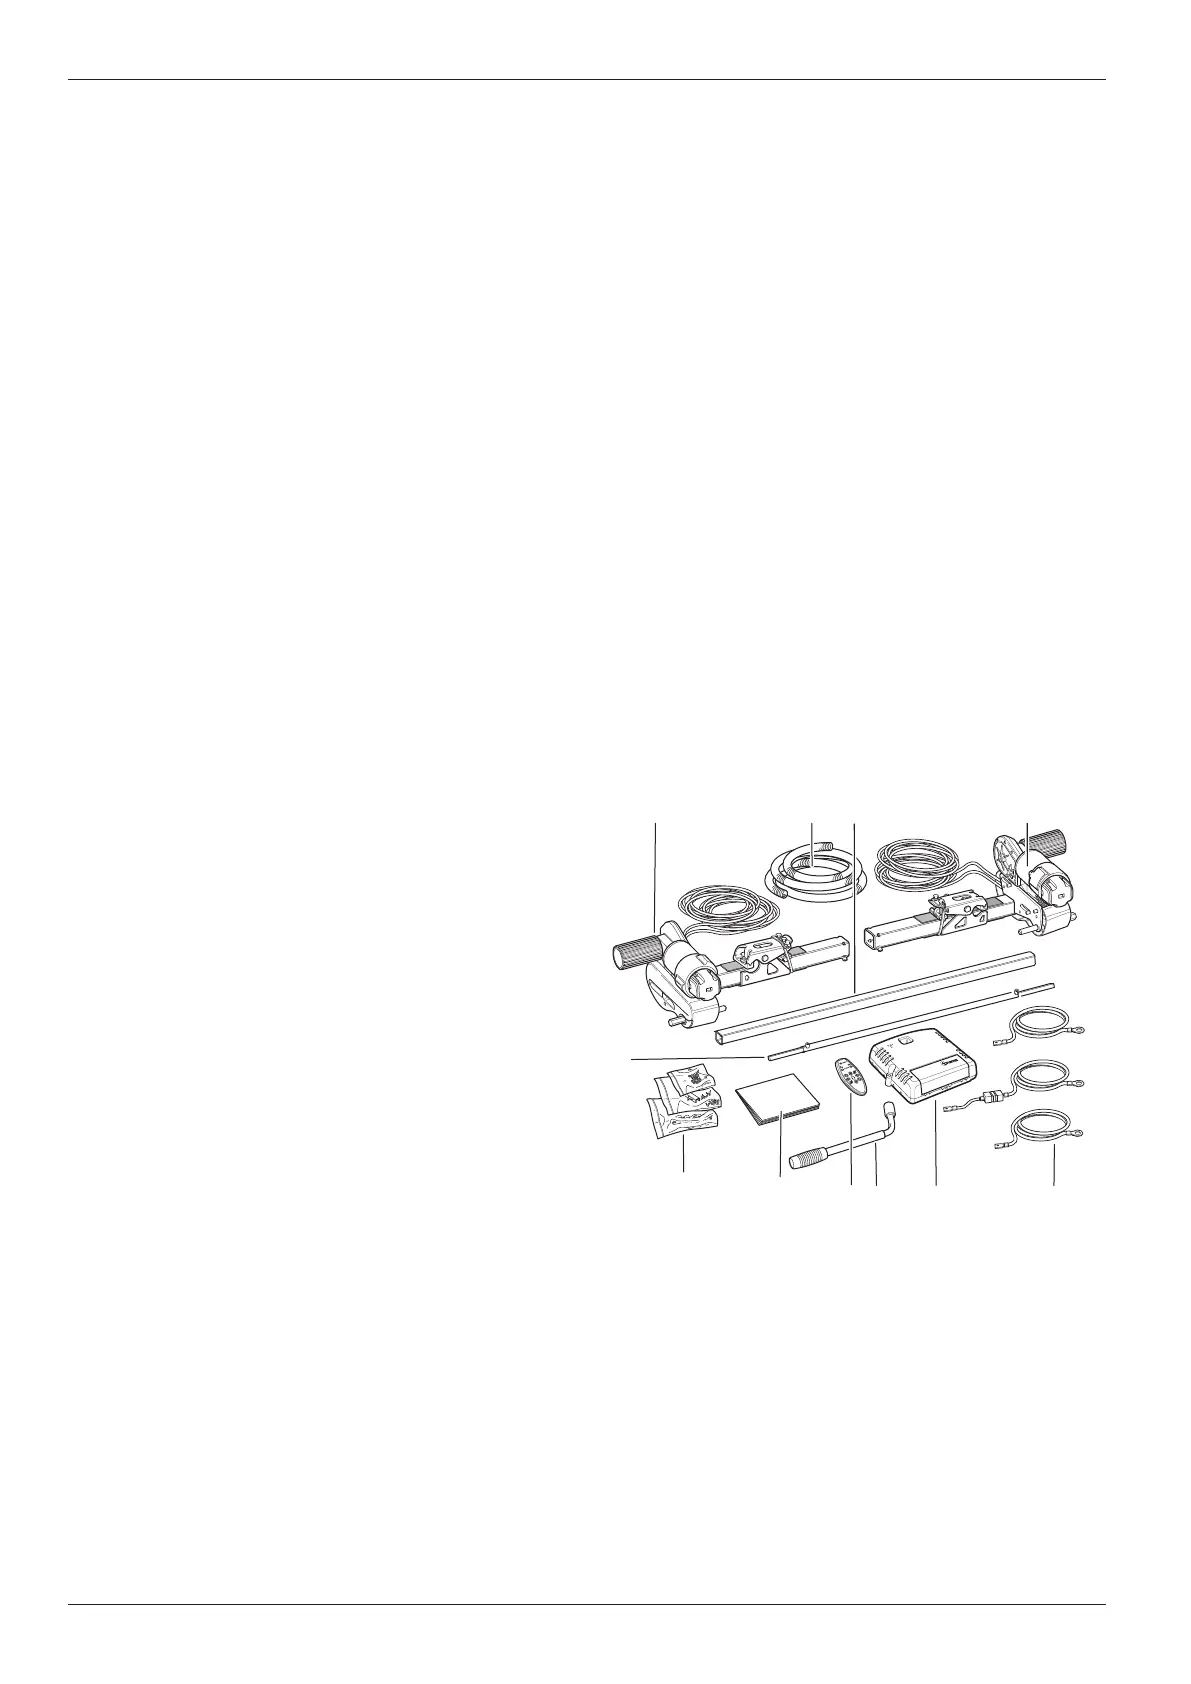
Fig� 32
1 Drive unit A
2 Drive unit B
3 Empty pipe
4 Connection pipe
5 Cross actuation device
6 Accessory pack
7 Operating and installation instructions
8 Remote control
9 Engagement lever
10 Control unit
11 Red battery cable and black battery cable
Note:
•
Take care with any lines or cables that have already
been laid (brake lines, gas lines, water pipes or elec-
trical cables)�
•
Pay attention to underfloor heating, chassis and
load-bearing chassis parts when drilling holes for the
cable feed-through�
•
Take water tanks into account�
•
The extension and retraction of the step must not be
obstructed�
•
The battery cut-o switch must be easy to access�
The door area is well suited for this purpose�
•
Before assembly, check the electrical wiring in Chap-
ter 6�2�
You must not drill into or weld onto the vehicle frame�
Wheel suspension parts must not be removed under
any circumstances�
5.7 Selecting a location for the manoeu-
vring system (in front of or behind
the axle)
The manoeuvring system should preferably be installed
in front of the axle� In exceptional circumstances (e�g�
lack of space) it is also possible to install it behind the
axle�
Only use the screws provided (or the accessory parts
available as special accessories) to mount the manoeu-
vring system�
6 Installation
DANGER
Personal injury due to independent move-
ment of the caravan
If the caravan is not adequately secured against
rolling away and tilting, this can lead to uncon-
trolled driving movements during installation
work�
Place the caravan on a level surface�
Apply the caravan’s parking brake�
Secure the tyres with wedges�
DANGER
Crushing hazard due to falling heavy acces-
sory parts
When working under the caravan, heavy acces-
sory parts can cause crushing�
Do not stand under suspended or unsecured
accessory parts�
NOTICE
Failure of screws to hold due to reused
sealant
Screws may be coated in sealant� If these
screws are loosened, the sealant becomes un-
usable� If they are reused, there is no guarantee
that the screws will hold securely�
Screws with sealant may only be screwed in
once�
 Loading...