APPENDIX REPLACING OVEN COMPONENTSA-10
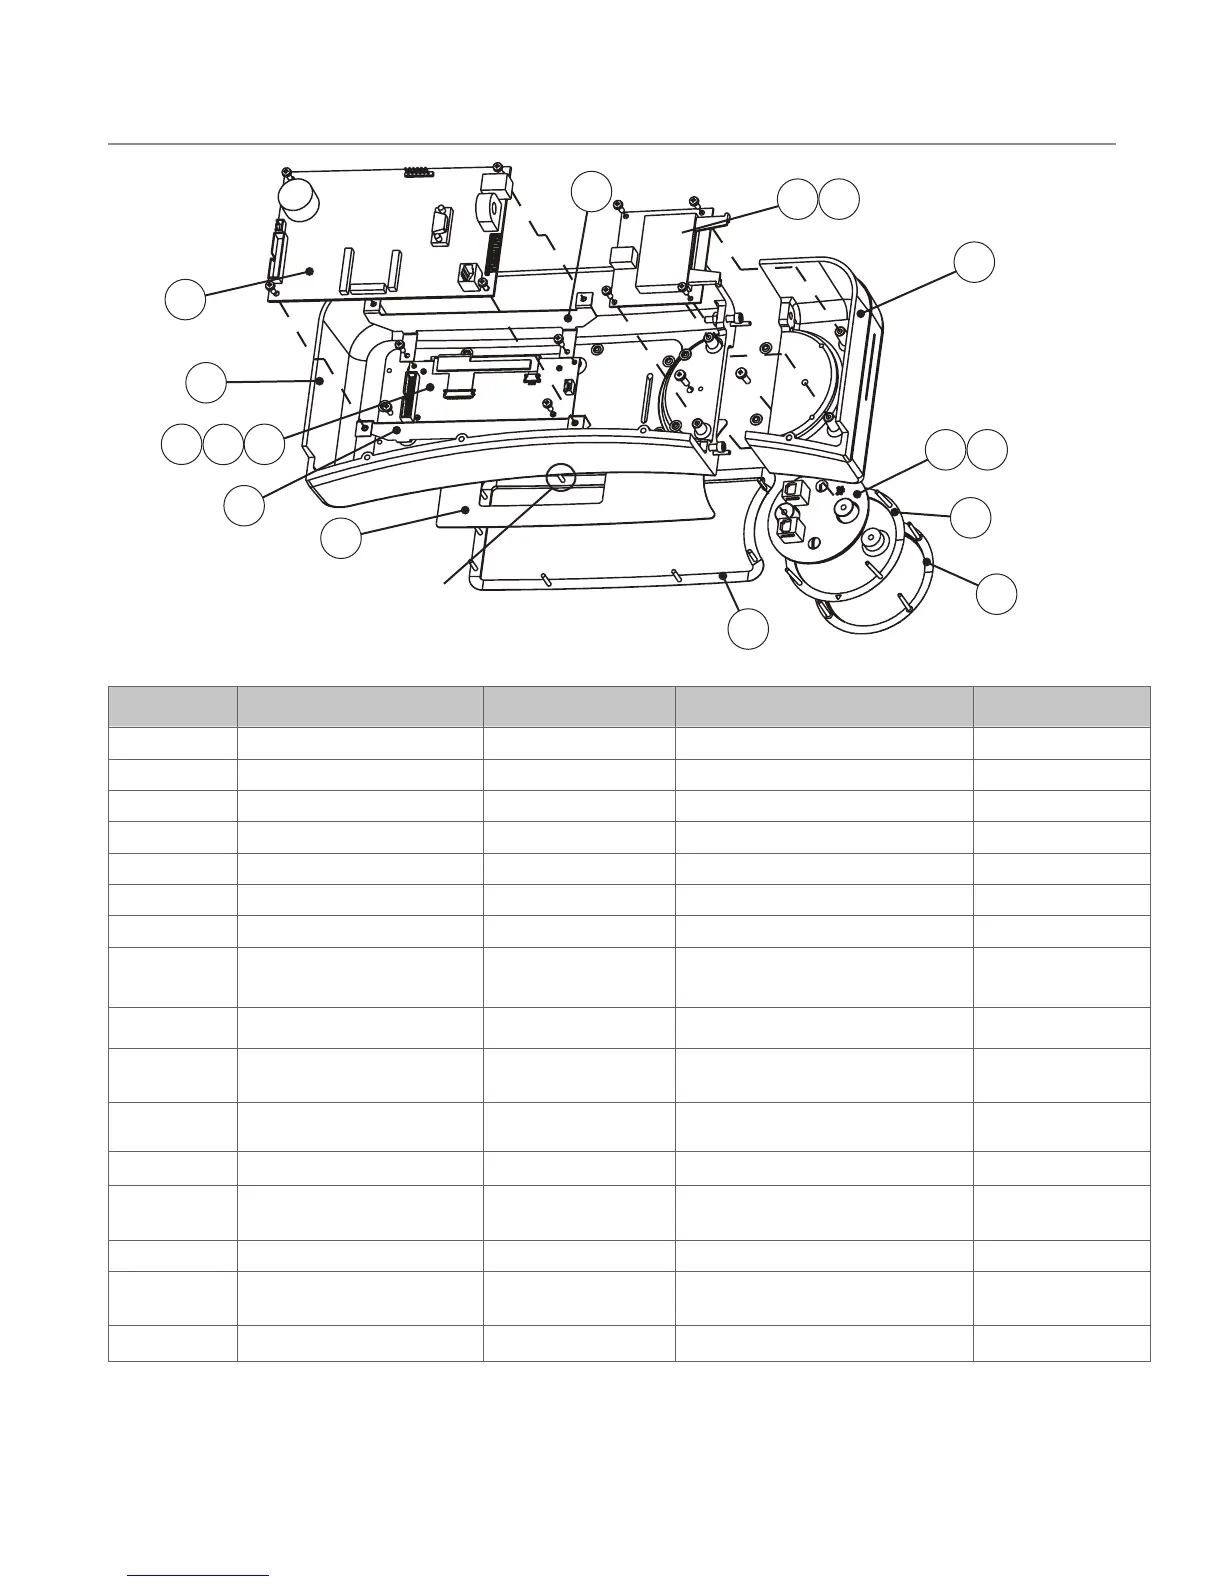
Figure A-16: Outer Shell Removed - Control Panel, Non-Touch
4
10
14
1
2
3
9
8
5
Figure
Reference #
Item Description Item Part Number Fastener Description Fastener Part Number(s)
1 Cable, Display, Power, 3-Pin, 3-Wire i1-9475 None None
2 Cable, Display, Ribbon, 26-Pin, 5” 100197 None None
3 Cable, Smart Card Reader 100182 None None
4 Control Board CON-3004-X* Screw, #6-32 x 3/8, Int Tooth, PPH, SS 102911 (qty 4)
5 Display, TFT ENC-3011 Screw, #6-32 x 3/8, Int Tooth, PPH, SS 102911 (qty 4)
6 Display Bracket, Bottom i1-9465 Screw, #6-32 x 3/8, Int Tooth, PPH, SS 102911 (qty 2)
7 Display Bracket, Top i1-9464 Screw, #6-32 x 3/8, Int Tooth, PPH, SS 102911 (qty 2)
8 Housing, Control, Left End
See Control Housing Color
Table, Page A-11
Screw, #10-32 x 1.00, Skt Hd, SS
Nut, Keps, Hex, #10-32, Ext Tooth, Cres
Pin, Roll, 0.125 Dia x 1.00 Lg, SS
101800 (qty 2)
102963 (qty 2)
101133 (qty 2)
9 Housing, Control, Display
See Control Housing Color
Table, Page A-11
Screw, #8 x 1/2, Serr Ph Truss Hd, Sheet Mtl 101688 (qty 4)
10 Keypad**
i1-3217-1 (SOTA/PANINI)
i1-3217-2 (SBK)
i1-3217-4 (STAINLESS)
None None
11
Light Ring, LED (includes items 14
and 16)
i1-3218 (SOTA/PANINII) Screw, #8-32 x 1/2, PPHD, Int Sems, SS 102923 (qty 2)
12 Scanner, TurboChef Connect CON-3016 Included with kit Included
13 Medallion, Display
i1-9491-T006 (SOTA/PANINI)
i1-9489 (SBK)
i1-9491-T005 (STAINLESS)
Nut, Push, 1/8”
Screw, #8-32 x 1/2, PPHD, Int Sems, SS
101293 (qty 4)
102923 (qty 2)
14 Smart Card Reader 100506 Screw, #6-32 x 3/8, Int Tooth, PPH, SS 102911 (qty 4)
15 Trim Bezel, Display**
i1-9454-T006 (SOTA/SBK/
PANIN)
i1-9454-T005 (STAINLESS)
Nut, Push, 1/8” 101293 (qty 8)
16 Trim Ring, Logo
i1-9455-T006 (SOTA/SBK)
i1-9455-T005 (STAINLESS)
Nut, Push, 1/8” 101293 (qty 4)
6
7
15
11
13
16
To prevent interference with display,
do not apply push nut to this prong.
* “-X” represents the firmware version that is preloaded to the control board kit at the factory.
** To prevent air bubbles when laying the keypad, start by sticking one end of the keypad to the surface and
then laying it across towards the other end. As you lay the keypad, ensure a proper seal.
12

 Loading...