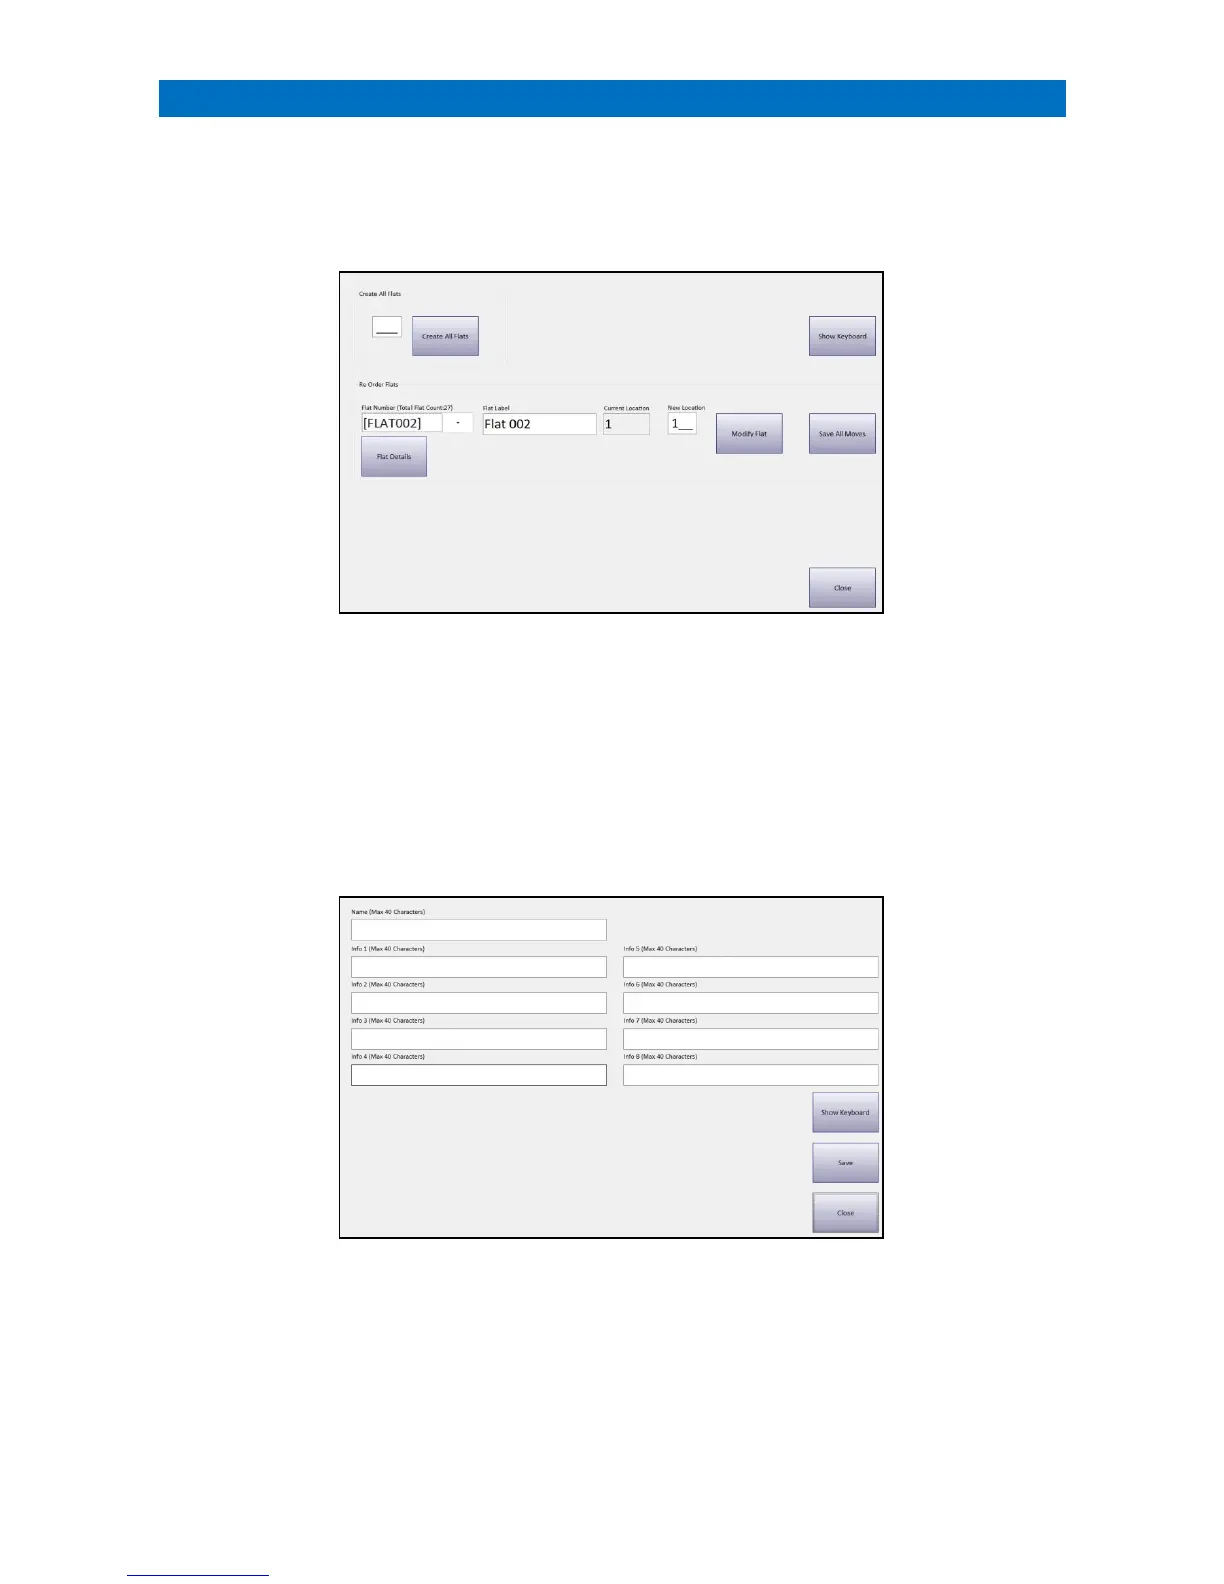
Flats can only be configured from the Manager’s Panel designated as the Controller.
The flat label that appears on the Status screen can be changed by editing the text in Flat Label box.
The order in which the flats appear on the array of LEDs can be changed by editing the New Location box.
Log on using the Manager (or Engineer) password and touch the Configure Flats button.
Select the Flat Number to edit from the drop-down box.
Press the Show Keyboard button to display a full keypad on-screen.
Edit the Flat Label text as required.
The Current Location in which the flat appears on the array of LEDs will be displayed.
Enter a New Location if required.
Once changes are made press Modify Flat and then Save All Moves.
Press the Flat Details button to enter more information about the resident – IMPORTANT: please ensure this data
complies with the General Data Protection Regulation (GDPR);
Press the Show Keyboard button to display a full keypad on-screen.
Enter details in the Name and Info 1-8 fields as required.
Press the Save button when done.
These details will be displayed in the Information Circle on the Flat Status screen – see section 33.