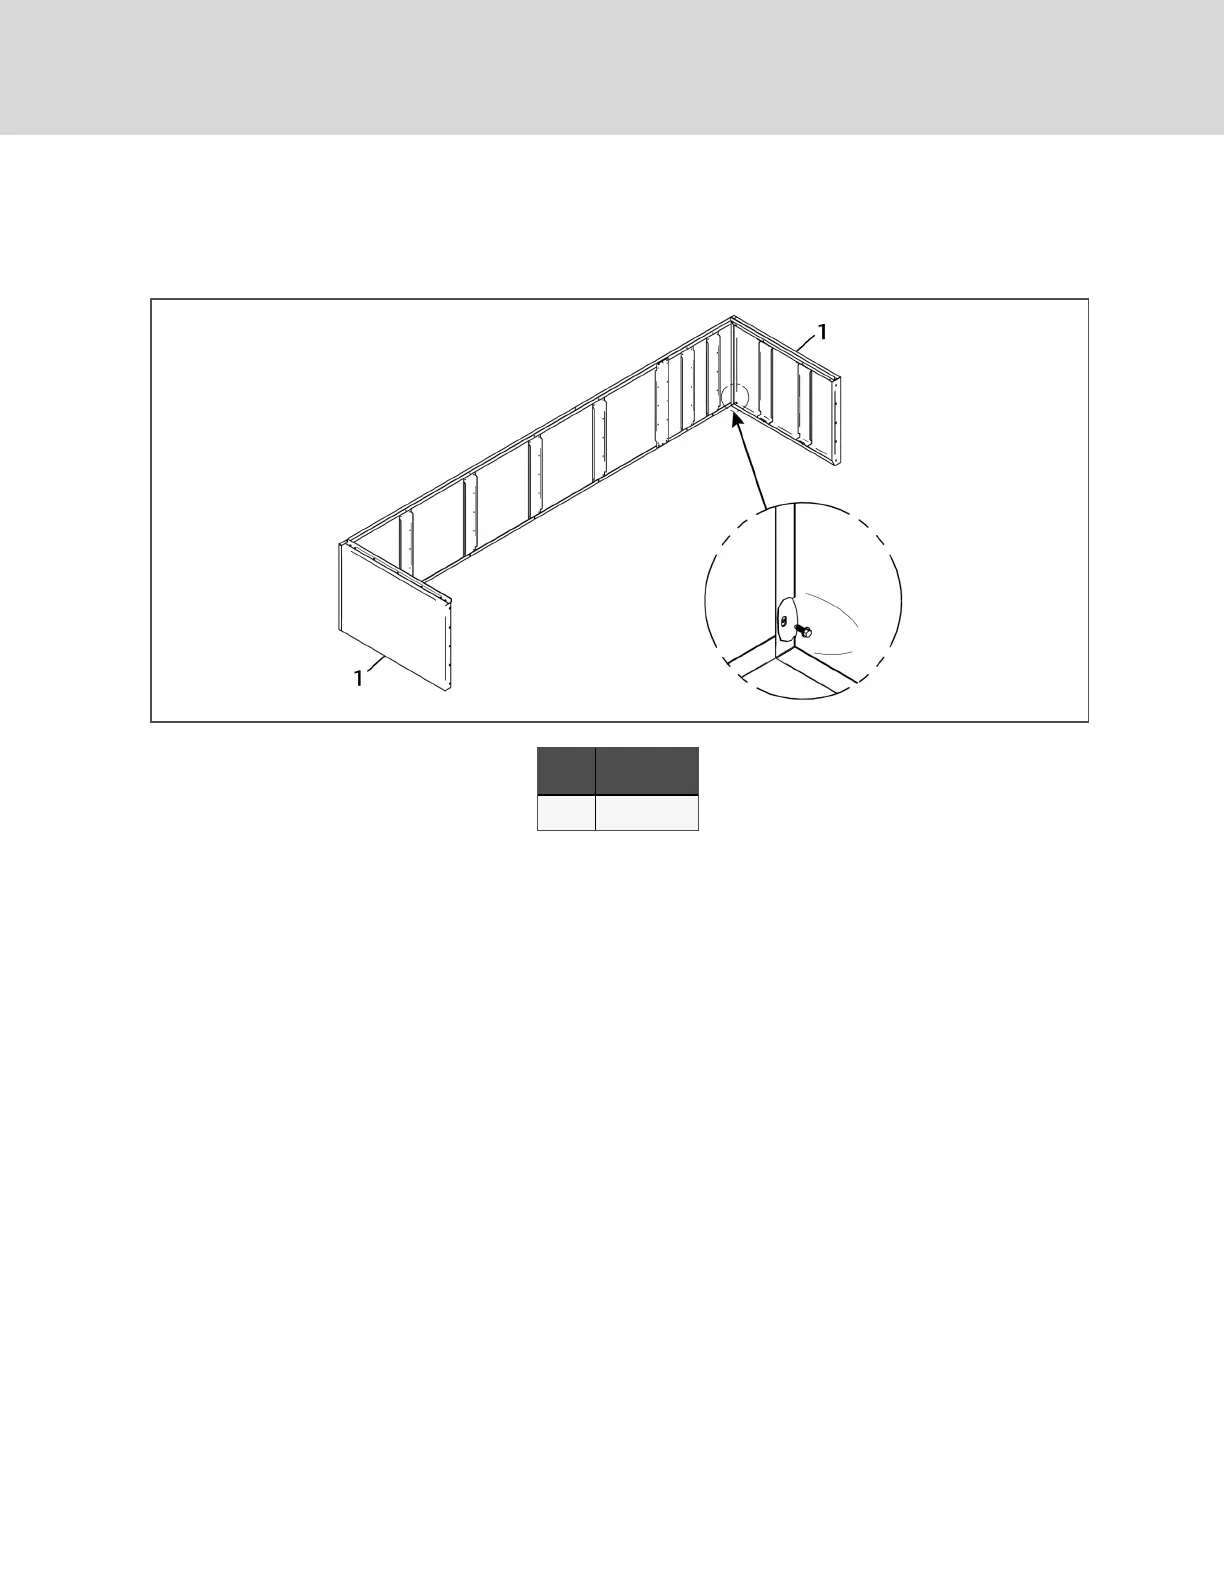
5. Attachthe 2 side panels to each end of the rear-panel assembly by pushing-inthe gasket/insulationto access
the screw holes and using sheet-metal screws asshownin Figure 7.9 below.
Figure 7.9 Push-in Gasket to Access Screw Holes
Item Description
1 Side panel
6.2.3 Place assembled panels and EC fans on top of unit
1. Lift the assembled plenum panels and place ontop of the unit, Figure 7.10 onthe facing page.
NOTE: Figure 7.10 on the facing page shows a non-grilled rear plenum as an example. If your unit is
rear-discharge, the rear plenum panels have grilles.
2. Make sure that the panels fit snugly along the collar flange ontop of the unit, and temporarily install clamps,
Figure 7.10 onthe facing page, to hold the panels tothe collar flange for final attachment.
Vertiv | Liebert® CW™Installer/User Guide
54
 Loading...