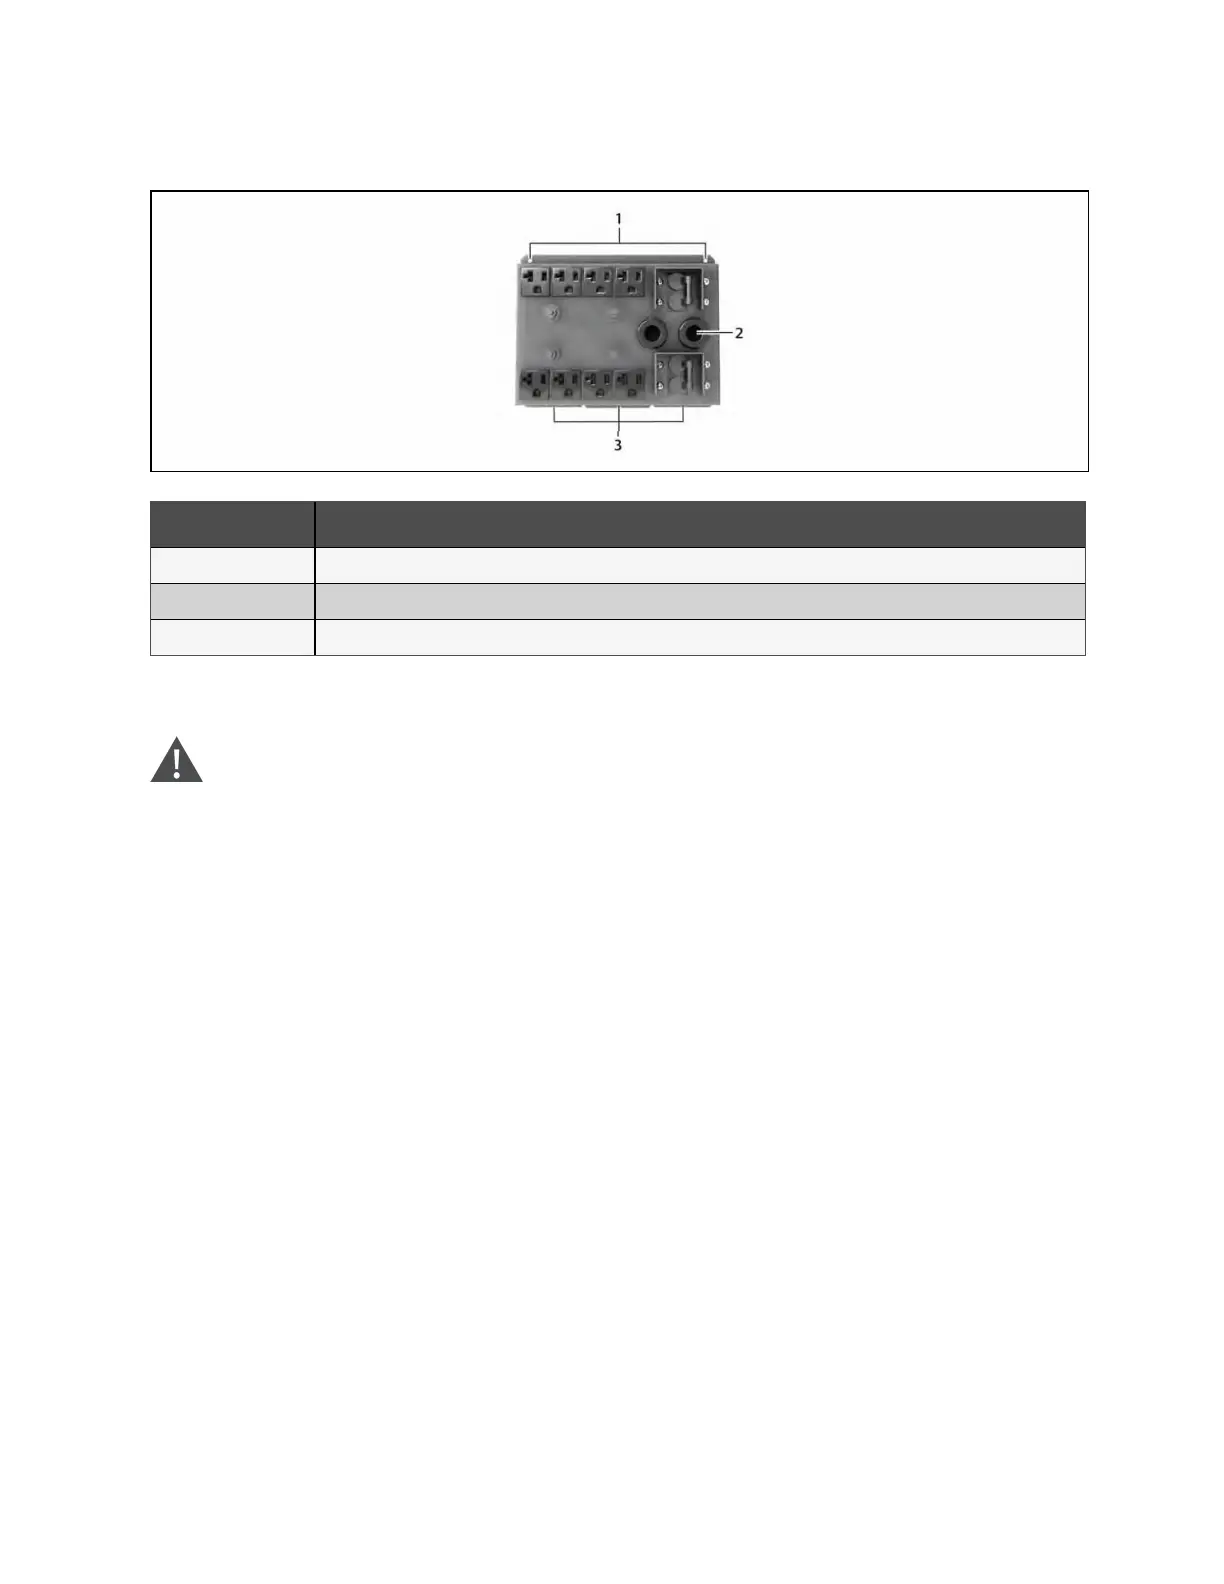
Figure 3.6 Power Distribution Box Removal from GXT5-8000MVRT6UXLN and GXT5-10KMVRT6UXLN Models
Item Description
1 Remove screws
2 Pigtails removed for clarity
3 Tabs slip into slots on the UPS
3.9 Hardwired Input/Output Connections
WARNING! Risk of electric shock. Can cause equipment damage, injury and death. Before beginning
installation, verify that all external overcurrent protection devices are open (Off), and that they are locked
out and tagged appropriately to prevent activation during the installation, verify with a voltmeter that power
is Off and wear appropriate, OSHAapproved personal protective equipment (PPE) per NFPA 7OE. Failure to
comply can cause serious injury or death. Before proceeding with installation, read all instructions. Follow all
local codes.
Observe the following guidelines and specifications when making the hard wire input and output connections:
• We recommend installing a Class D UL489 approved breaker upstream of unit.
• Provide circuit breaker protection according to local codes. The mains disconnect should be within sight of the
UPS or have an appropriate lock out.
• Maintain service space around the UPS or use flexible conduit.
• Provide output-distributions panels, circuit breaker protection, or emergency disconnects according to local
codes.
• Do not install input and output wiring in the same conduit.
• On models with a cord connected input plug that is used as the power disconnect device, the UPS must be
installed near a wall socket or outlet that is easily accessible per the National Electric Code/NFPA 70
requirements. Models/POD options subject to this requirement are: GXT5-5000MVRT4UXLN and GXT5-
6000MVRT4UXLN with POD PD5-001, PD5-002, PD5-003, PD5-004, PD5-005, or PD5-006.
24 Proprietary and Confidential ©2024 Vertiv Group Corp. 3 Installation
Vertiv™ Liebert® GXT5 UPS Installer/User Guide



 To Next Page