42 Maintenance
3
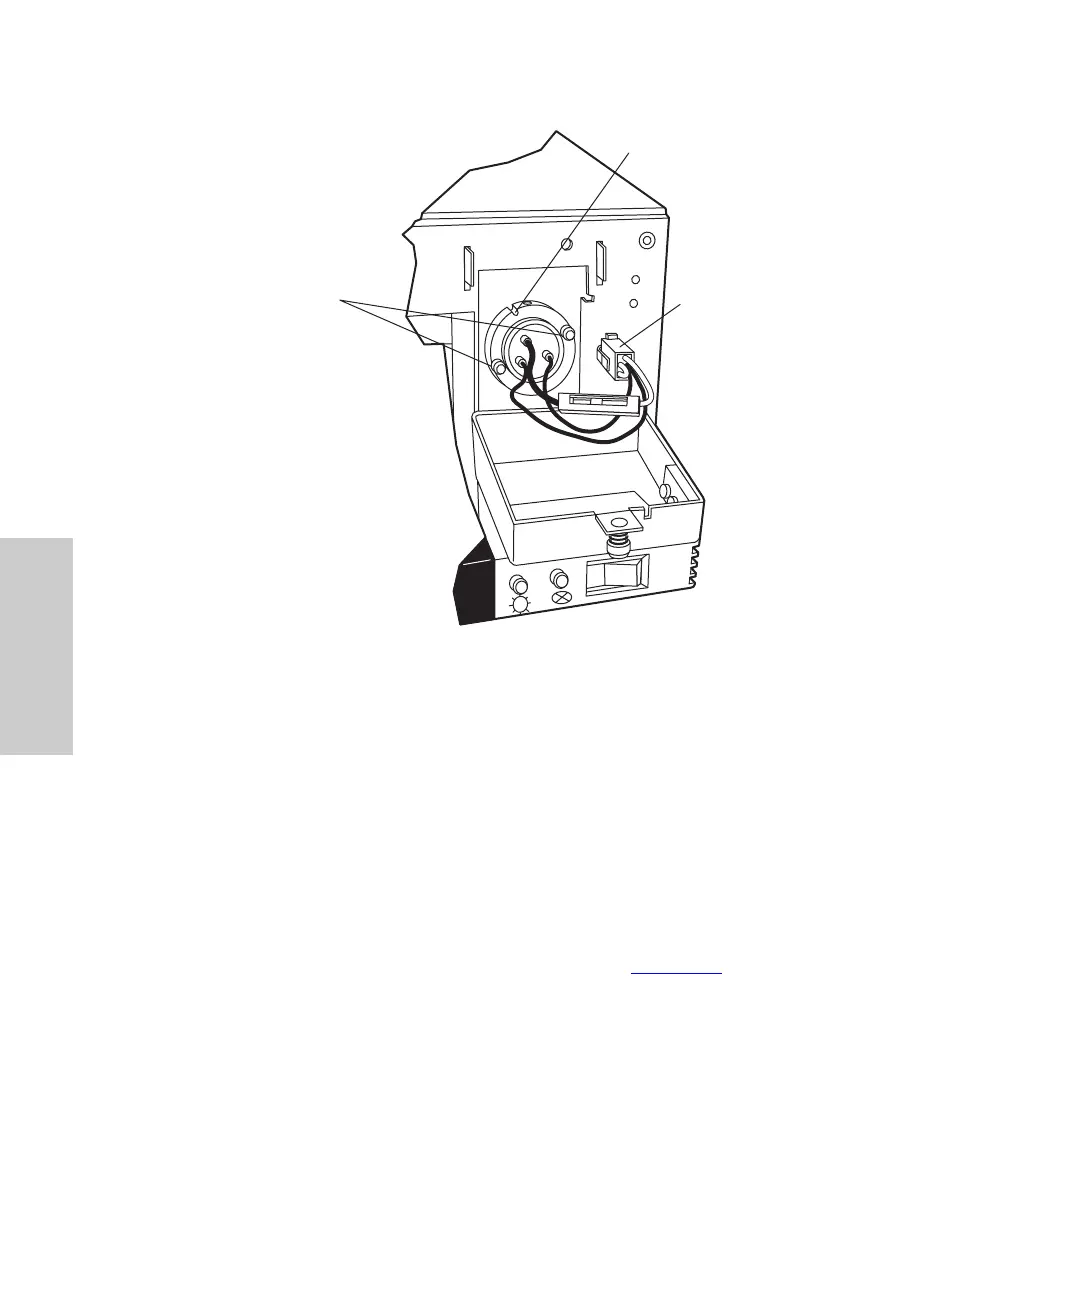
Figure 3-7 Lamp Power Cord and Mounting Screws
5. Use the TORX T20 screwdriver to unscrew the two T20 lamp mounting screws.
6. Grip the metal base of the lamp, pull the lamp out, and set it aside.
7. Carefully unpack the replacement lamp.
8. While wearing powder-free gloves and holding the lamp by its base, orient the
lamp so that the notch in the base aligns with the positioning pin in the optics
bench.
9. Insert the lamp and secure it with the two T20 screws. Make sure that the lamp
base is flush against the lamp housing.
10. Reconnect the lamp power connector (see Figure 3-7
).
11. Close the lamp door and secure it with the thumbtab.
12. Install the front panel cover.
13. Reconnect the power cord and power on the 996 detector.
TP01467
Lamp Power
Connector
Lamp Alignment Notch
Lamp Mounting
Screws