Networking and conguring the EV charging box
85
Operating instructions – AC SMART
► If no Ethernet cable was installed in the EV charging box during initial
installation, add another cable feed-through in the housing of the EV
charging box and insert a cable gland. Observe the Assembly and installa-
tion instructions.
► Route the Ethernet cable through the cable gland and connect the cable to
Ethernet interface X3 of the control board in the housing cover.
► Close the EV charging box and screw the cover back on.
► Install the design cover if available.
► Switch on the EV charging box.
The next steps:
– Adjust the network settings (assign an IP address), see Chapter 9.2.
– ConguretheEVchargingboxinthewebserver,seeChapter 9.3.
9.2 Assigning the network settings and IP address
The EV charging box must be connected to a local network via LAN cable,
see Chapter 9.1.
► Start your computer.
► Press the Win+R buttons.
The Execute window opens.
► Enter the command ncpa.cplandconrmbypressingOK.
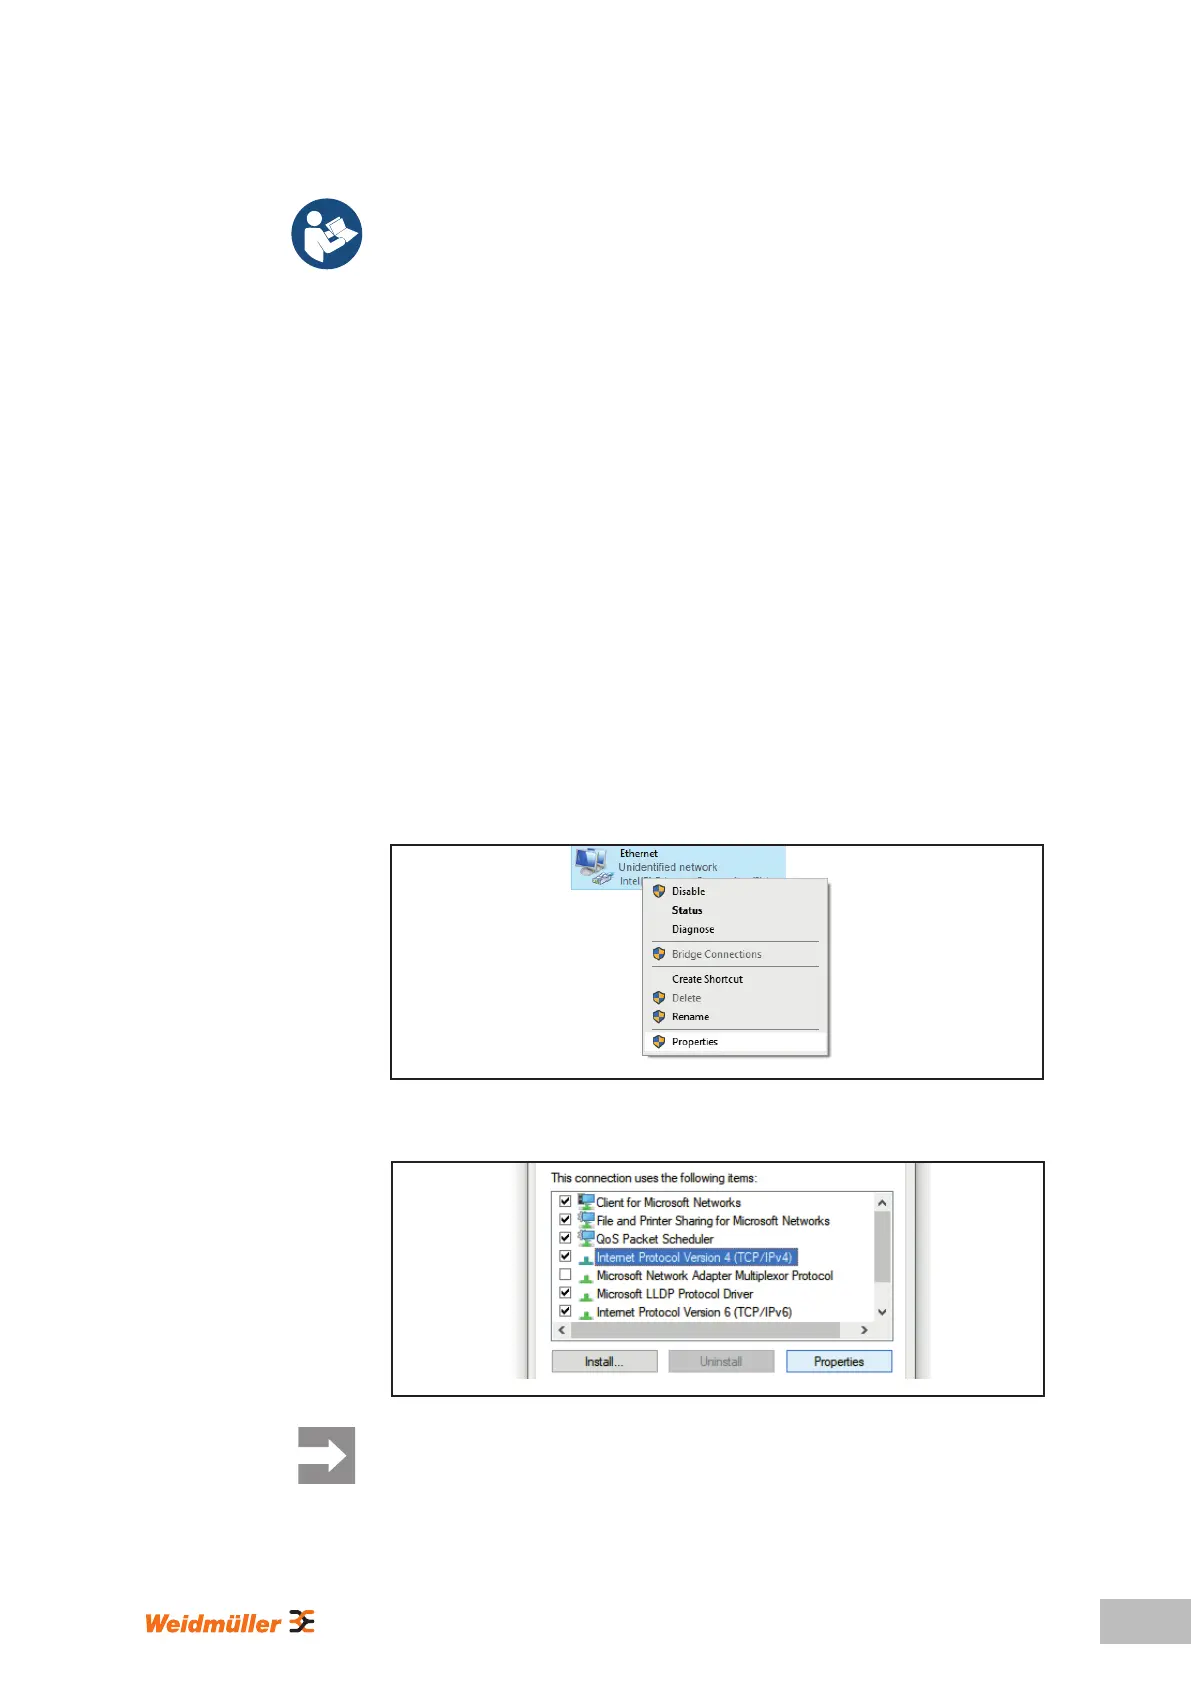
► Right click on the cabled network connection and click Properties.
Image 9.2 Selecting the network connection
► Click internet protocol, version 4 (TCP/IPv4) and then click Properties.
Image 9.3 Selecting internet protocol
Ifthereisalreadydataintheelds,notethedataandsettingssothatyouwill
be able to access the network later on.
Prerequisite