Operation
0515−1/A1
Winterthur Gas & Diesel Ltd.
5/ 8
3.3 Procedures
3.3.1 Fuel Quantity Sensor
It is not necessary to stop the engine. Engine operation is also possible with a
defective fuel quantity sensor.
Replace the defective fuel quantity sensor as follows:
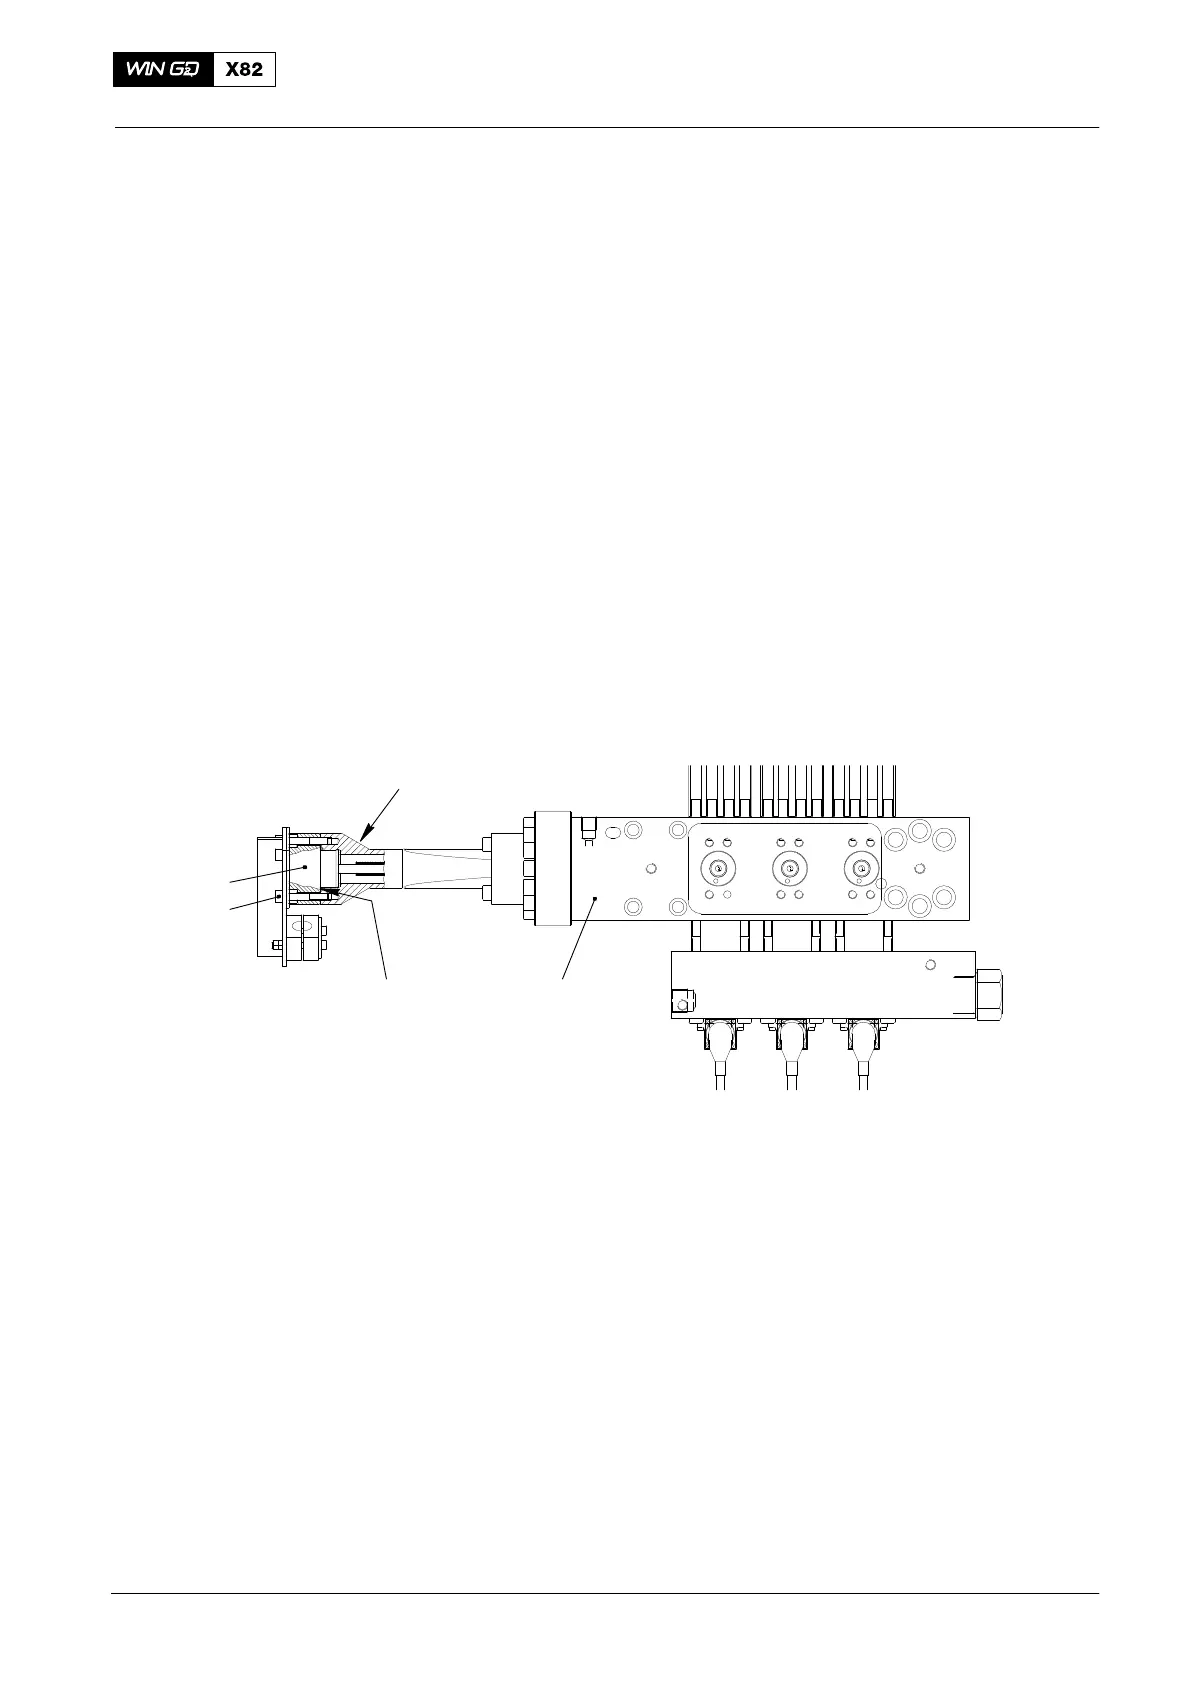
1) Disconnect the electrical connection from the fuel quantity sensor (2, Fig. 2).
2) Remove the screws (3) and washers.
3) Remove the fuel quantity sensor (2). Make sure that O-ring (4) stays in the
housing (5).
4) Put oil on the O-ring (4).
5) Put the new fuel quantity sensor in position in the housing (5).
6) Put Never-Seez NSBT-8 on the threads of the screws (3).
7) Install the washers and screws (3). Torque the screws to 20 Nm.
8) Connect the electrical connection to the fuel quantity sensor (2). Make sure that
the electrical connection is tight.
4
3
2
1
015.456/07
5
Fig. 2: Injection Control Unit
1 Injection control unit 3.02 4 O-ring
2 Fuel quantity sensor 3.03 5 Housing
3 Screw
3.3.2 Fuel Quantity Piston
1) If the fuel quantity piston is against the stop, use the fuel shut-down pilot
valve 3.08 (EM. STOP ZV7061S) to manually release the pressure in the fuel rail.
Note: If a rail valve stays in the Inject position, it is possible that this will cause
a hydraulic lock. This can prevent movement of the fuel quantity piston.
Usually, this not a seized piston.
2) If the procedure above is not satisfactory, see paragraph 3.3.4, Injection control
unit.
Note: You can find the fuel shut-down pilot valve 3.08 (EM. STOP ZV7061S) on
the fuel pressure control valve 3.06 (see 5562−1, Fig. 2).
2014
Faults in High Pressure Fuel System