Insulation Blowing Machine M99
X-Floc Dämmtechnik-Maschinen GmbH Page 29 of 51
Rosine-Starz-Straße 12 · 71272 Renningen · Germany
Phone +49-7159-80470-30 · Fax -40 | info@x-floc.com · www.x-floc.com
6.1.2 Conditioning Unit & Rotary Airlock Maintenance Function
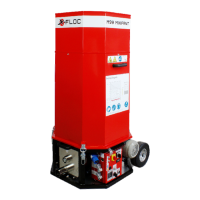
Figure 24: Control elements for maintenance
For maintenance purposes and to rectify any faults, the rotary
airlock [8] and the conditioning unit [9] can be run both
forwards and backwards.
For forward rotation, press the rotary airlock and conditioning
unit maintenance button S1/S2 [26] .
For reverse rotation for the rotary airlock and conditioning unit,
turn the reverse operation selector Q5/S1 [25] and the press the
rotary airlock and conditioning unit maintenance button.
6.1.3 Sealing Rings
Dichtring
Dichtring
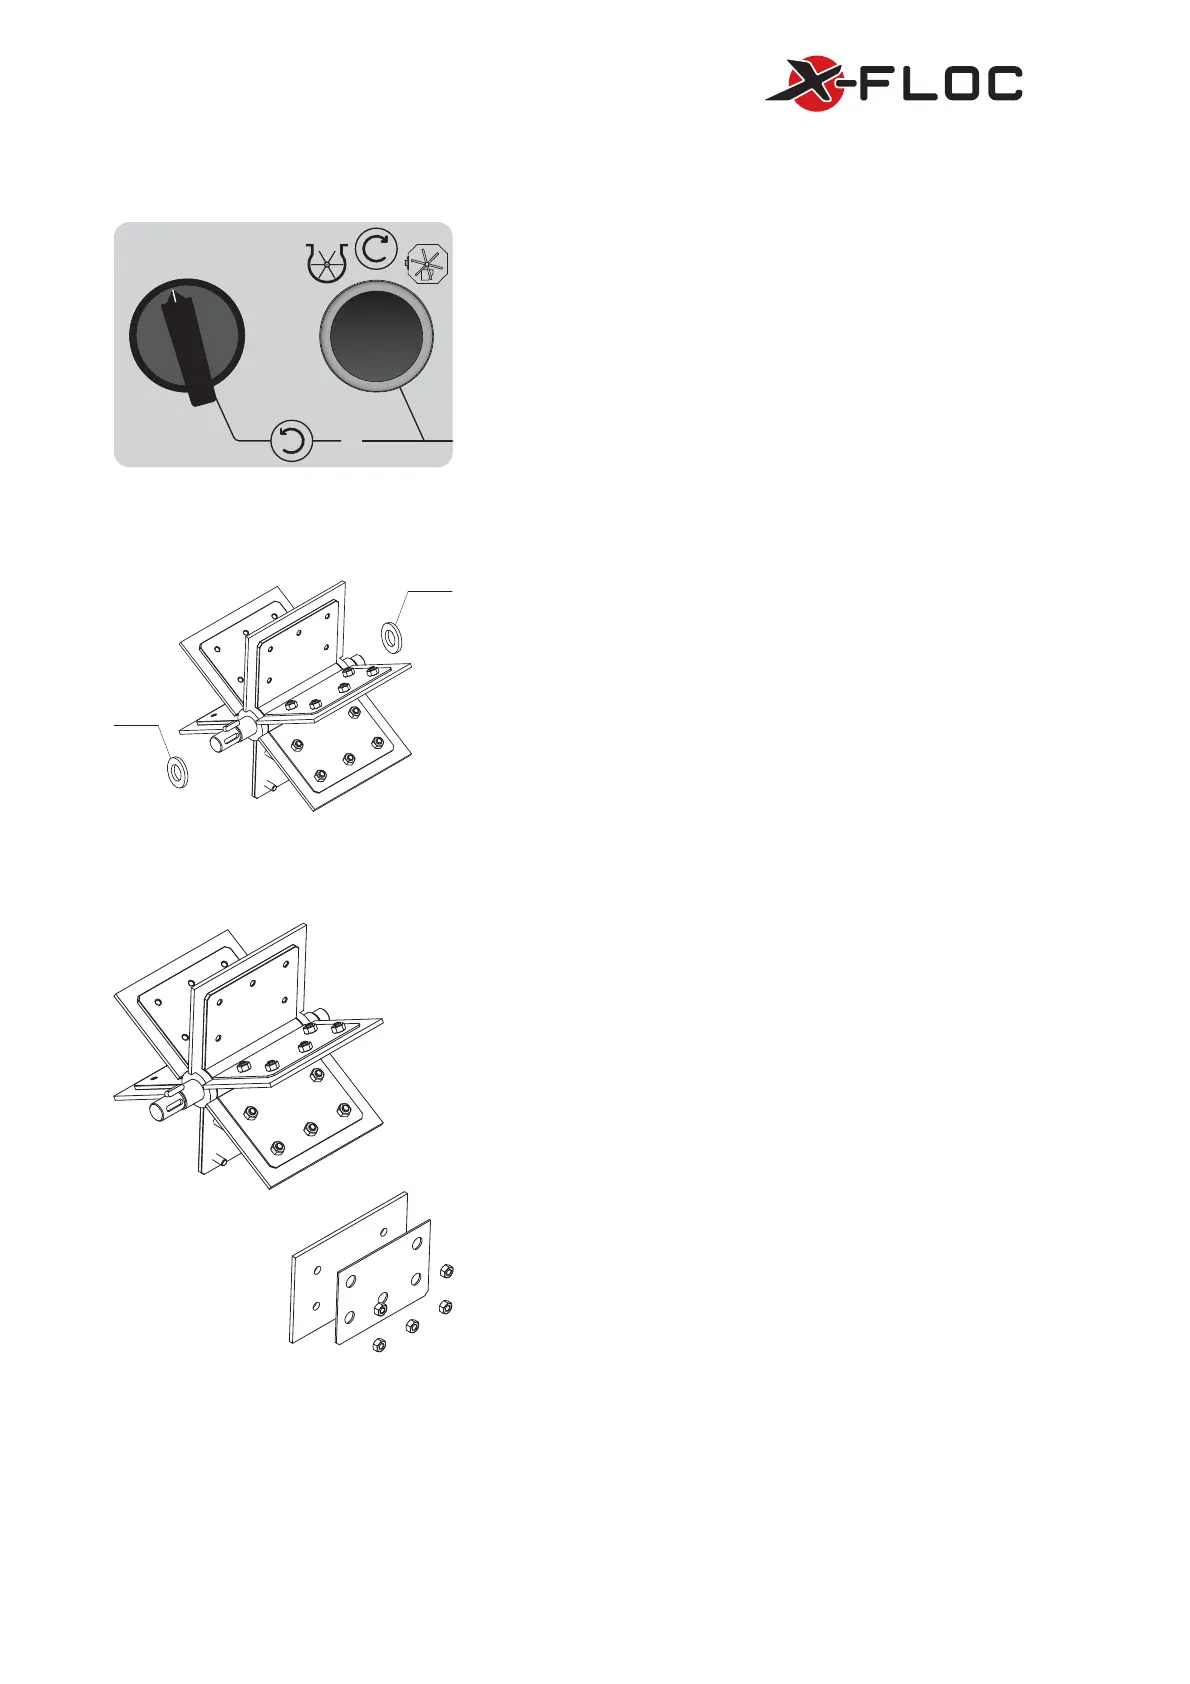
Figure 25: Rotary airlock [8] with sealing rings
Covered between the rotary airlock [8] and the outlet console
are felt rings which protect the bearing position from
contamination.
The sealing rings should be oiled with vegetable oil regularly.
If there is any abrasion on the sealing rings, then there is a
higher amount of leaked air during operation. Damaged and
worn sealing rings must be replaced.
For further information, please contact customer service.
6.1.4 Rotary Airlock & Gaskets
Figure 26: Rotary airlock [8] with gaskets
The gaskets must be replaced if there are any visible entry-
holes, excessive abrasion on the gaskets and/or gauged
blowing pressure of >230 mbar (at maximum blower power).
To turn the rotary airlock [8] to the right position, press the
rotary airlock maintenance button S1/S2 [26] so that an airlock
chamber is directly accessible. If necessary, the conditioning
unit [9] must be removed by undoing the central fastening bolt
from the machine’s bottom [10].
Loosen the female screw from the clamp sheet and take off the
screw with the clamp sheet. Replace the worn gaskets with
new ones, aligning them in centrically and screw back on with
the clamp sheet and female screw. Tighten with a tightening
torque of approx. 4
Nm. Repeat this procedure for the rest of
the airlock chamber. After replacing the gaskets, lubricate the
airlock contact surfaces with silicon spray. Let the insulation
blowing machine run empty for approx. 1-4 hours.
 Loading...