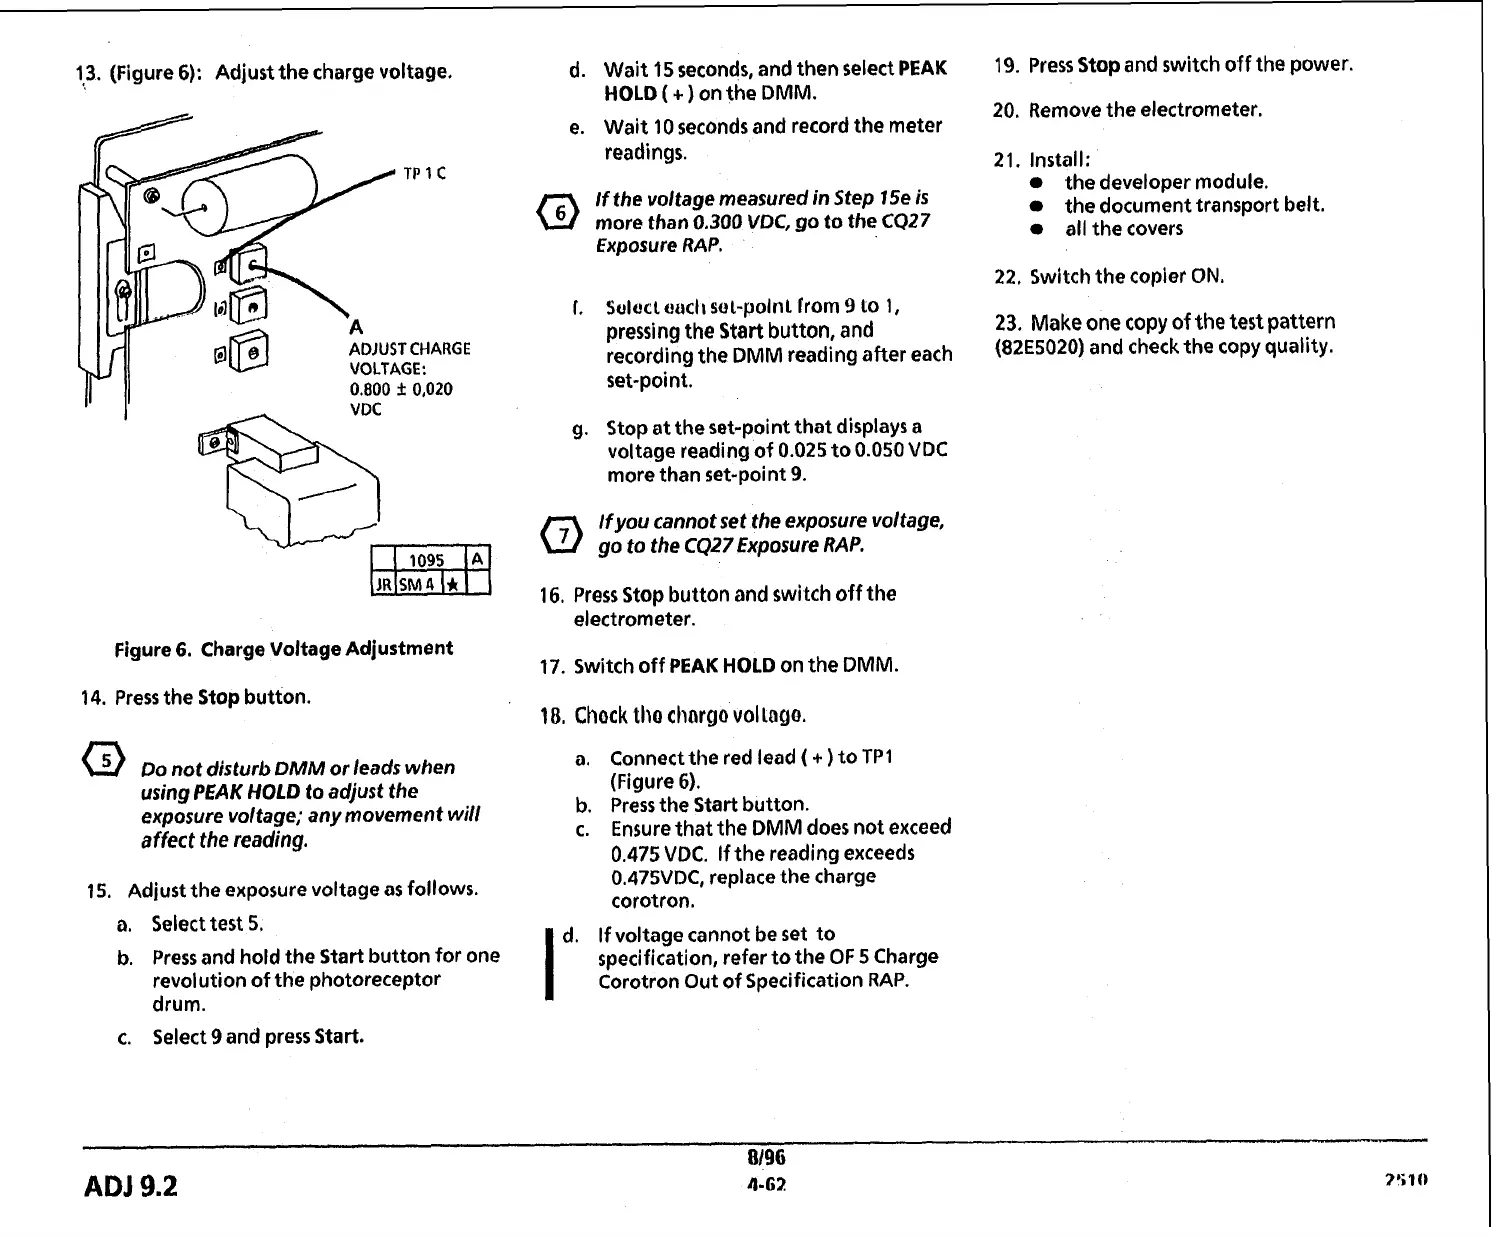
13.
(Figure
6):
Adjust the charge voltage.
d. Wait
15
seconds, and then select
PEAK
HOLD
(
+
)
on the
DMM.
TP
1
C
ADJUST CHARGE
VOLTAGE:
e. Wait 10 seconds and record the meter
readings.
If
the voltage measured
in
Step 15e
is
more than
0.300
VDC,
go
to
the
CQ27
Exposure
RAP.
I.
Solocl ouch sul-polnl from
9
lo
1,
pressing the
Start
button, and
recording the
DMM
reading after each
set-point.
VDC
Figure
6.
Charge Voltage
Adjustment
14. Press the
Stop
button.
Q
Do not disturb
DMM
or leads when
using
PEAK
HOLD
to adjust the
exposure voltage; any movement will
affect
the
reading.
IS.
Adjust the exposure voltage as follows.
a. Select test
5.
b. Press and hold the
Start
button for one
revolution of the photoreceptor
drum.
c.
Select
9
and press
Start.
19.
Press
Stop
and switch off the power.
20. Remove the electrometer.
21.
Install:
the developer module.
the document transport belt.
all the covers
22.
Switch the copier
ON.
23,
Make
one copy of the test pattern
(82E5020) and check the copy quality.
g. Stop at the set-point that displays a
voltage reading of 0.025 to 0.050
VDC
more than set-point
9.
Q
lfyou cannot
set
the exposure voltage,
go to the
CQ27
Exposure
RAP.
16,
Press
Stop
button and switch off the
electrometer.
17.
Switch off
PEAK
HOLD
on the
DMM.
18,
Chock
tho
chargo
vol
lago.
a. Connect the red lead
(
+
)to TP1
(Figure
6).
b.
Press the
Start
button.
c.
Ensure that the
DMM
does not exceed
0.475
VDC.
If the reading exceeds
0.475VDC1 replace the charge
corotron.
I
d. If voltage cannot be set to
specification, refer to the OF
5
Charge
Corotron Out of Specification
RAP.
8196
ADJ
9.2
4-62
3510
 Loading...


