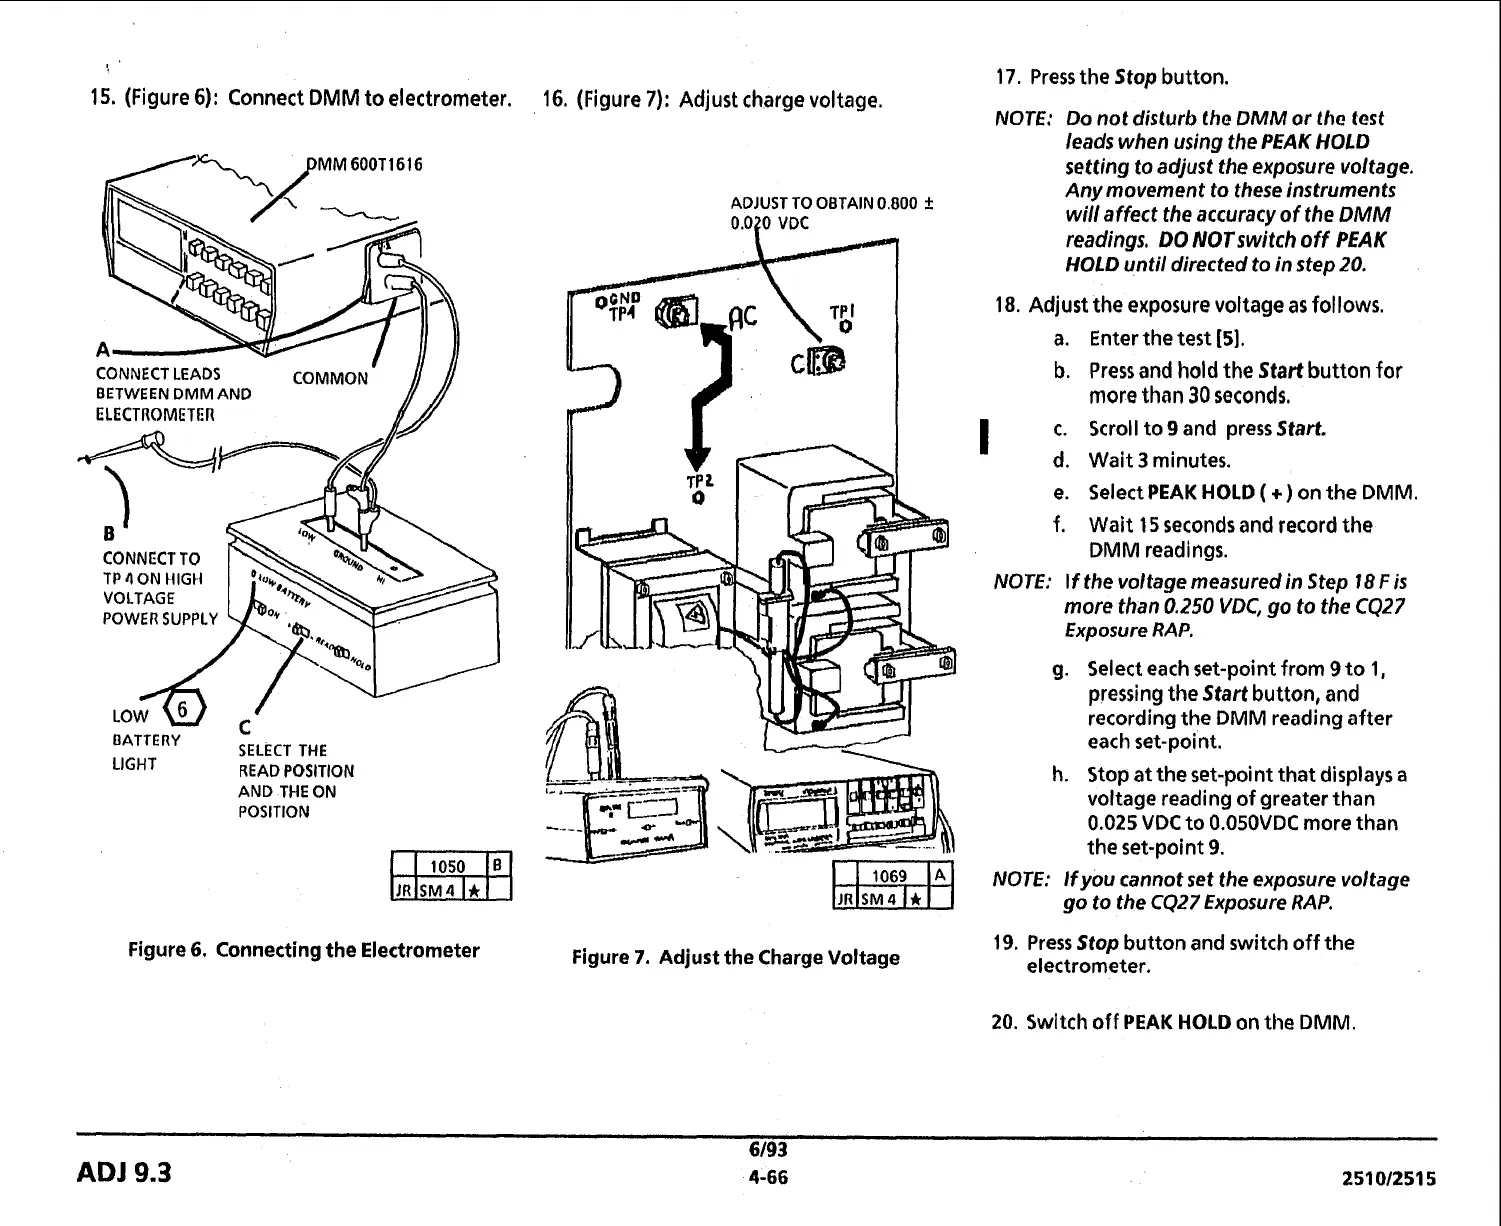
15.
(Figure 6): Connect
DMM
to electrometer.
TP
4
ON HIGII
L
SELECT THE
LIGHT
READ POSITION
AND THE ON
POSITION
16. (Figure
7):
Adjust charge voltage.
ADJUST TO OBTAIN
0.800
f
0.020
VDC
17.
Press the Stop button.
NOTE:
Do not disturb tho DMM or thc test
leads when using the
PEAK
HOLD
setting to adjust the exposure voltage.
Any movement to these instruments
will affect the accuracy of the
DMM
readings,
DO
NOT
switch off
PEAK
HOLD
until directed to
in
step
20.
18.
Adjust the exposure voltage as follows.
a. Enter the test
[S].
b.
Press and hold
the
Start
button for
more
than
30
seconds.
I
c.
Scroll to
9
and press Stan
d. Wait
3
minutes.
e. Select
PEAK
HOLD
(
+
)
on the DMM.
f. Wait 15 seconds and record the
DMM readings.
NOTE:
If
the voltage measured
in
Step
18
F
is
more than
0.250
VDC,
go to the
CQ27
Exposure
RAP.
g. Select each set-point from
9
to
1,
pressing the Start button, and
recording the DMM reading after
each set-point.
h. Stop at the set-point that displays
a
voltage reading of greater than
0.025 VDC to 0.050VDC more than
the set-point
9.
NOTE:
lfyou cannot set the exposure voltage
go to the
CQ27
Exposure
RAP.
Figure
6.
Connecting the Electrometer
Figure
7.
Adjust the Charge Voltage
19.
Press Stop button and switch off the
electrometer.
20. Swltch off
PEAK
HOLD
on the
DMM.
ADJ
9.3
 Loading...


