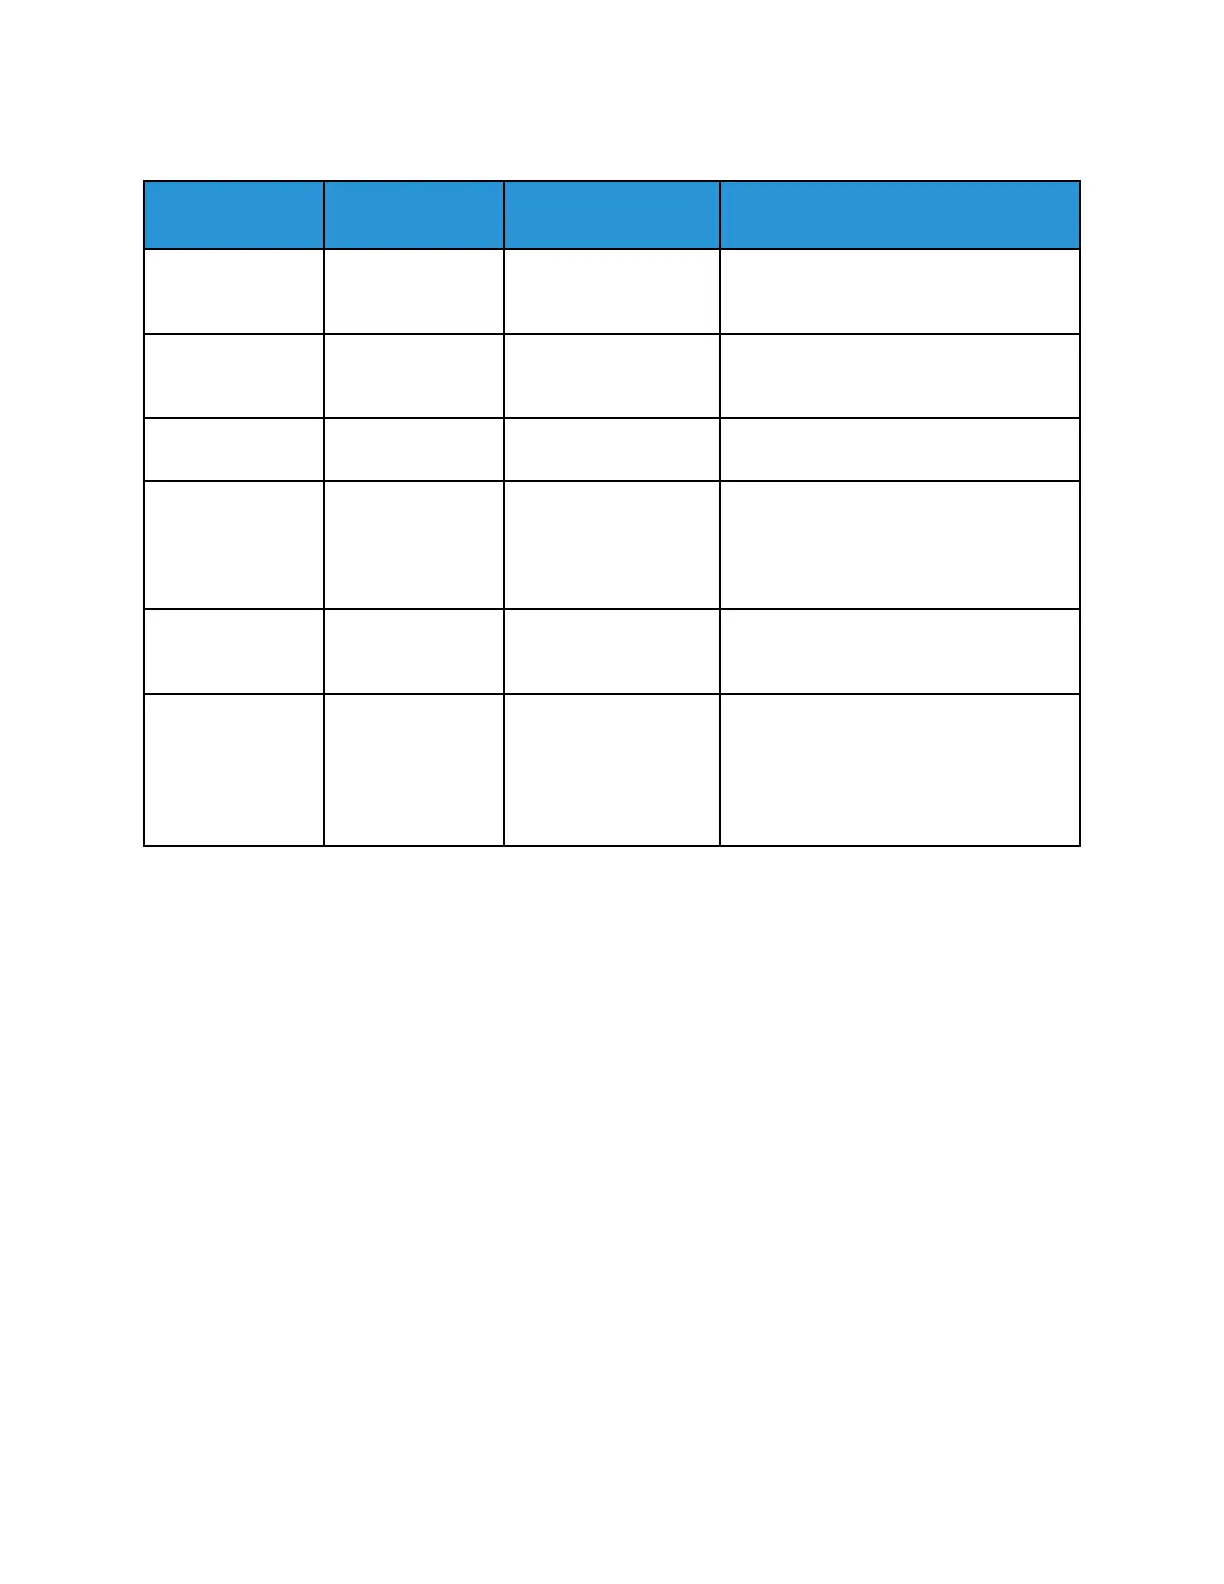
Scan Resolution Options
DPI (Dots per
Inch)
Image Quality
File Size
Purpose
72 Acceptable Smallest This DPI setting is for onscreen viewing
only. If you print the image, it can
appear grainy.
100 Good Small This DPI setting is for onscreen viewing
only. If you print the image, it can
appear grainy.
200 Good Moderate Best suited for standard office
documents and photographs.
300 High Large Offers better image quality for standard
office documents and photographs.
Recommended for automated
processing and OCR (Optical Character
Recognition).
400 Higher Very Large Used for original documents that have
thin lines, small font sizes, or for image
enlargement.
600 Highest
Extremely Large
Files scanned at 600
DPI can take longer to
transmit over a
network.
Intended for commercial-quality
printing.
SSeettttiinngg tthhee OOuuttppuutt CCoolloorr
If the original image contains color, you can scan the image in color, grayscale, or in black and white.
If you select black and white, the file size of the scanned images is reduced.
To set the output color:
1. At the printer, load the original document on the document glass.
2. At the printer control panel, press the Clear All button.
3. Press the Scan To button.
4. To select Network, press the Down Arrow button, then press the OK button.
The Address Book screen appears.
5. To bypass the Address Book, press the OK button.
6. To select Network Features, press the Down Arrow button twice, then press the OK button.
7. To select Output Color, press the Down Arrow button as many times as necessary.
8. Press the OK button.
9. Select an appropriate output color.
Xerox
®
B1022 Multifunction Printer
User Guide
67
Using the Services