134 7 Maintenance
Replacement Procedure
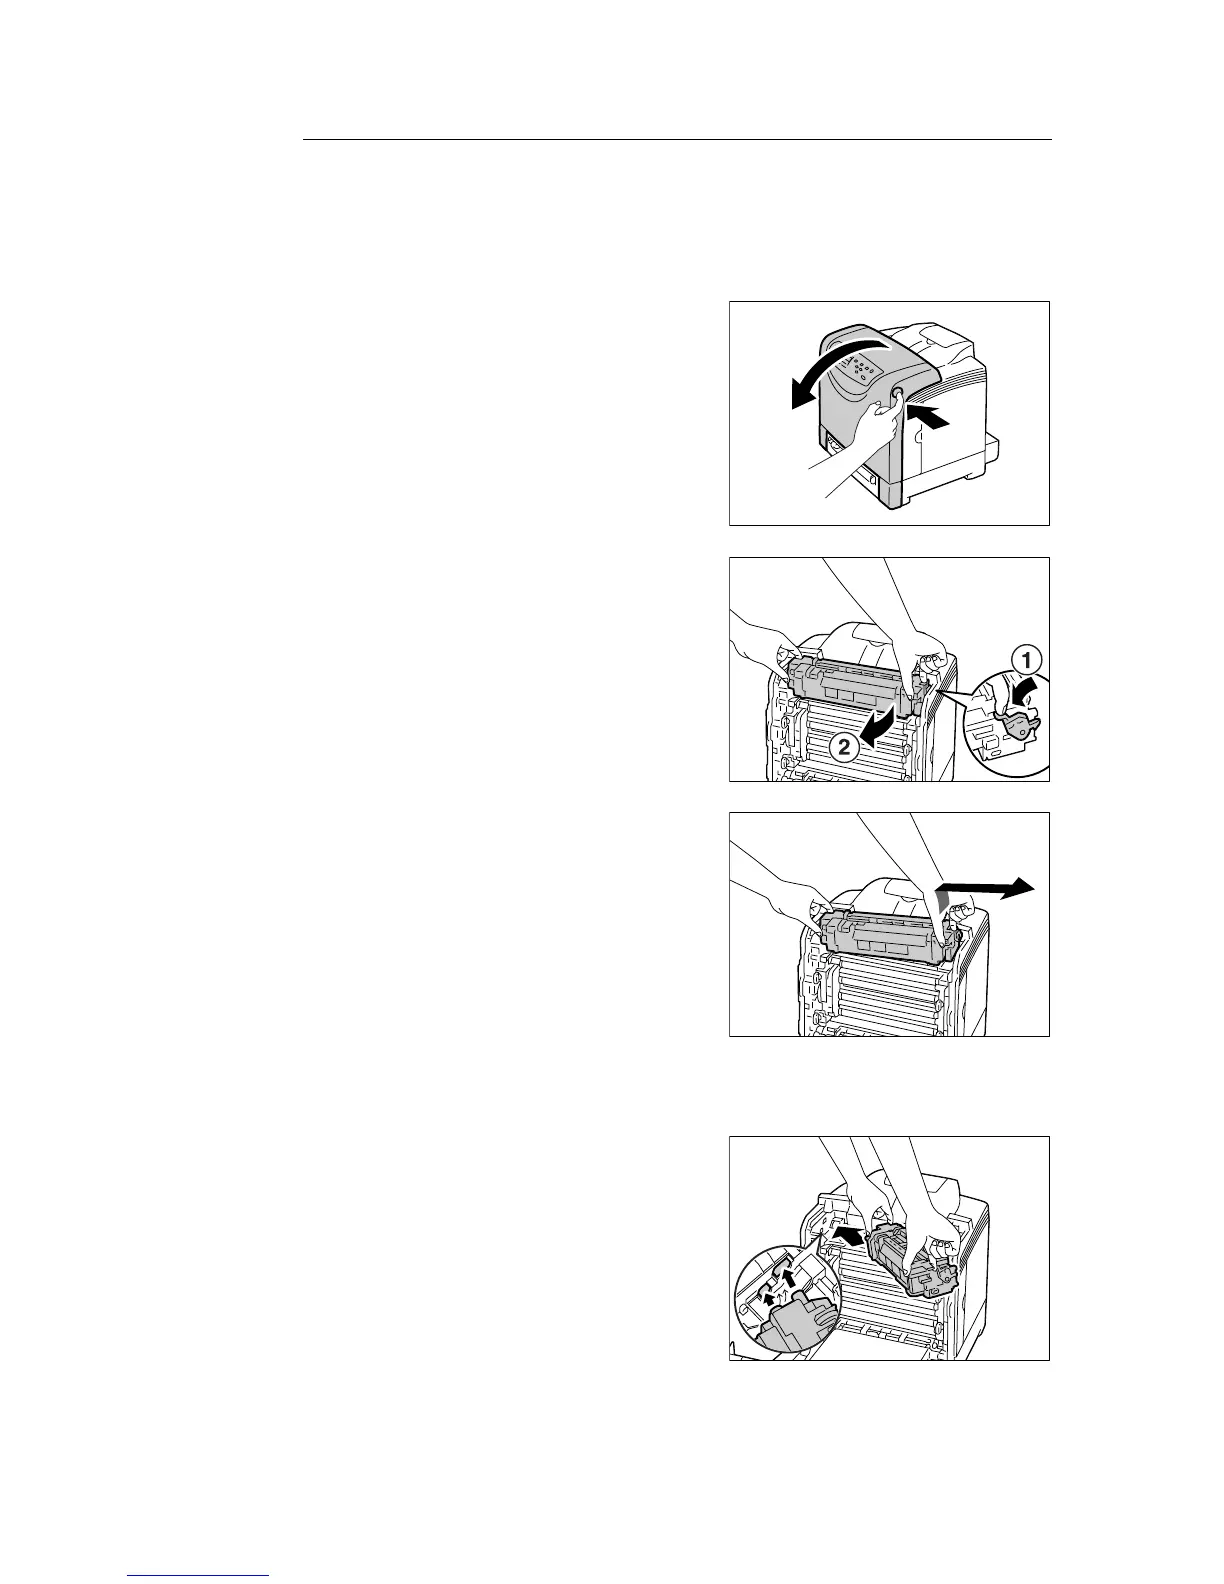
Use the following procedure to replace the fuser unit.
1. Switch off the printer and wait for 30
minutes for the fuser to cool down before
removal.
2. Push the side button (right side) and open
the front cover.
3. Hold the gray tab on the right side of the
fuser unit, and the turn the right side of the
fuser unit towards the front of the printer.
4. Hold the fuser unit by both ends, and
slightly lift the right side of the fuser unit to
remove it from the printer.
5. Remove a new fuser unit from its
packaging.
6. Hold the new fuser unit by both ends, and
insert the left edge of the fuser unit into the
holes inside the printer.

 Loading...


