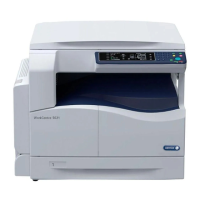
Product overview
WorkCentre 5019/5021
User Guide
3-11
6 Energy Saver button Press this button to enter an energy saver mode when the machine is not in
use. The button lights up.
Press the Energy Saver button to exit an energy saver mode.
For more information, refer to Energy saver modes on page 3-8.
7 Stop button Press this button to cancel a current job or errored job.
8 Clear All button Press this button to reset the displayed settings of each feature to default
values or to clear the numbers entered. The settings return to the same
condition as when the machine is powered on.
9 Start button Press this button to start scanning documents or to confirm the value of
each setting.
10 Error indicator Blinks when a system error occurs.
Lights when an error other than a system error (such as paper jam or out of
paper) occurs in the machine.
11 Data indicator Blinks while the machine is sending or receiving data.
12 Last Original button Press this button when the last document has already been scanned.
This button blinks while the machine is scanning a document and lights up
while the machine is waiting for the next document to scan.
13 C (Clear) button Press this button to delete one numeric value that you have entered.
14 Paper Supply button Press this button to select a tray to use.
The tray indicator next to the selected tray moves to the next tray on the
machine status diagram every time the button is pressed.
For more information, refer to Paper supply on page 5-10.
15 Size (Press 2sec) button Press this button to select the size and the orientation of paper loaded in
the selected tray.
The paper size and orientation changes on the machine status diagram
every time the button is pressed.
For more information, refer to Setting the paper size on page 4-13.
16 Status Machine Diagram
(mimic)
Displays error locations, machine status, and other settings.
For more information, refer to Machine status on page 3-13.
17 Reduce/Enlarge button Press this button to select a zoom ratio.
The Reduce/Enlarge indicator next to a fixed zoom ratio moves to the next
zoom ratio and the zoom ratio changes on the machine status diagram
every time the button is pressed.
For more information, refer to Reduce/enlarge on page 5-12.
18 Variable Zoom Ratio
button
Press this button to specify the zoom ratio within the range of 25 to 400%
in 1% increments.
The zoom ratio increases every time the button is pressed.
For more information, refer to Reduce/enlarge on page 5-12.
19 Ton e r S aver ico n The indicator of the Toner Saver icon is lit in toner saver mode.
For more information, refer to Lighten/Darken on page 5-15.
No. Component Description
 Loading...


