32 Doc. 20780_03
Planning and Commissioning Manual ADPRO Passive-Infrared (PIR) PRO Series by Xtralis
Factory Settings of
DIP Switches 1 and 2
DIP-Switch Status Function
1 ON 100% sensitivity hardware
2 OFF
3 OFF ATD-Function
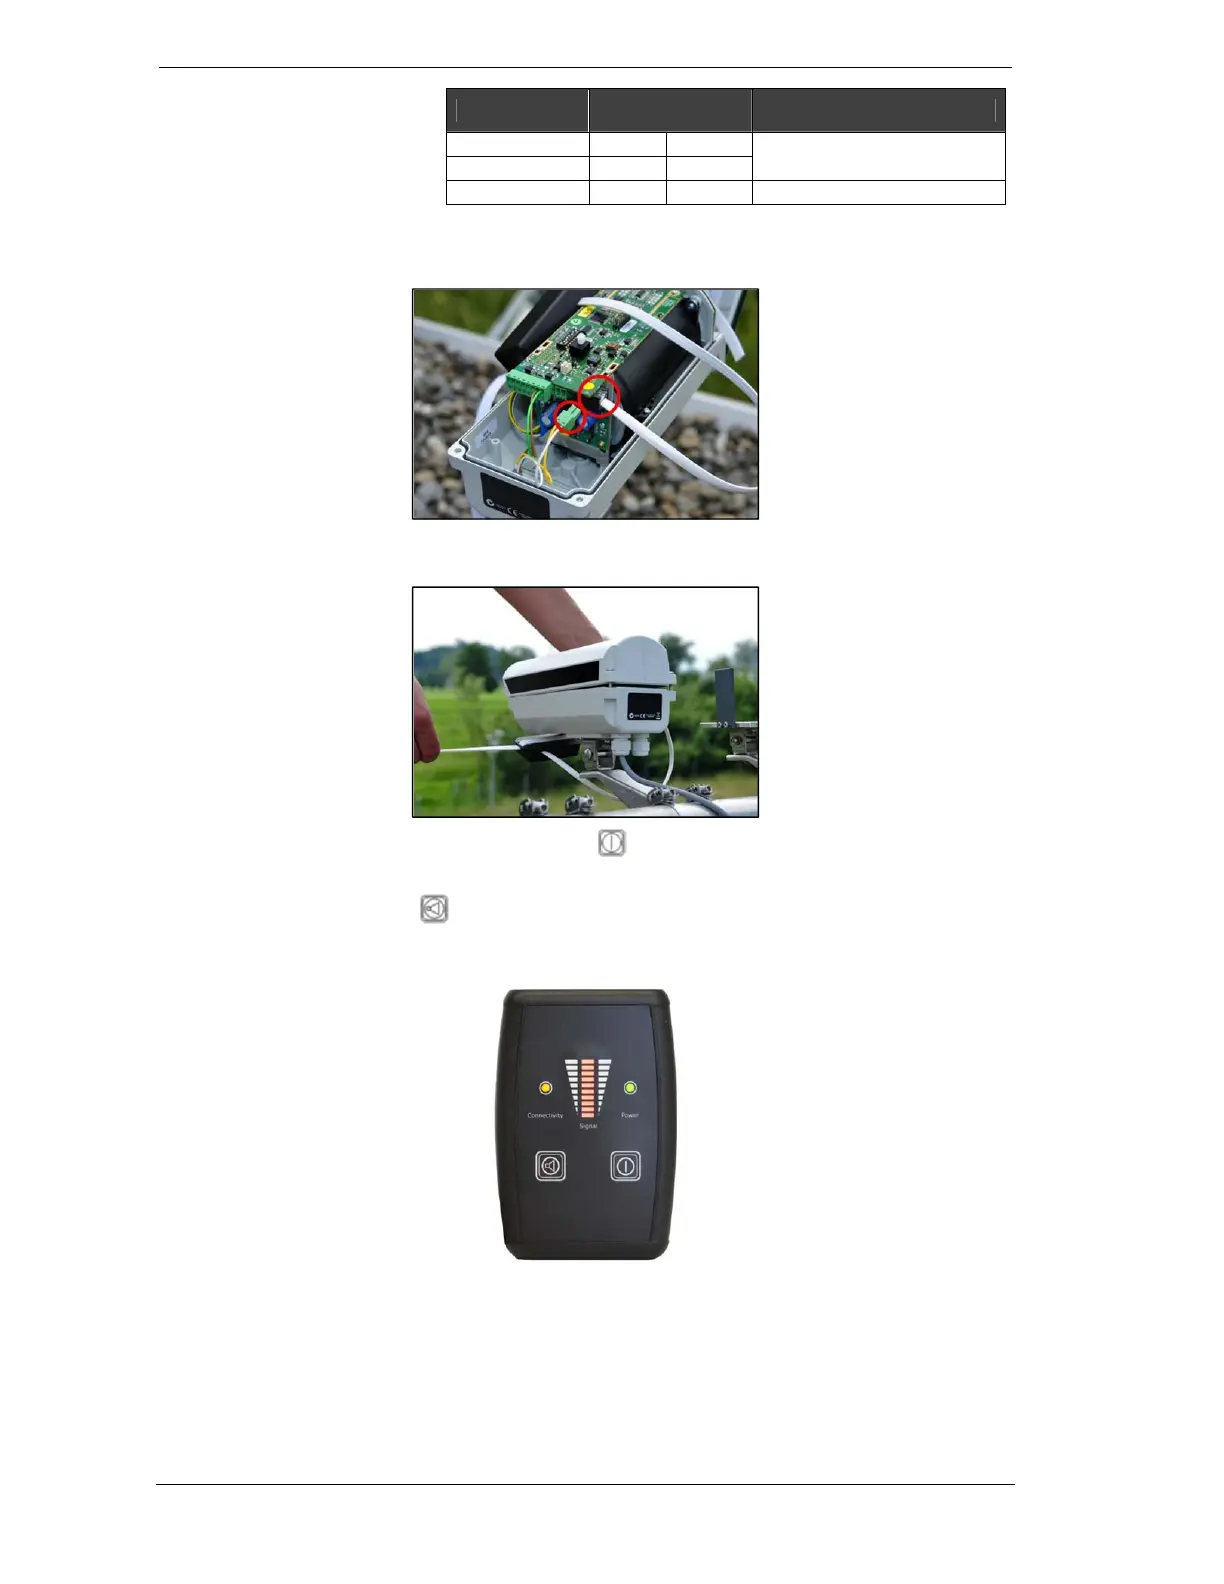
2. Disconnect the RS-485 plug (left circle),
3. Connect the CT-PRO transmitter with the RJ12 connector (right circle),
4. Close the cover,
5. Fix the CT-PRO transmitter to the bottom of the detector with the provided cable strap,
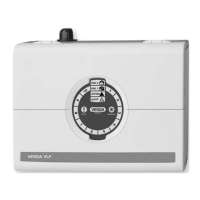
6. Click ‘ON’ on the CT-PRO receiver. ( ),
The green LED lights up. The yellow LED flashes.
7. Click ‘buzzer’. ( ),
The green LED flashes.
The red LEDs (1) show the signal strength.
8. You can now perform the walk test as described in section 8.1.1. Cross the area
several times at different distances and in different directions.
A high level on the LED bar indicates strong sensor signals.
A low level on the LED bar indicates weak sensor signals.
The buzzer indicates an alarm within the zone being monitored.