REAR WHEEL
4-8
EAS1SM1129
REMOVING THE REAR WHEEL
1. Use a suitable stand to raise the rear wheel
off the ground.
EWA13120
Securely support the vehicle so that there is
no danger of it falling over.
2. Remove:
• Rear wheel axle nut “1”
3. Loosen:
• Locknut “2”
4. Tighten:
• Adjusting bolt “3”
5. Remove:
• Rear wheel axle
• Rear wheel
• Push the rear wheel forward and remove the
drive chain from the rear wheel sprocket.
• Do not depress the brake pedal with the rear
wheel removed.
EAS1SM1130
CHECKING THE REAR WHEEL
1. Check:
• Rear wheel axle
• Rear wheel
• Bearing
• Oil seals
Refer to “CHECKING THE FRONT WHEEL”
on page 4-4.
2. Check:
•Tire (s)
• Rear wheel
Damage/wear Replace.
Refer to “CHECKING THE TIRES” on page
3-32 and “CHECKING THE WHEELS” on
page 3-33.
3. Check:
• Spokes
Refer to “CHECKING THE FRONT WHEEL”
on page 4-4.
4. Measure:
• Radial wheel runout
• Lateral wheel runout
Refer to “CHECKING THE FRONT WHEEL”
on page 4-4.
EAS1SM1131
DISASSEMBLING THE REAR WHEEL
1. Remove:
• Oil seals
• Bearing
Refer to “DISASSEMBLING THE FRONT
WHEEL” on page 4-5.
EAS1SM1132
CHECKING AND REPLACING THE REAR
WHEEL SPROCKET
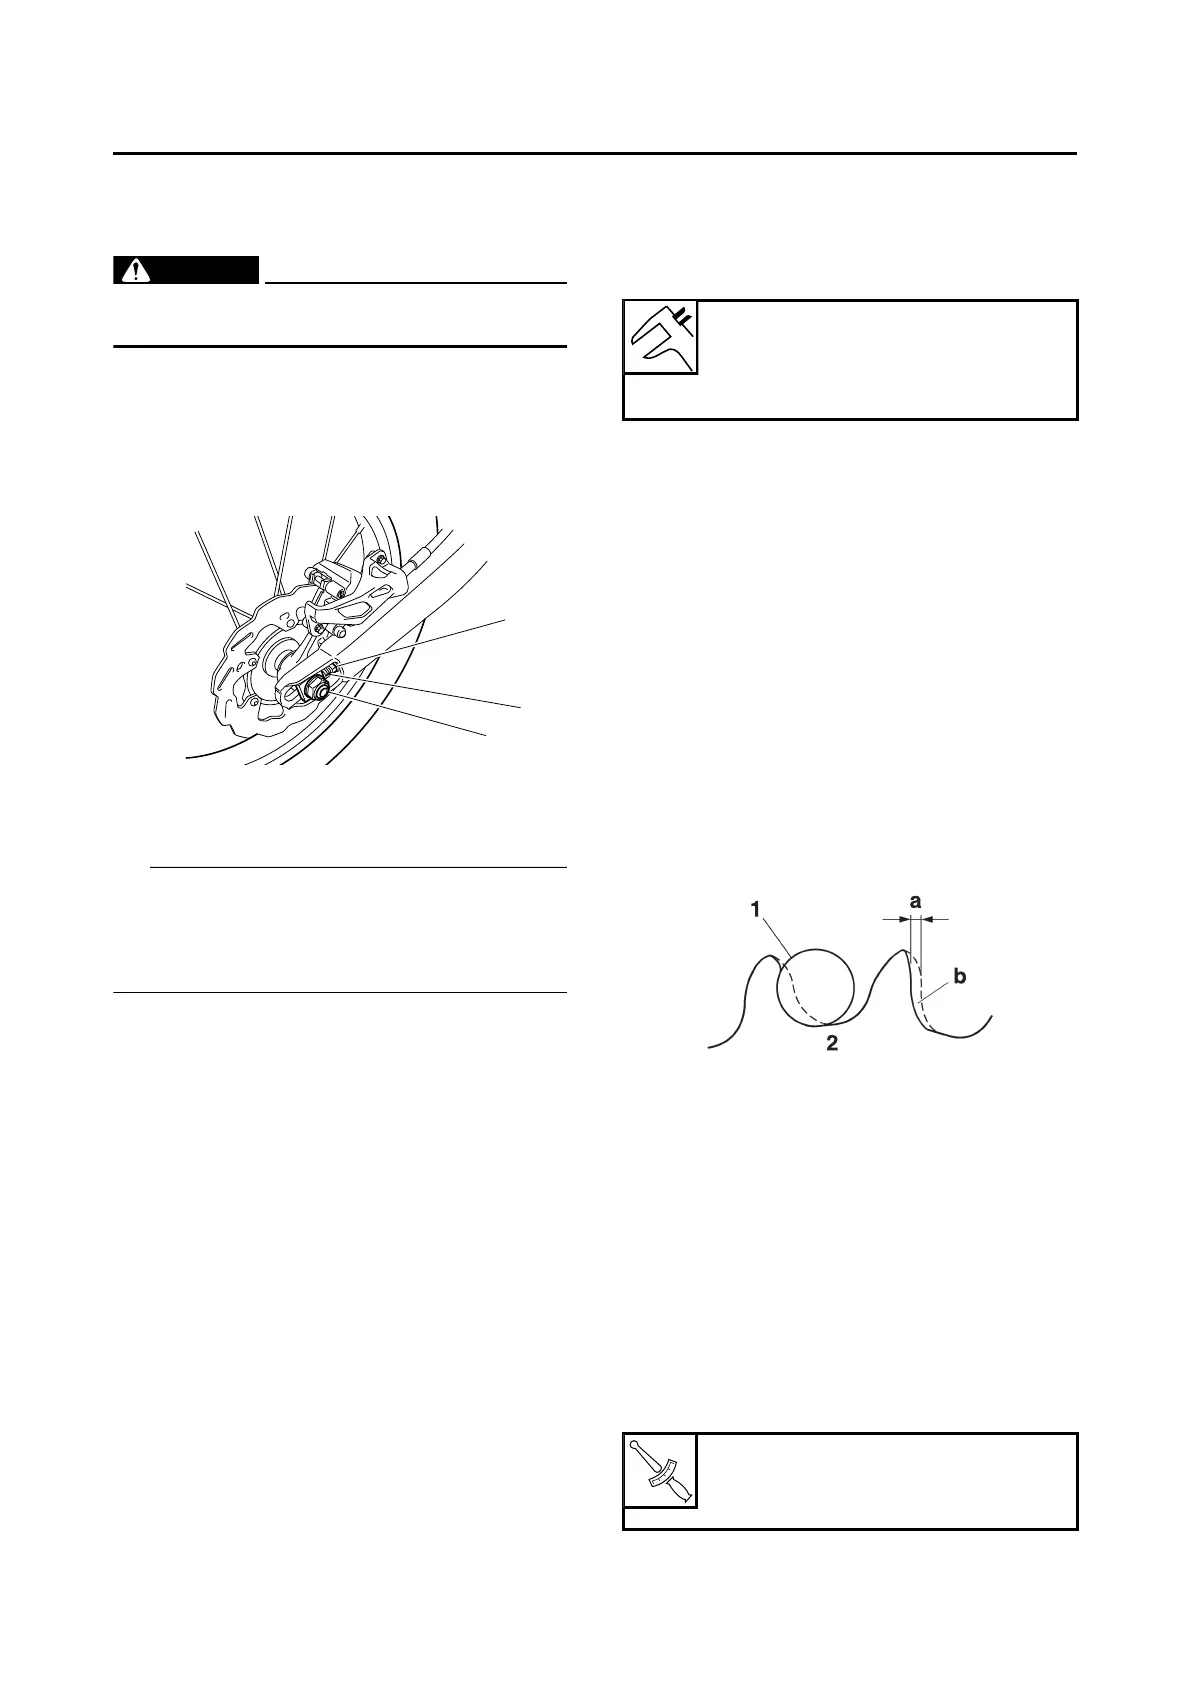
1. Check:
• Rear wheel sprocket
More than 1/4 tooth wear “a” Replace the
rear wheel sprocket and the drive sprocket
as a set.
Bent tooth Replace the rear wheel
sprocket and the drive sprocket as a set.
2. Replace:
• Rear wheel sprocket
▼▼▼▼▼▼▼▼▼▼▼▼▼▼▼▼▼▼▼▼▼▼▼▼▼▼▼▼▼▼▼▼
a. Remove the self-locking nuts and the rear
wheel sprocket.
b. Clean the rear wheel drive hub with a clean
cloth, especially the surfaces that contact
the sprocket.
c. Install the new rear wheel sprocket.
Radial wheel runout limit
2.0 mm (0.08 in)
Lateral wheel runout limit
2.0 mm (0.08 in)
b. Correct
1. Drive chain roller
2. Rear wheel sprocket
Rear wheel sprocket self-locking
nut
42 Nm (4.2 m·kgf, 30 ft·lbf)