VALVES AND VALVE SPRINGS
5-23
EAS1SM1220
REMOVING THE VALVES
Before removing the internal parts of the cylin-
der head (e.g., valves, valve springs, valve
seats), make sure that the valves are properly
sealed.
1. Remove:
• Valve lifter “1”
• Adjusting pad “2”
• Place a cloth in the timing chain space to pre-
vent adjusting pads from falling into the crank-
case.
• Make a note of the positions of valve lifters
and adjusting pads so that they can be rein-
stalled in their original places.
2. Check:
• Valve sealing
Leakage at the valve seat Check the
valve face, the valve seat, and the valve seat
width.
“CHECKING THE VALVE SEATS” on page
5-25.
▼▼▼▼▼▼▼▼▼▼▼▼▼▼▼▼▼▼▼▼▼▼▼▼▼▼▼▼▼▼▼▼
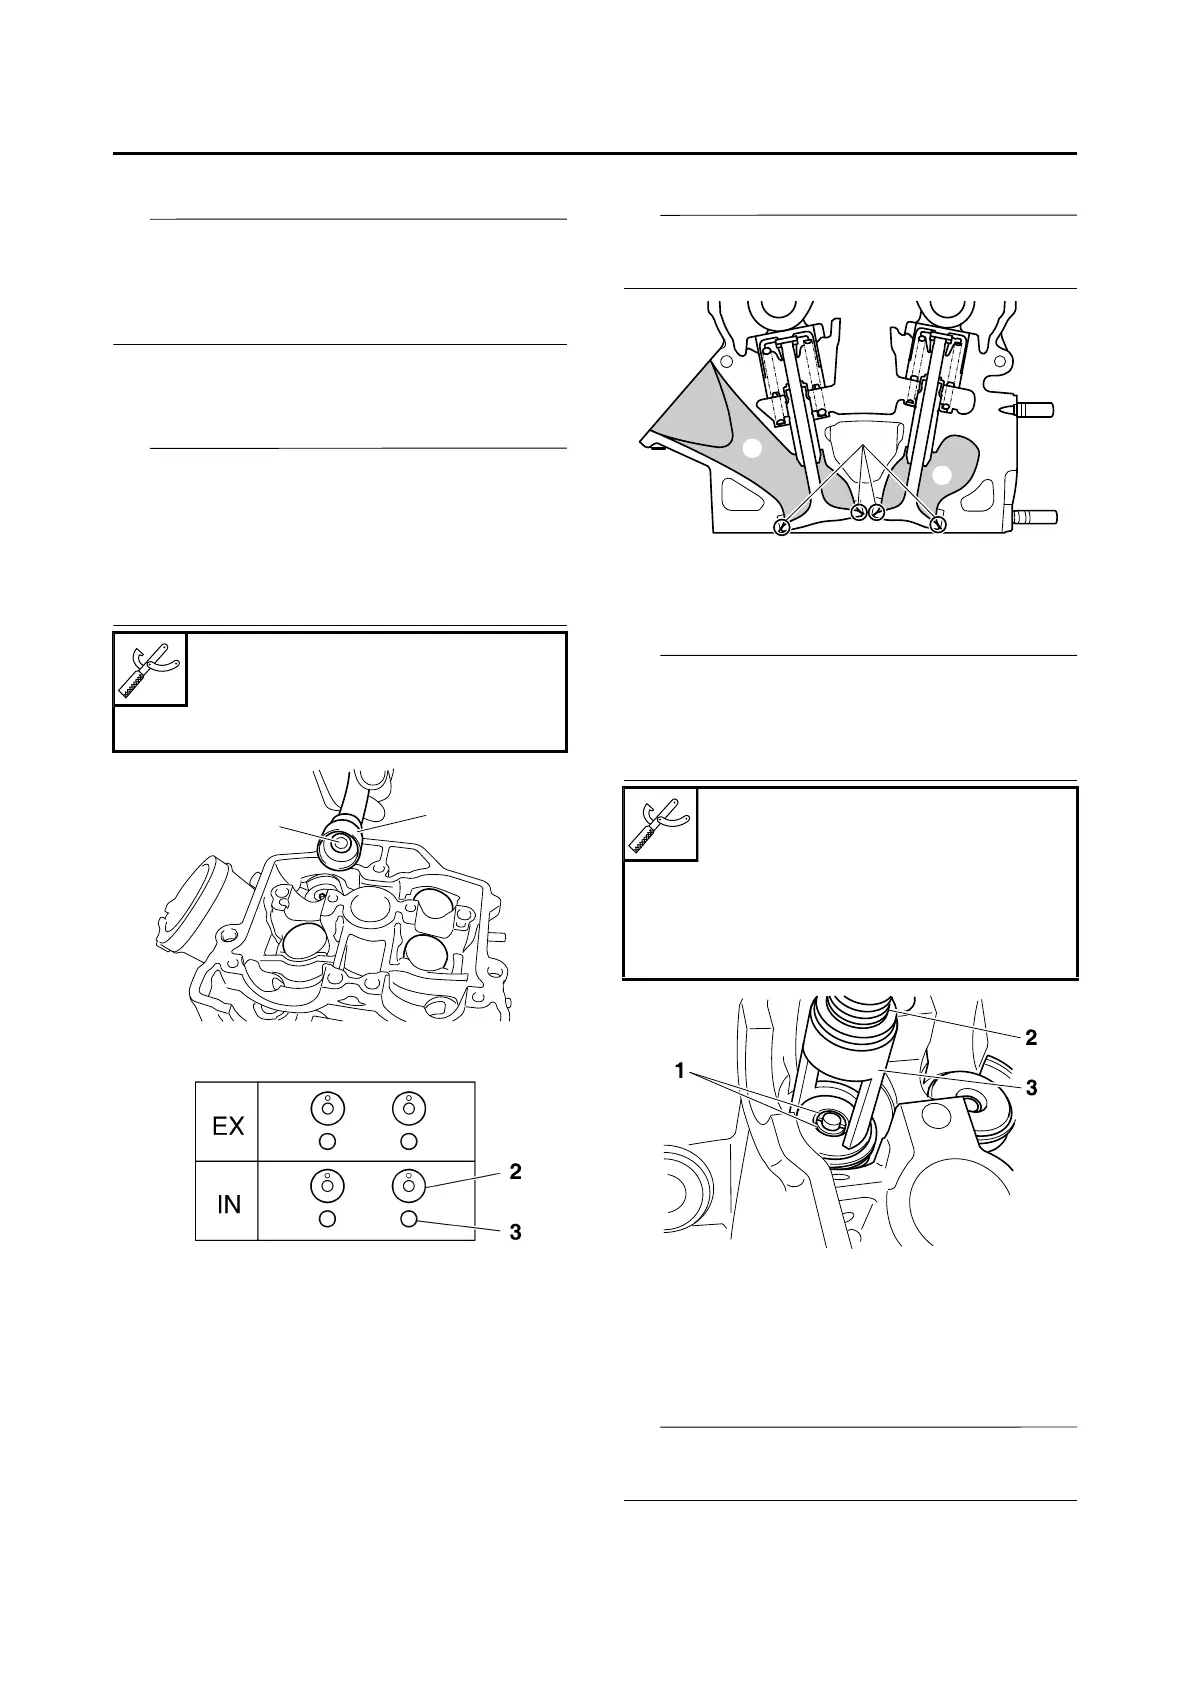
a. Pour a clean solvent “a” into the intake and
exhaust ports.
b. Check that the valves are properly sealed.
Check that there are no kerosene leaks from
the valve seat “1”.
▲▲▲▲▲▲▲▲▲▲▲▲▲▲▲▲▲▲▲▲▲▲▲▲▲▲▲▲▲▲▲▲
3. Remove:
• Valve cotter “1”
Remove the valve cotters by compressing the
valve spring with the valve spring compressor
“2” and the valve spring compressor adapter
“3”.
4. Remove:
• Valve spring retainer “1”
• Valve spring “2”
•Valve “3”
• Valve stem seal “4”
• Valve spring seat “5”
Identify the position of each part very carefully
so that it can be reinstalled in its original place.
Valve lapper
90890-04101
Valve lapping tool
YM-A8998
Valve spring compressor
90890-04019
YM-04019
Valve spring compressor adapter
22 mm
90890-04108
YM-04108